Thursday, February 27, 2025

BFF Open House


Whew! Happy Friday Eve and how is Saturday March already?! The first signs of Spring for me are allergies and my nose and eyes are starting to feel the twitch. Hopefully it's warmed up some in colder places and you're seeing signs of Spring emerge. 

It's beeen a fun week at the Cricut Craft Fest with great projects and tips and techniques. Can't wait to play with some of the things I learned. A sure sign of Spring her in the Tucson area is the Spring Artisans Market sponsored by the Tucson Museum of Art. In a couple of weeks, we'll also have the annual Festival of Books on the UofA campus which is any book lover's dream! I love the appreciation for art and learning in this part of the state and how it honors the diverse people who live here. 

I wasn't very creative this week due to errands and appointments so looking forward to playing with some stuff I picked up while out. Still in shock that JoAnn will now be closing ALL of their stores!

OK...let's take a look at some of the ideas from last week's party!


Steph Creates Things shared a wonderful upcycle project with this pretty Metal Tea Container Redesign. 

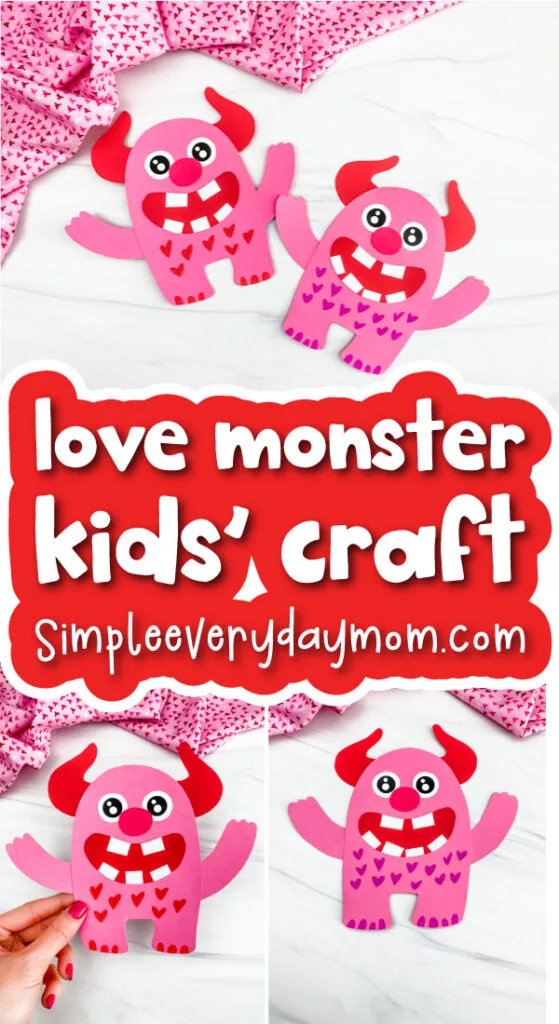
Sunday is Dr. Seuss' Birthday and this idea from Simple Everyday Mom is a fun way to celebrate with kids! Cat in the Hat Fork Painting!


March also means Mardi Gras this year and you don't have to be in New Orleans to celebrate. Check out this fun DIY Mardi Gras Mask from Hunny I'm Home DIY!


Speaking of Mardi Gras, these King Cake Cookies from Cindy's Online Recipe Box are a perfect way to bring some of the fun home.


Thanks to all who linked up and can't wait to see what Spring goodies you've got in store! Happy Weekend Creative Peeps. Be good to yourselves. 


You are invited to the Inlinkz link party!

Click here to enter

Thursday, February 20, 2025

BFF Open House


Greetings all and Happy Weekend Eve! I hope everyone's had a creative week. I know the Midwest got blanketed with more snow and cold so I hope you're staying warm and dry! Here in the desert, I think allergy season may be starting up. Ugh! 

It's clear that the stores have made their jump to Spring and Easter! I was in Walmart two days after Valentine's Day and BAM, Spring and Easter decor was everywhere and they have some cute stuff! 

This week I shared a couple of altered cigar box projects I had a lot of fun making and I really love repurposing things. 


Nothing says Spring like flowers and Crazy Little Love Birds has a lovely way to repurpose a jar to hold them with this DIY Flower-Embellished Glass Jar Makeover.


Sometimes, you love a piece but just want to freshen it up. Via A Ray of Sunlight comes How to Paint Furniture with Chalk Paint in a guest post by Breath of Life Design! 


Sonata Home Design shared a wonderful tutorial to make a bold statement piece in the style of artist Piet Mondrian using faux stained glass supplies. Mr. Chocolate is a huge Frank Lloyd Wright fan and this would work with his style too! 


Finally, alchemy happens when you combine chocolate and raspberry and they come together in these mouth-watering Raspberry Truffle Brownies from The Kitchen Is My Playground.

Thanks to all who linked up and can't wait to see what you've been up to this week! 


You are invited to the Inlinkz link party!

Click here to enter

Tuesday, February 18, 2025

Repurposing: Upcycled Cigar Box Tea Storage II


I mentioned in another post that there was a part II and here it is. While I was busy ordering a special tea for Mr. Chocolate, little did I know that a sweet friend who'd taken a trip to London with her family last year, would be sending us a wonderful assortment of teas from there! Natch, they needed storage befitting their origin.

Supplies:

  • Cigar Box
  • Acrylic Paints
  • Vinyl
  • Digital Images
  • Crown Embellishment


As I mentioned in my other post, I get my cigar boxes from Total Wine. They're usually on a wall behind the registers. Just take them to the register. 


We might live in the Copper State but it's also a Turquoise State with several turquoise mines so this is an homage to that, plus I love the color! I sanded over the parts of the label I couldn't remove and then painted with Waverly No Prep Paint in Lagoon. I painted the inside edges in case my paper calculations were off. 


The upside to being a paper hoarder, I mean having an extensive scrapbook paper collection, is you have papers for every color project! I chose this marbled paper (Recollections) with gold foiling for my interior, measured, cut, and then applied using Mod Podge Matte. 


Once the inside was done, I dry brushed some white and gold paints on the exterior and then gathered my embellishments. I found a tea sentiment and teapot in Cricut Design Space, cut those from black and gold vinyl as shown, and chose a metal crown from a pack I bought at a stamping show.


I positioned and applied my vinyl, then using Loctite Gel Superglue, applied the crown.


The box had an oval shape engraved in it and debated about covering it with paper but I decided it made a good frame for the crown. 

So that's the story of Tea Box I and Tea Box II and we will each enjoy many tea times to come!


Monday, February 17, 2025

Repurposing: Upcycled Cigar Box to Tea Storage I


As much as I may ever joke about my Iced Mocha addiction, we drink a LOT of tea in this house. On a trip last year, the place we stayed had this tea Mr. Chocolate fell in love with. It turned out to be something that had to be specially ordered so I got him a big box for Christmas and it literally came in a cardboard box. Well, that wouldn't do! I have a stash of cigar boxes and knew they were perfect for this project. And stay tuned because there will be a part two I'll share this week.

Supplies:
  • Wood Cigar Box (Total Wine sells these for cheap!)
  • Acrylic Paint
  • Scrapbook Paper
  • Mod Podge (I used Matte)
  • Vinyl
  • Embellishments


Although I haven't gotten any recently, I think Total Wine still sells their empty cigar boxes. I've gotten them for as little as $.99. You can also sometimes get wood crates and other boxes too. These have run me $4-5. 

I grabbed one I had in my stash, sanded any rough edges and then painted using Waverly No Prep Acrylic Paint in Truffle. 


Love this paint so much! I kept the outside pretty simple because Mr. Chocolate is the opposite of me when it comes to blinging things up!


I measured the scrapbook paper I chose (and yes, when I applied it I had a little gap but it'll be covered by tea so...) and used Mod Podge Matte to glue it inside the box. Then I taped off the bottom and went around the edges with silver. 


I chose silver vinyl (Cricut) and an image from Cricut Design Space, sized and cut.


I placed it on top of the box to make sure it was well positioned and then applied using my scraper. To finish, I found some self-adhesive metal studs. 


I let the vinyl design be my guide to where I placed them and applied them until I was satisfied. 


Of course these bougie tea bags are slightly larger than normal so I had to rearrange to close but the most important thing is, Mr. Chocolate loves his box! 

I mentioned there's a part two coming. It was a very Tea Christmas! Stay tuned.


Thursday, February 13, 2025

BFF Open House


Happy Friday Eve, Valentine's Day Eve, and Galentine's Day! Sending warm thoughts to the Chicagoland area and surrounds because our son let us know "It's FREEZING" as we remind him "You chose this!". It cooled down a bit here in the desert too but nothing like that no thank you!

This week I shared:


And you've all been busy prepping for Valentine's celebrations so let's take a look at some wonderful ideas! Wishing you all lots of love. Self, family, partner, kids...LOVE. Now, more than ever. 

Artsy Va Va shared this pretty Watercolor Heart Canvas that would work for Valentine's or anytime. The background makes it pop! 

Simple Everyday Mom shared these adorable Love Monsters that again are fun for V-Day but could work for anytime with these or different colors! 

Galentine's Day...the day before Valentine's Day to celebrate our girlfriends who play such important roles in our life...continues to gain traction. Rose Bakes shared this great Galentine's Charcuterie Board to celebrate! 


Finally, who wouldn't want to have a plate of CHOCOLATE WAFFLES like these from Recipes Simple? That who would be me! 

Thank you to all who linked up. Wishing you a weekend filled with love!


You are invited to the Inlinkz link party!

Click here to enter

Tuesday, February 11, 2025

Home Decor: Gothic Valentine's Day


This was actually my first Valentine's Day project this year and I've forgotten to post it! When I showed it to Mr. Chocolate his response was "Isn't it a little early for Halloween?" and I had to remind him that he's married to someone who loves the macabre and that there is a sub-genre of Valentine's decor that's Gothic! Besides, my decor style is best described as "Do what you like".

Supplies:
  • Ornate Frames (Dollar Tree)
  • Multi-Surface Paints (Craft Smart and Waverly)
  • Vinyl (Cricut)
  • Embellishments 


These frames from Dollar Tree were my inspiration. Have you seen them? Have you picked any up? I got the oval and rectangle shapes. But Carol, why do you have gold paint if they're already gold. I'll tell you later.


This is what it looks like when you take the frames apart. There's a two-part backing. 


I painted the frames with the Waverly No Prep Paint which worked so nicely on these because they're plastic! The color is Silver Lining. Here's where the gold comes in. I dry brushed it over the silver to give it a good gothic aged look. 


I found images I liked in Cricut Design Space, sized and cut them from white vinyl. Then I applied them directly to the backing from the frames. 


Put the frames back together and:


Yes, I kind of goofed on the Til Death Do Us Part vinyl placement but hey, "handmade" isn't always perfect, right?

I'm still not sure Mr. Chocolate gets the concept, but my Other Child (my girlfriend's eldest) totally gets and appreciates them! 


Sharing At: