Back in February when I made this for Valentine’s Day, it served a dual purpose. I wanted to have something that would be up all year long to commemorate a milestone in our lives this year. In addition to our son’s HS graduation and starting college, TODAY we celebrate our 20th Wedding Anniversary!
20 years ago today I married by real life BFF. The guy who makes me laugh when I want to take myself too seriously. The guy who lets me cry when he knows I need to. The guy who remembers all the little things but knows how to do big things in style.
We knew each other for several years starting in college even though we didn’t date…each other that is lol. When shortly after college life threw me a curveball (my dad suddenly passed away ) and I needed someone the most I have ever needed anyone in my life but couldn’t communicate that to anyone, not even my mom, he was there. I couldn’t let my guard down until he walked through the door with mocha almond fudge ice cream and chocolate sauce. How well he knew me !
Twenty years of all the things that marriages go through. Silly arguments over dumb things; agreement on the things that matter. Challenges that test what you’re made of and rewards that can only be shared with someone who’s been there. Love and loss and more happy moments than sad. Laughter, tears (sometimes from the laughter) shared looks that need no words. An amazing father to our son and truly my other half. My biggest cheerleader, coach, and constructive critic (although I’ve learned to never show him a project until it’s DONE).
I can’t begin to imagine ( nor do I want to ) what the last 20 years would have been like without him. I can’t wait to see what the next 20 bring.
I love you B. Even more than that day 20 years ago when we said “I do”, and it was a lot then!
Wednesday, August 31, 2011
Tuesday, August 30, 2011
Back to An Empty Nest
First off, I have to thank my wonderful friends and guest bloggers who shared such amazing ideas with you while I was away for some family time and moving our son into college. I wasn’t able to keep up on all of the comments, but judging from them, everyone enjoyed the guest posts and I am so grateful to Jenn, Kathleen, Carolyn, Jocelyn, Maggie, Christine, Michele, Bev and Doreen! You ladies ROCK!
We had a fantastic road trip from Washington to California where “Chocolate Chip” ( son ) is now loving college life and settling in with a great roommate, academic adviser he really likes, and plenty of food in the dining halls. I’m sure the SoCal weather doesn’t hurt either.
We spent a few days at Disneyland which was way more emotional than I thought it would be. While all of the “classic classics” are still very much alive and we enjoyed the character sightings of pals like Mickey, Minnie, Pluto, Donald etc., I realized on this trip how much of Disney is part of our son’s childhood.
Movies from Pocahontas, all three Toy Stories, Lion King, Aladdin, The Little Mermaid, Beauty and the Beast, Monsters Inc., A Bug’s Life, both Cars, Up…..all of these were part of his childhood, adolescence and now (YIKES) adulthood.
A candied apple wearing Belle’s dress from Beauty and the Beast and marshmallow and pretzel confections including one in honor of Tigger!
Good thing there was glass between me and the kitchen 
We had a fantastic road trip from Washington to California where “Chocolate Chip” ( son ) is now loving college life and settling in with a great roommate, academic adviser he really likes, and plenty of food in the dining halls. I’m sure the SoCal weather doesn’t hurt either.
We spent a few days at Disneyland which was way more emotional than I thought it would be. While all of the “classic classics” are still very much alive and we enjoyed the character sightings of pals like Mickey, Minnie, Pluto, Donald etc., I realized on this trip how much of Disney is part of our son’s childhood.
Movies from Pocahontas, all three Toy Stories, Lion King, Aladdin, The Little Mermaid, Beauty and the Beast, Monsters Inc., A Bug’s Life, both Cars, Up…..all of these were part of his childhood, adolescence and now (YIKES) adulthood.
Woody and Cowgirl Jessie from Toy Story
His Royal Highness The Lion King
I love these little alien guys!
No intro needed...BUZZ
Heimlich from "A Bug's Life"
Every time we saw one of these characters or their attractions, it brought back a wonderful memory. I also love Disneyland and its sister park California Adventure for the friendliness of the “Cast Members”, the cleanliness, the attention to detail and ensuring their guests have a wonderful experience.
It All Started With A Mouse...
and his gal pal
faithful pet ( although someone still needs to explain to me why if Goofy and Pluto are both dogs, one speaks and wears clothes and the other doesn't. Don't even get me started on Pooh's lack of pants)
BFF Donald
You knew I’d find the chocolate right? On Main Street and in the resort kitchens, chocolatiers are busy busy busy! A candied apple wearing Belle’s dress from Beauty and the Beast and marshmallow and pretzel confections including one in honor of Tigger!
Monday, August 29, 2011
Today's Guest Chocoholic: Doreen from Altered Artworks!
I became an immediate fan of Carol’s “The Answer is Chocolate” [Does the Question Really Matter?] blog from its name alone. You don’t have to call me twice when there’s chocolate in the room. And when there’s chocolate and crafts together? You got me on hello.
After 25 years, fate [a job and a boyfriend] brought me to So Cal, where it’s sunny practically every day.
Crafting in Laguna Beach
"If we knew grandchildren were so much fun, we would've had them
first!"
My Dad, Mom, Elysa & Kaylee
|
I am a passionate crafter. My Mom taught me how to sew and knit, and I dabbled in what is now called altered art. My first projects included covering cigar boxes (when the tobacco stores gave them away) with wallpaper samples and decoupaging jigsaw puzzles into wall art. Fast forward to today. After many years of creating handmade gifts, I sold my altered art at local craft boutiques. However, I quickly realized that instead of selling my work, I wanted to share my love for the actual process with others. Thus, Altered Artworks was created
If you’re a fan of the inspiring magazine, “Where Women Create,” you might appreciate my teeny-tiny craft room. It measures 8 ft. x 10 ft. This is a photo of it on a good day. I am not at liberty to share what it looks like on a not-so-good day.
My craft stash must-haves include ribbon, Mod Podge, buttons, acrylic paint, beautiful paper, metal ephemera and more ribbon. My altered art “transforms the mundane, one embellishment at a time.” Here are a few of my favorite projects. [Just click on photo to view specific post.]
Altered
Shutter
|
| Two panel canvas photo frame |
| Coffee-theme Ensemble: tile coasters, notepad/pen holder and clipboard |
| Mother-Daughter Altered Wall
Canvas (Top canvas: Me in 1956. Bottom: Me now.) |
| Love, love, love altered clipboards |
To see additional altered art and a few tutorials, please visit my Altered Artworks blog. And if
you live in Southern California, please join me at one of my Creative Therapy
workshops.
And thanks, Carol, for letting me share my story and love for altered art with your blogger friends.
Doreen
Sunday, August 28, 2011
Today's Guest Chocoholic: Bev from Flamingo Toes!
I'm so excited to be here guest posting!
My name is Bev and I blog over at Flamingo Toes.

One of my favorite things to do is to make knockoffs - especially from Anthropologie.
So that is what I'm doing today!
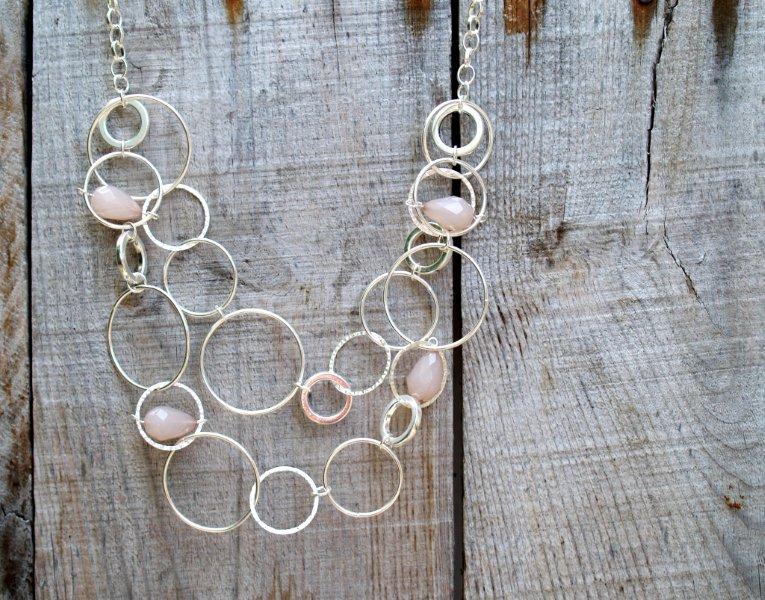
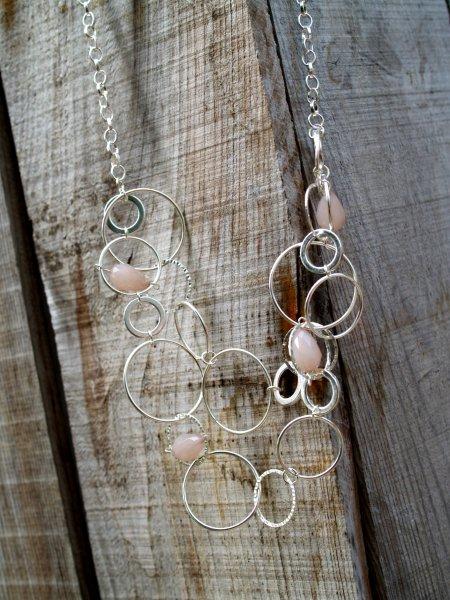
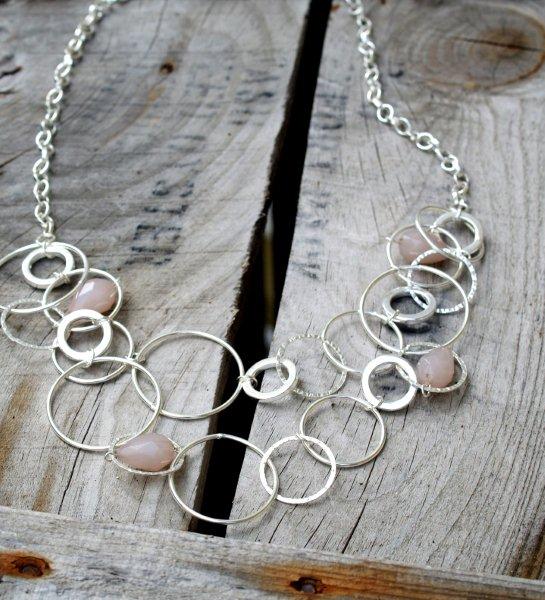
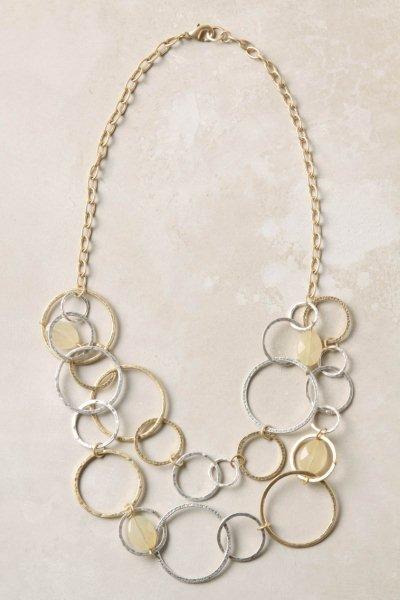
I fell in love with the Shepherd Moon Necklace at Anthro a few months ago - and I really love
how it came out!
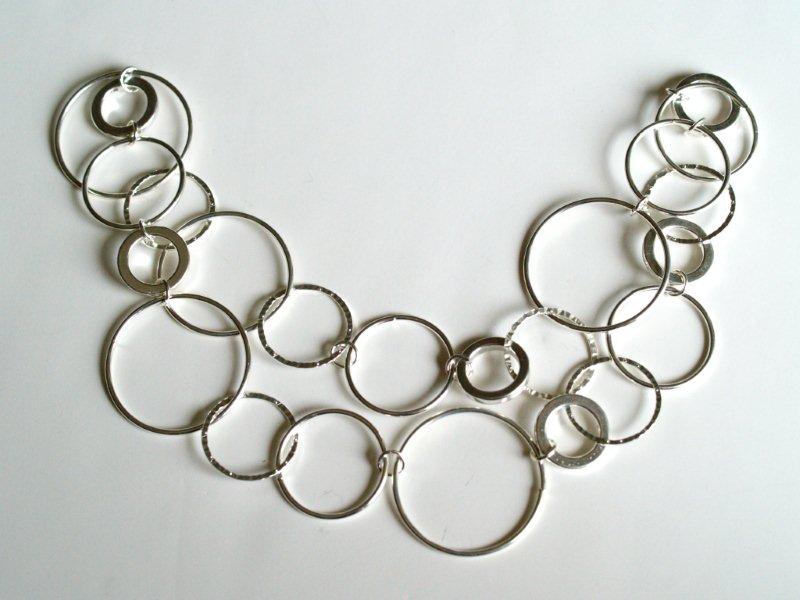
Here's my version:
And here's Anthro's version:
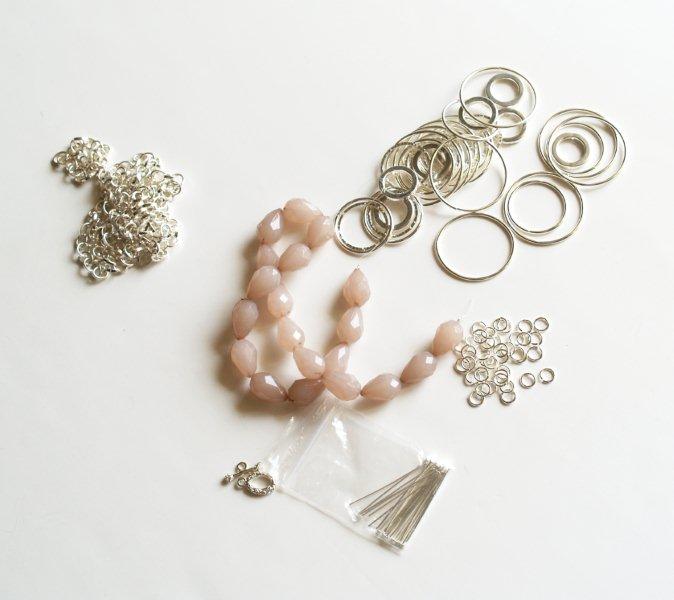
You'll need:
Length of chain - 16"
Assortment of silver rings (I bought an assorted package + a strand of smaller rings from Michaels)
Beads (just smaller than the medium ring size
Eye pins (same number as beads)
Jump rings
Necklace Closure
Jewelry pliers: wire cutters, round nosed pliers
Start by laying out the lower half of the necklace, just to get an idea of placement.
You should have two rows - one shorter than the other.
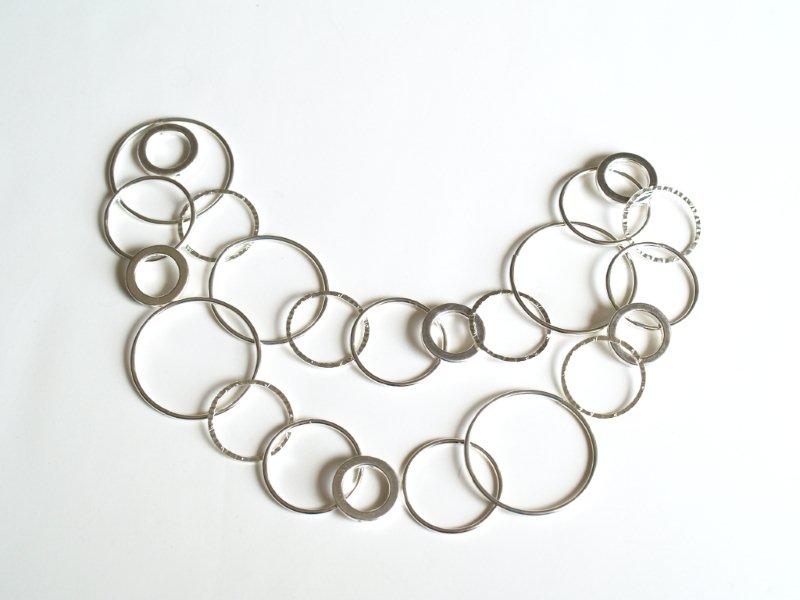
Start on one side and begin connecting your rings with jump rings.
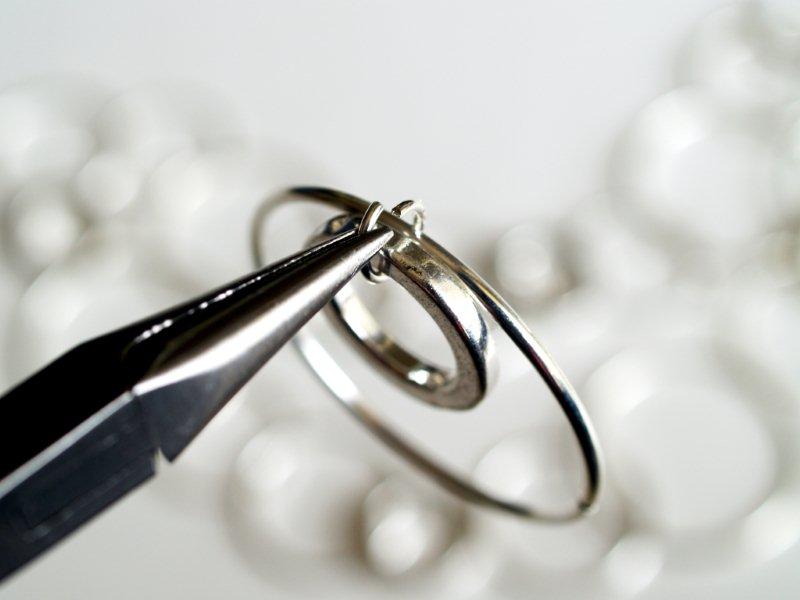

Work your way across the top row of rings.
Some of the rings were like jump rings and had an opening. For those, I opened up the ring and connected them that way.
If your rings don't have openings - you could cut them with wire cutters.
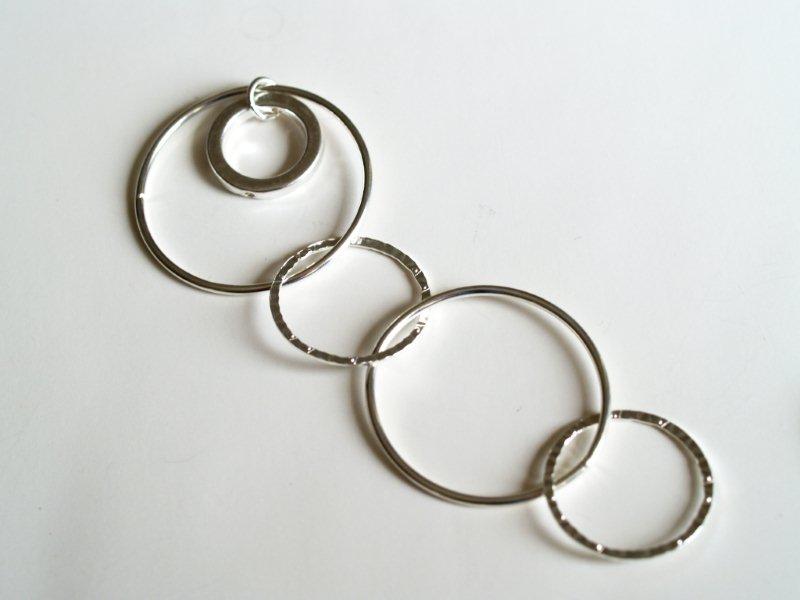
The top row of rings should measure around 10" across when pulled straight.
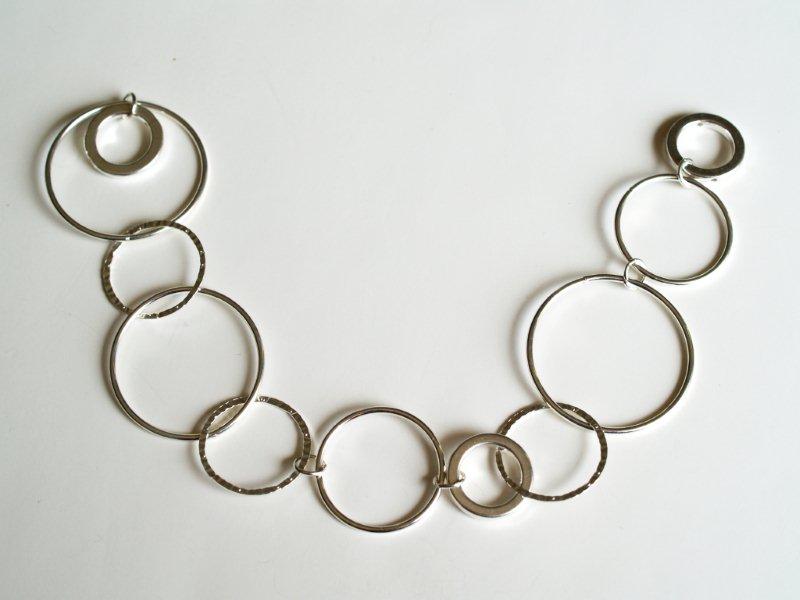

Start adding in your longer row of rings the same way.
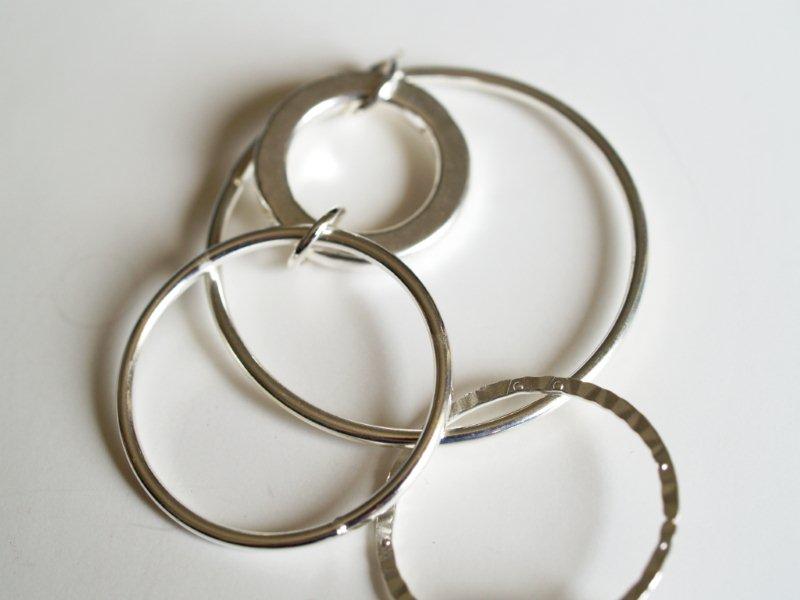

The longer row should measure about 13" long.

Now we're going to add in the beads. You can use eye pins for this (pins that have a loop on one end) or you can create your own from wire.
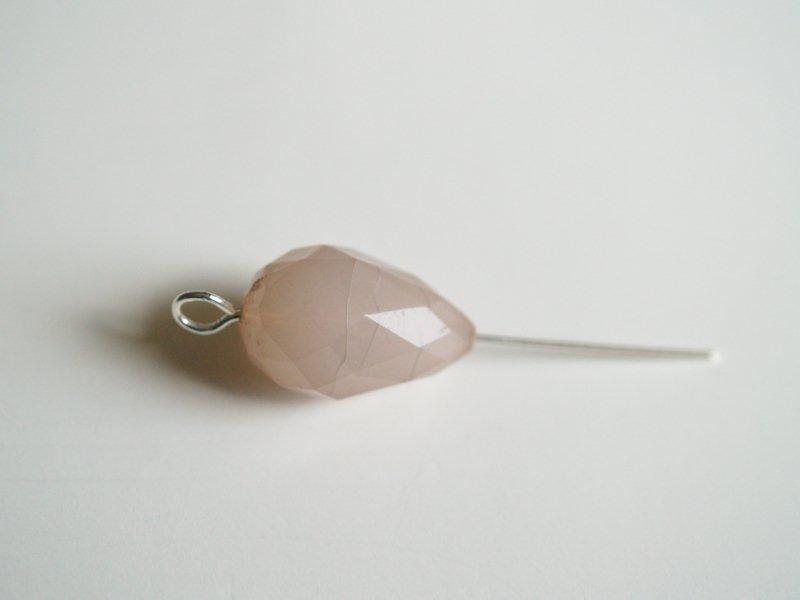
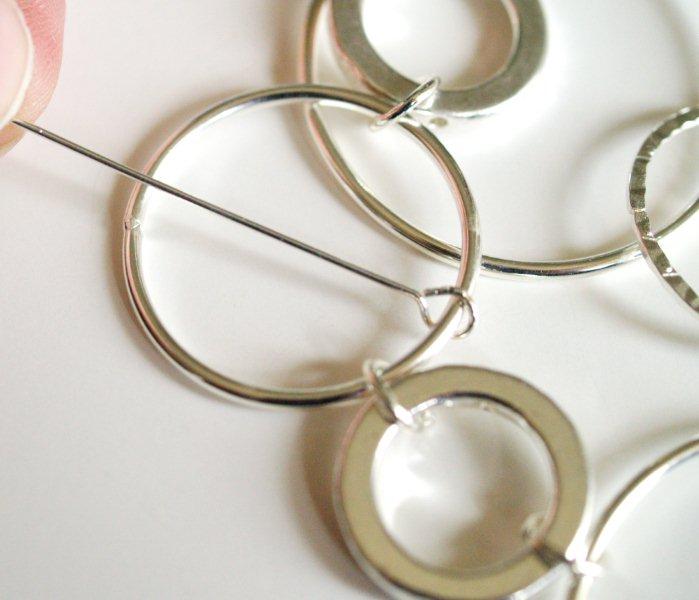
Decide which rings you'd like your beads on and measure how long the pin needs to be.
Add the bottom
loop to one side of the ring.
Add the bead to the wire and decide where the other loop needs to be.
Create the loop at the other side and attach it to the ring.
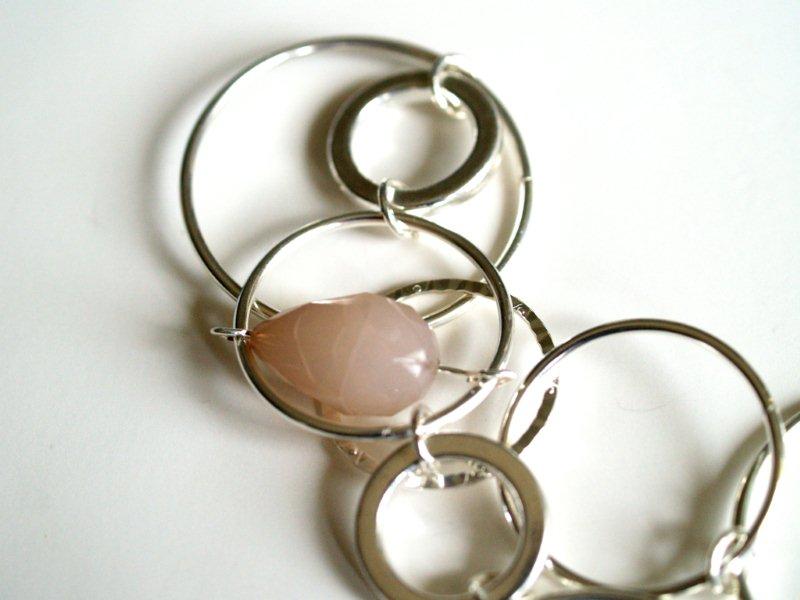

Continue adding beads to the necklace where you'd like them.
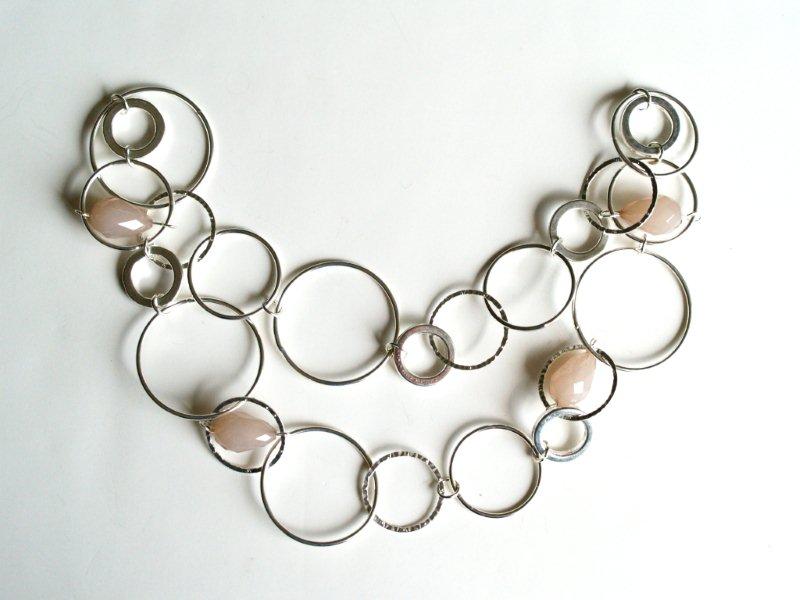

Add a jump ring to the top ring on each side. Cut the 16" chain in half. Add one 8" piece of chain to each side.
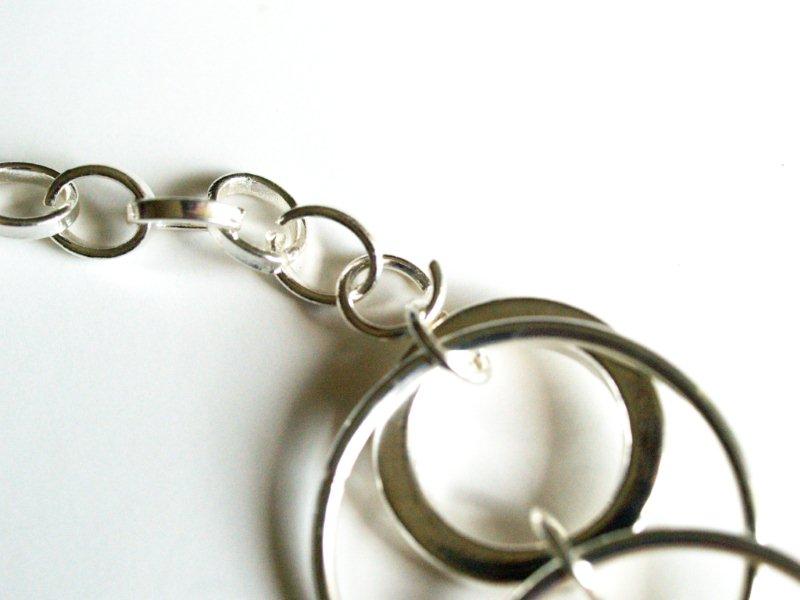
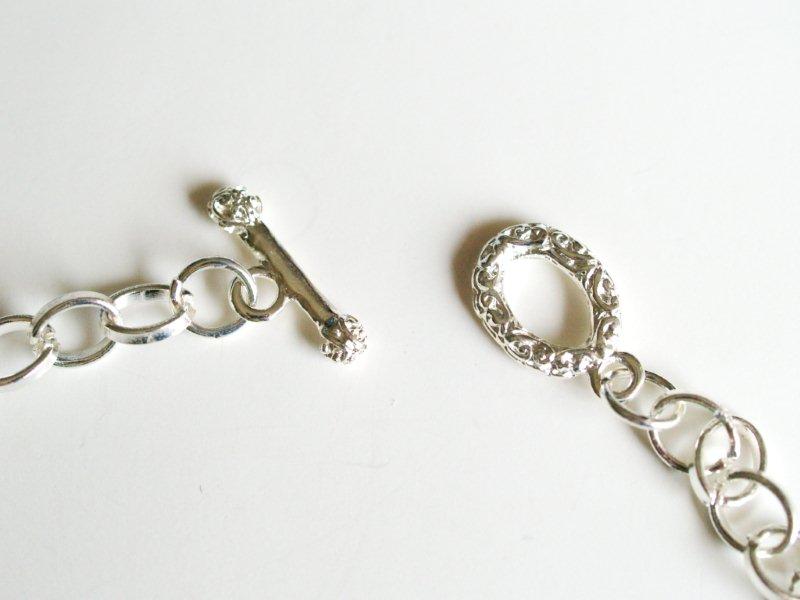
Add a necklace closure to the other end of the chains. I used a toggle clasp but you can use any tip of closure. Connect it to the two loose ends of chain with jump rings.

That finishes off your Shepherd Moon Necklace!!
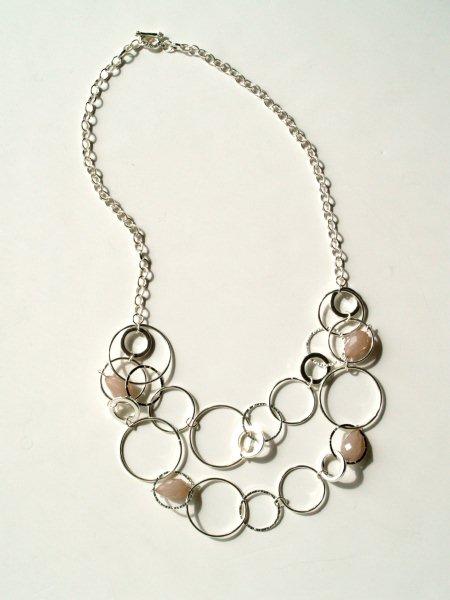

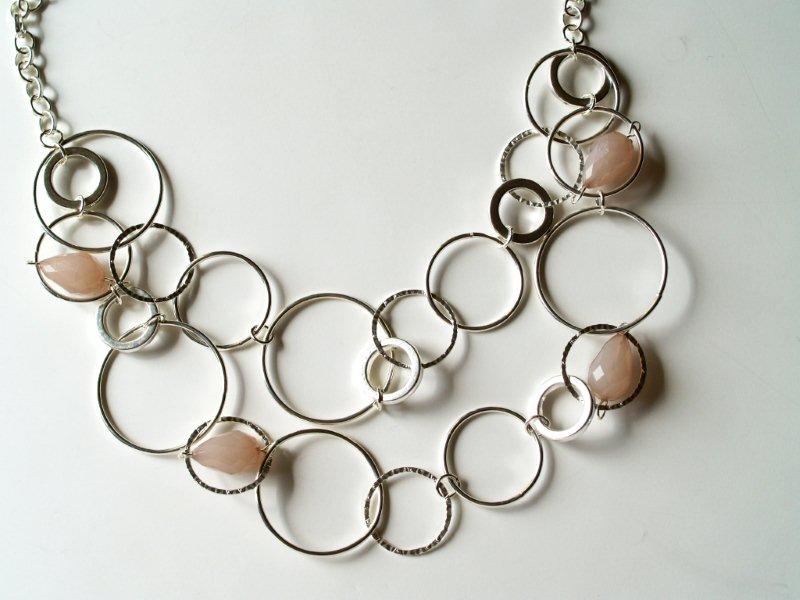
Isn't it fun?

I love all the different sizes of rings!
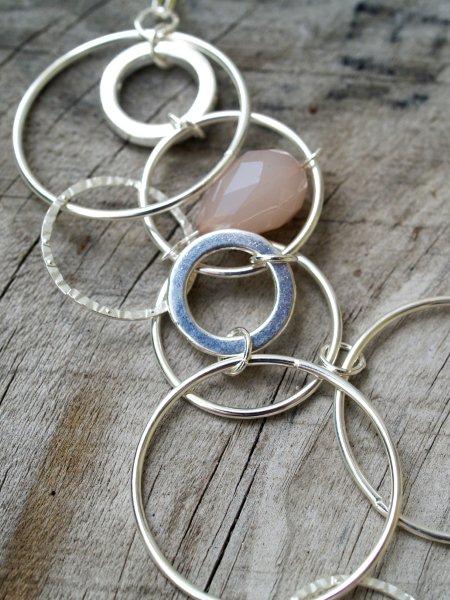

I hope you like it!
I'd love for you to stop by Flamingo Toes and check things out!
Here's a little sampling of projects - you can find these and more on my Tutorial pages!
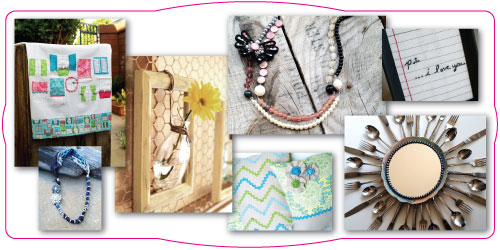

Thanks so much Carol for letting me come over and hang out! :)
Saturday, August 27, 2011
Today's Guest Chocoholic: Michele from The Scrap Shoppe
Hello chocolatiers! My name is Michele, and I create over at The Scrap Shoppe.
I use my blog to share interesting craft techniques, craft projects that catch my eye, and give you some fun freebies that you can download and use in your own crafting. And I also share a creation of my own each week which often includes a full tutorial so you can try it yourself.
I'm excited to be guest posting for Carol today!
Something you all need to know about me up front is that I'm slightly obsessed with monograms.
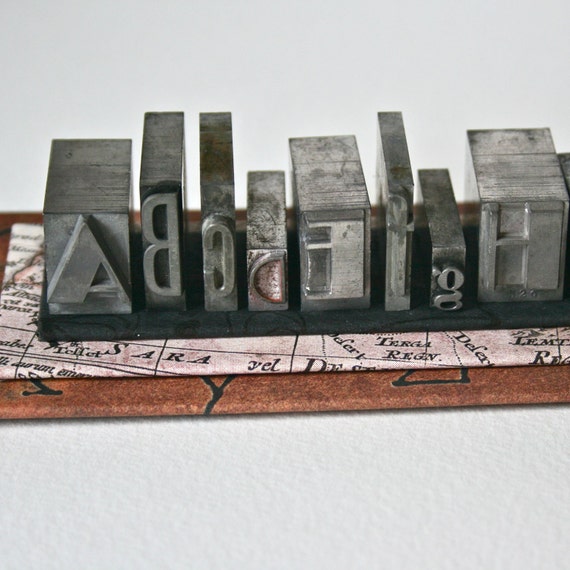 source
I present you with the DIY Letterpress Stamp!
4. Yarn Wreath
And I'm always trying to think up new creative ways to make more to add to my decor!
This is my latest inspiration:
 source
I present you with the DIY Letterpress Stamp!
The materials needed to make your own oversized letterpress stamp are pretty basic.
I used a large paper mache monogram letter and a couple of pieces of wood cut about a 1/4" larger than the letter.
Just stacking everything up you can see what I'm going for with these three pieces.
Now to start putting everything together!
The two pieces of wood were glued together then wood putty was used to seal the cracks between the two pieces. It was then sanded and primed. You can see that you can not even tell that this block is more than one piece of wood!
I mixed some brown, black, and dark green acrylic paint to make a grayish brown color and painted the wood block. With the primer, it only took 2 coats of paint for good coverage.
I painted the M the same color as the block. Then I mixed some brown, black, and gold acrylic paint and brushed it lightly over the top of the M, making sure not to give it good coverage. Then I quickly wiped much of the paint back off.
I think that extra lighter coat of paint on top gives the letter a "used" feel like it really was used as a stamp! And it helps add that metallic touch of an old letterpress stamp.
Once everything was painted and dry it was time to glue my monogram to my wood block.
I used my trusty Beacon's 3-in-1 adhesive.
This stuff is like a hot glue gun in a bottle.
All the adhesive power, none of the burns!
I made sure I had my 1/4" edge all the way around my new "stamp" as I glued the letter down.
Although the letter was made of paper mache, it still made the front of the stamp a little forward heavy when it was standing upright. And with that 1/4" gap on the bottom of the stamp, it had a tendency to tilt slightly forward. To remedy that I added a small bit of that material you put under your rugs so they don't move around. Then I painted it black so as not to be noticed.
Its amazing the transformation paint can have!
Another happy monogram project to check off the list!
Thanks so much for letting me share this project with your readers, Carol!
And I invite everyone over to my place to have a look around!
Subscribe to:
Comments (Atom)


