Thursday, August 21, 2025

BFF Open House: Two Week Party (Aug 21-Sept 1)


Happy Friday Eve all! Hope you've all had a good week. So many things going on...Back to School continues for parents, students, and teachers... Summerween and Augtober, as we transition from Summer to Fall...LOTS of home garden harvesting...just tons of things! 

Scheduling this as a two-week party because our busy-ness includes our upcoming 34th Anniversary, so we're getting away next week to celebrate. It'll be nice because Mr. Chocolate is feeling so much better after dealing with the illness that led to his surgery last month, and we have MUCH to be grateful for. 

This week I shared a couple more Halloween projects I made: 


Let's take a look at some of the inspiring projects shared at last week's party. 


Steph Creates Things shared a BRILLIANT use for all those candle lids we accumulate from our scented candles and repurposed them into Fall Shelf Decor


Artsy Karma shared a beautiful way to repurpose plastic bottles into BEAUTIFUL Flower Lights!


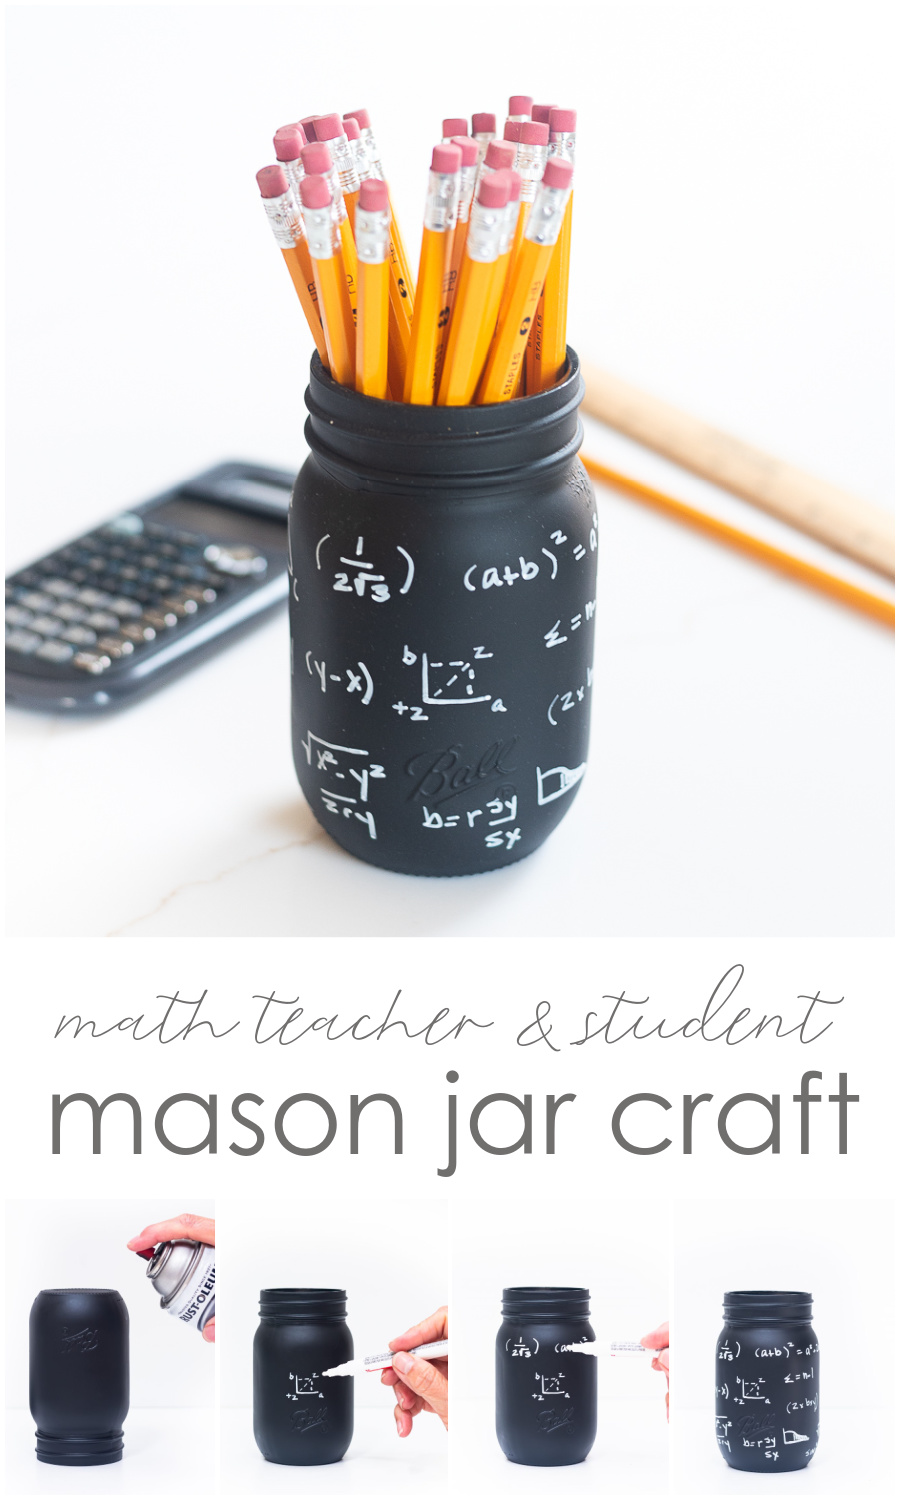
It All Started With Paint shared a perfect gift for a Math Teacher (or student!) with this Math Mason Jar Pencil Holder

And even if it's not yet sweater weather where you are (like me) you can get ready for Halloween and Fall with this Upcycled Sweater Vase shared by From the Bay to the Beach


Thanks to all who linked up, and can't wait to see what you've been up to! It'll be September when I post my next party so happy early September, which may or may not be my favorite month of the year. 


You are invited to the Inlinkz link party!

Click here to enter

Wednesday, August 20, 2025

Halloween: What's a Glam Witch Cottage Without Furniture?


A Glam Witch needs her furniture so I made some to go with the Cottages I shared last week.

Supplies:

  • Fairy House Chairs and Tables (Dollar Tree)
  • Black Acrylic Paint (Craft Smart Multi-Surface)
  • Silver Acrylic Paint (Craft Smart Bright Silver)
  • Mini Halloween Decorations (Michaels)
  • Misc. Gems
  • Acrylic Paint Pens

I was smart and picked up accessories when I purchased my Fairy Houses from Dollar Tree. I've learned the hard way "see it, get it". 


I got the chairs and tables. When I made my Glam Witch Cottages, I thought they'd go well with them even though the scale being a bit off went against my Virgo brain. But I went with it! I mean they can magically be resized to fit, right?


I painted the chairs and tables black with Craft Smart Multi-Surface black paint, then dry brushed the arms and legs with a little silver. I let a little of the original brown show through the tables. 


I had a stash of Halloween miniatures from Michaels I bought last year and didn't use. They were perfect for this! I chose a cloche with a skull and spellbook, and used E6000 to glue atop the tables. 


For the chairs, I used acrylic paint pens to accent the leaves and petals on the chair, and then of course, I had to add a sparkly gem. 


Since I haven't started decorating officially, this is how I plan on displaying as soon as I do! 


Sunday, August 17, 2025

Halloween: Glam Pinkoween Ghost


This week's party continues here through today. 

Pink has become a core part of Halloween in recent years and is on display EVERYWHERE in craft and home decor stores. I'm even planning to include my pink tabletop tree I used for Valentine's and Easter this year, into my Halloween decor. 

I'd bought some pink glitter HTV (heat transfer vinyl) to use for Valentine's Day, but life got in the way. There's no such thing as wasted craft supplies, though, so I grabbed it for this project. 

Supplies:
  • Ornate Frame (Dollar Tree)
  • Waverly Chalk Paint (White)
  • Decoart Acrylic Paint (White Pearl)
  • Vinyl (Doesn't have to be HTV)
  • Embellishments


NOTE: I was originally going to do the frame in black but, I ended up not liking it and didn't re-take pics. I used Waverly Chalk paint in white instead. Paint your frame (I picked up a few of these ornate frames from Dollar Tree because...you know!) and set aside. 


Remove the backing and dry brush with paint of choice. I used Deco Art white pearl which I got at Dollar Tree. 


I wanted a simple background. 

I chose a ghost image from Cricut Design Space and cut using the pink glitter HTV (Michaels). You don't need HTV but it's what I had in the right color. You can use regular vinyl. If you do use HTV, remember to mirror your image!


Since I did use the HTV, i needed to heat press it onto the background. I used my Cricut mini press. Once my ghost was pressed down, the fun began! 


Here's the white frame and you can see I let some of the gold peek through. Reassemble, then decorate! 


I grabbed some clear and iridescent gems from my stash, using black rhinestones for the eyes, and then went around the bottom of the ghost with large gems and dotted the background and frams with smaller ones. 
 

The iridescent gems look like dimensional drops on the ghost, and it's hard to see in pics, but they add just a little oomph to the frame. To finish, I added a bow of iridescent tulle. Easy. Peasy. 


Happy Pinkoween! 

Thursday, August 14, 2025

BFF Open House


Happy Friday Eve, all! Our monsoon season seems to be going out like a lion. Living in the desert, we don't follow "traditional" seasons. It's been a mild one but whew, last night was everything by me. Lightning, thunder, rain, wind. I was looking for the Wicked Witch flying by. 

It felt great to be in my craft room this week and started on some Spooky Season projects! This week I shared: 


Busy working on a few more things to share. 

OK! Let's take a look at some of the fun ideas shared at last week's party!


Back to school calendars are all over the place so if school hasn't yet started (or even if it has) Creatively Beth has a wonderrful Clay Pot Apple for Teacher project! 


My Thrift Store Addiction shared this beautiful Vintage Headboard to Trellis transformation. 


Press Print Party shared this amazing DIY Coral Reef! Perfect for a Little Mermaid theme or any party celebrating the sea! 


Finally, it's never too early to start thinking of holiday and host/hostess gifts, right? Flour on My Face has you covered with DIY Rosemary Salt


Thanks to everyone who linked up and can't wait to see what you've been up to this week! 


You are invited to the Inlinkz link party!

Click here to enter

Wednesday, August 13, 2025

Halloween: From Dollar Tree Fairy Houses to Glam Witch Cottages


Last year, I went looking for these little Fairy Houses at Dollar Tree too late in the season, so when I saw them in the Spring, I grabbed up a few. I was thinking ahead to Spooky Season and decided they'd make great Witch Cottages. You may still be able to find them now or use any little ceramic houses from there or thrift shops. 


Supplies: 

  • Ceramic Fairy Cottage (Dollar Tree)
  • Black Spray Paint (Rustoleum)
  • Silver Acrylic Paint (Craft Smart)
  • Embellismhments (Michaels)

I forgot to  take pics of them before I started so this is from their website. This is the design I used for these. 


I spray-painted them with the black Rustoleum I used for my Haunted Mansion. It's amazing how different they look, isn't it? I got a different style I'm going to use for Christmas.


I used a bright silver acrylic paint (Craft Smart Multi Surface Ultra Bright Silver, Michaels) to dry brush the roof, stones, windows etc. 

I love scoping the kids crafts sections of Michaels because I always find some goodies like these gems from Creatology. They're iridescent and faceted and can go with anything! 


I used a quick-drying glue to attach the gems along the roofline, door, and plants, and added a few self-adhesive rhinestones as shown. 


I picked up these charms last year (Michaels), which I ended up not using, so I chose the pumpkins to add to the front. 


And there you have it! From Fairy Houses to Glam Witch Cottages! Can't wait to show you what I did with some of the Fairy House accessories I also picked up. Stay tuned!