Showing posts with label Fall Decor. Show all posts

Wednesday, October 22, 2025

Fall Decor: Painted and Gold Leafed Fall Pumpkins


I'm not doing a lot of new Fall Decor projects this year, but a few. Made these metallic and gold leafed pumpkins to coordinate with my Fall Sign


Supplies: 

  • Ceramic or Resin Plain Pumpkins (Michaels)
  • Acrylic Paints in Choice of Colors
  • Mona Lisa Leaf Size and Gold Leaf (Michaels)

I picked these up last year and didn't get around to using them. I saw some this year too. I like these because they look like ceramic but are resin, and a lot lighter in weight. They also take paint really well. 


Grabbed paints in my palette from my paint stash. 


I painted each pumpkin with "Grape" (the one without the label). Once dry, I went over them with a metallic paint to give them a sheen. 


To finish, I dry brushed some of the copper onto the pumpkns.


I painted the stems mostly as a guide for the gold leafing. It made it easier to see the glue once applied. 

NOTE: There's a difference between GOLD LEAF and FOIL. I used LEAF. The easiest way to tell them apart is on the foil, the underside will be dull. On the leaf, it's the same on both sides. It also comes packaged with layers of tissue in between. 


Using a small paintbrush, I applied the leaf size over the stems. Allow to dry until tacky. You will also need a stiff brush to apply the actual leaf. I just use a stencil brush.


Leafing is messy. No way around that! So I used a repurposed plastic container, lined with wax paper. That makes for easy cleanup since the paper catches the excess and is easily wadded up and thrown away. 


Hold the leaf by the tissue between the layers, and apply over top of the adhesive. 


Next, take your brush and start pouncing on the leaf. Where there was no adhesive, the leaf will fall away and you can use the bigger pieces on the next item. 


Some of the leaf may stick to areas of paint, which in this case, I didn't care because it added to them. If you're being very picky, make sure any areas you don't want leaf on are completely dry. This is also why I painted the stems in case the leaf missed any spots. 


I almost want to take down my Halloween table centerpiece to put up my Thanksgiving centerpiece because that's what happens with us Makers, isn't it? Not quite yet! 


Sunday, October 19, 2025

Fall Decor: Dollar Tree Fall Pumpkin Sign


This week's BFF Open House Link Party continues here.

Getting a few Fall projects done before I start on Christmas. I found this blank sign at Dollar Tree and thought it would be a perfect Fall project. 


Supplies: 

  • Embossed Pumpkin Sign (Dollar Tree)
  • Acrylic Paints (Michaels)
  • Sponge Spouncer Brushes (Dollar Tree)
  • Glitter Acorns (Dollar Tree)
  • Self-Adhesive Wallpaper (Dollar Tree)
  • Misc Embellishments (Stash)


This is the unfinished sign. I used paints in Copper, Gold (Craft Smart), and Metallic Berry (DecoArt), along with a Ceramcoat Grape (not shown). 


Using a sponge or sponge spouncer, apply the paints all over. I just kept spouncing and blending and picking up colors until I was happy. 


Once I was happy with the base, time to embellish! 


Dollar Tree has these fabulous sheets of self-adhesive wallpaper. I've picked up a bunch without a specific project in mind, but knowing they'd get used SOMETIME! I grabbed this gold and white patterned paper to use at the top of the sign. 


Using the sign, I traced the arc on the back of the wallpaper, cut it out and applied to the top of the sign. 


The maple leaf charms are ones I'd stocked up on YEARS ago when Michaels first had their dollar spot. I glued these across the bottom of the wallpaper as shown. This season, Dollar Tree has these glitter acorns in the color shown, as well as a brilliant Fall orange, so I grabbed some for this project. Likewise, Dollar Tree has packages of sequins, and I got a Fall colored set. Each color is packaged individually in a set of six, but I just dumped them all together. 


I used these to decorate the stem of the pumpkin, and added coordinating glitter to the vines. 


I added a few to other spots on the pumpkin as shown. To finish, I made a bow from some coordinating glitter ribbon and then added the acorns. 


This is a preview of my color palette for Fall and Thanksgiving decor. After Halloween comes down of course! 


Tuesday, November 7, 2023

Fall Decor: Paint Poured Paper Mache Pumpkins


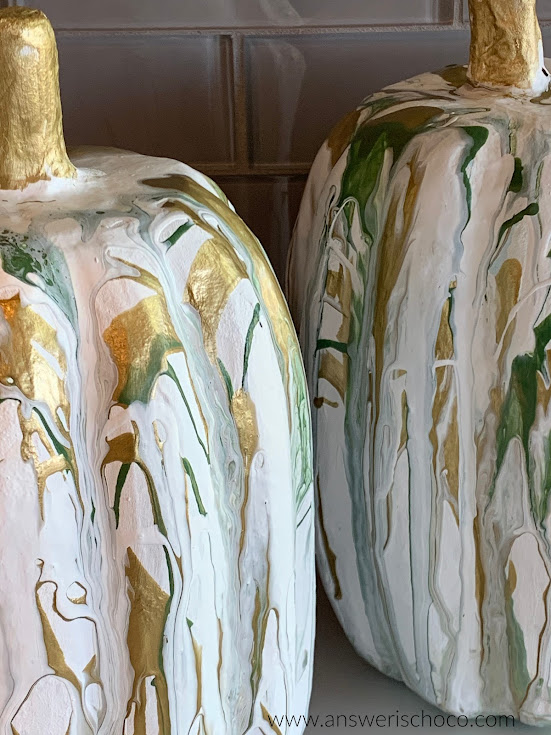
In addition to the Tissue Paper Pumpkins I shared yesterday, I had fun this weekend paint pouring some paper mache pumpkins. I'm thrilled with how they turned out! 


Supplies:

  • Paper Mache Pumpkins (70% off at JoAnn)
  • Liquitex Acrylic Paint Pouring Medium (Michaels)
  • Acrylic Craft Paints

I found these tall skinnier pumpkins for 70% off at JoAnn. Who could pass those up? Not me! You could do the paint pour on these as is but I knew I was using white in this project and really wanted it to pop so I coated with white acrylic paint. 


I was sure I took pics of my paints before I poured them but apparently not. So, I mixed white, green, and gold paints in their own cups along with Liquitex Pouring Medium. It's available wherever fine art supplies are sold. I got mine at Michaels. 


I am not an exact person. I guestimate how much I'll need for a project then do about 1/3 medium to 2/3 paint. Different paints have different viscosity. Metallic paints are sometimes thicker so I use a little more medium with them. I go for a consistency that's about the same as white school glue. And since pouring and taking pictures require more hands than I have, I didn't take pictures of the actual pouring. 

Some prefer layering the paints into one separate cup but I worked with the three colors/cups individually. Kind of like I cook. Some of this, some of that, more of this until the colors were dripping down the pumpkins to my liking. 


 This is the paint still wet and doing its thing of swirling, streaking, blending. I just let gravity do the work. 


Once dry, they almost look like they were carved from wood. SO happy with them! They were around $4 each and I already had everything else on hand.


Monday, November 6, 2023

Fall Decor: Tissue Papered Dollar Tree Pumpkins


While last year was our first year in our new home, we also went away for Thanksgiving. So this year is our first Thanksgiving here and I decided I wanted to switch up some of my color palette. Since the leaves don't really change much where we are, I went with the colors we do have in abundance. Shades of greens and golds. The best part is, it will still work with the more traditional Fall colors. 

Supplies:
  • Dollar Tree Foam Pumpkins 
  • Tissue Paper
  • Mod Podge
  • Acrylic Paints


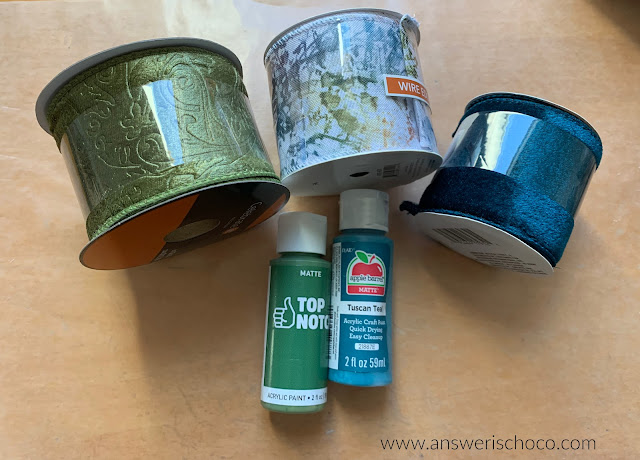
This is the color palette I'm working with. I'm in the process of decorating so will be sharing things as I go along. 


The first step is to cover your pumpkin with tissue paper. Any tissue paper will work. I love the "ugly" pumpkins. The knotted, gnarly, knobby, creased ones. I crumpled the tissue paper then tore it into pieces. This is not scientific or measured! Apply some Mod Podge to the pumpkin, lay the tissue paper on, spread some more Mod Podge and continue until covered, including the stem. 


The tissue paper soaks up the Mod Podge but I like to go over it anyway just to make sure it's really good and on there!


When you're done, yes, it will look like it's been covered in a cocoon! I wanted the teal paint to be just a little deeper so I added a few drops of black and didn't completely mix it so it would have some variegation. 


I was very happy with how the crinkles and paint came together but of course, I wasn't done! The final step was to go over the pumpkins with gold, which I dry brushed all over, and covered the stem.