Monday, August 2, 2021

Papercrafting: More Cards For Box Of Balloons !


I wrote in May about an organization called Box Of Balloons that works to ensure that children get to be celebrated on their birthdays. They were then partnering with several of my local Starbucks locations to collect cards, wrapping, decorations etc. and as a Cardmaker and a Mom, it was right up my alley. I did it for the sheer joy of combining those two loves and because I want every child to know the feeling of being special on their birthday. 

I was honored and humbled to receive the following email from the local chapter President, Amy:

"I'm so impressed with your handmade cards and gift tags and wanted to say THANK YOU so much for your wonderful donation.

I've been putting a card and gift tag in each birthday box I've been creating and it adds such a personal touch to each box. Thank you so much for donating these as I'm sure they took a lot of time and energy to create. They're so beautiful and made so well and I'm just blown away and grateful :) "


I was thrilled they were happy and would be put to use and immediately planned on making more! As I've written about (probably ad nauseum!) June was a bust for creating between prepping for a planned move and spending an unplanned week in the hospital. So once things had settled ( somewhat...life is life!) in July, I wanted to get back to it and on Saturday dropped another three dozen cards in the mail! 

Supplies:

  • Birthday Themed Papers (American Crafts, The Color of Memories Collection from JoAnn and Happy Cake Day stack by Recollections from Michaels)
  • Cardstock
  • Birthday Themed Washi Tape ( Park Lane, JoAnn) 
  • Glitter Papers ( Recollections, Michaels) 


 This time around I used some American Crafts birthday themed papers I found at JoAnn along with some Park Lane birthday themed washi tape I scooped up on sale there. 


Like some of the sheets from the Recollections "Cake Day" stack, this sheet had panels I cut up to use as the focal for the cards, matting each with coordinating glitter papers. The washi tape coordinated perfectly with the colors (and it didn't hurt that it was an additional 50% off clearance). 


The Balloon background paper is from the same American Crafts collection. I kept things simple, matting the image on glitter paper, then another coordinating paper ( great way to use scraps) and attaching to the card with foam squares. 


Since I still had plenty of papers from the "Happy Cake Day" stack I previously used (and may or may not have bought another stack when Michaels had another buy one get two free Hot Buy sale which is my kryptonite) I made some more using those. 


Unintentionally, I usually make my cards in a portrait vs landscape orientation...no reason...just do...but since these panels didn't lend themselves to that, made some that way too. 


It's very fulfilling to feel like doing something you absolutely love can make a difference. Especially now. Especially in a child's life! 


Thursday, July 29, 2021

BFF Open House


Happy Friday Eve ! We're already at the final weekend of July which is hard to believe. I've really enjoyed what has clearly become a more widespread tradition of Christmas in July and now I need to start acting on some of the great ideas I've seen but my creating time has again been limited by the realities of life. This was supposed to be the year that I got my "act" together and focused on branding but "life is what happens when you're busy making other plans". 

Lots of great ideas shared at last week's party so let's take a look at a few! 


If you don't have a lightbox in your tools, then you should! Years ago I had a really bulky one but they are so sleek and slim now and my next "treat myself" will be the newest one from Cricut which is the cordless Bright Pad. They're invaluable for everything from tracing, to weeding vinyl to as An Artful Mom showed in her post, using for hand lettering. Perfect for cardmaking or home decor! 


Got scraps? Paper scraps, ribbon scraps, fabric scraps, fiber scraps? Check out what Fresh Vintage by Lisa S did with a bunch of her with these wonderful Paper Snippet Rolls! I've seen similar ones at vintage shops and craft fairs (in the before times pre-pandemic!) and they can get pricey so I love the idea of making your own and goodness knows, I have all the materials! 


If you're looking for inspiration for a bedroom makeover, look no further than this beautiful one from The House on Silverado. So elegant and beautiful! 


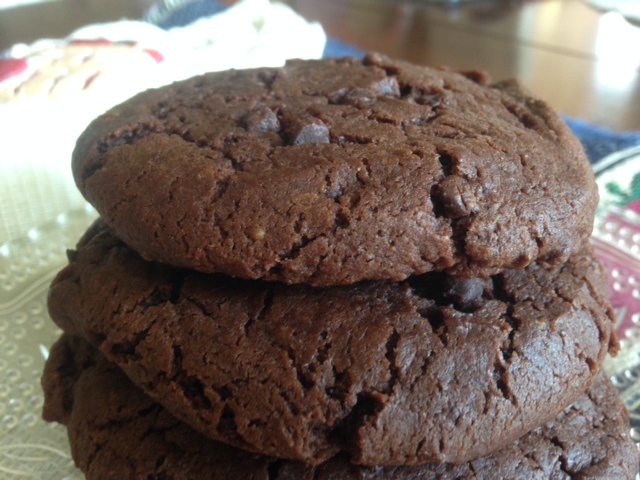
Finally, if you're like me, the best part of a muffin is the top! So these Chocolate Fudge Muffin Top Cookies from Cindy's Online Recipe Box are just perfection! 


OK Creative Peeps...let's see what you've been up to this week! 


You are invited to the Inlinkz link party!

Click here to enter

Thursday, July 22, 2021

BFF Open House


Happy Friday Eve all! It's monsoon season here in the desert so we've had muggy ( for us ) days and stormy nights with lots of lightning shows and thunder. It's a crazy Summer all around and I hope that you're all managing to stay cool and safe. 

This week I shared my Coffee Filter Flower tutorial for those of you who may not have seen and been on the lookout for it! 

Let's take a look at some of the ideas shared at last week's party! 


Popsicles scream Summer and if you need a Summer card, you can't go wrong with this idea from Linda at Paper Seedlings. Looks good enough to eat! 


It's never to early to start making Christmas Ornaments either for your own tree or as gifts. Apple Street Cottage has a simple way to do so using polymer clay and an embossing folder. Genius! 


As much as July has become "Christmas in July" month, it's also an ongoing celebration of Harry Potter in honor of Harry's birthday. This Deathly Hallows pillow from Creatively Beth is so cool ! 


Finally, what's better on a hot Summer day than some ice cream? How about Chocolate Pomegranate ice cream from Morsels of Life? Yum! 


Now let's see what everyone's been up to this week! 


You are invited to the Inlinkz link party!

Click here to enter

Saturday, July 17, 2021

Tutorial: Coffee Filter Flowers


This week's party continues here so please link up! I had several requests for a tutorial on the Coffee Filter Flowers I made and used in my Oversized Floral Wreath so here it is. They were never designed to be any specific kind of flower...they're just "flowers" I made while playing around one day.

The process is the same for all three styles and you can definitely adapt to other styles. 

Supplies: 
  • Coffee Filters. The basket kind, not the cone kind. You can get them everywhere...Dollar Store, Grocery Store etc. 
  • Dimesional or Thick Glue. I used Glossy Accents by Ranger. Available at craft stores, online, etc. You can also use a thick glue like Aleene's Turbo Tacky. 


That's it on the supplies! I'm going to show the step by step for Flower number 1 and the basic cuts for the other two. The process is the same. It's the cuts to make the petals that make the difference! 

For each flower, I used nine filters. 

Separate each filter and crumple each of them up. I did this because it gets rid of the original shape and also because it helps give the flowers some body and shape. 


Once you've crumpled them, uncrumple them! I know...work work work. You'll use three filters each to make three sets of layers for each flower. To begin, fold one filter in quarters. 


Then make the cuts into narrow petals as shown. If you are a person who needs to be exact, you can draw them but I'm not so I just eyeballed and did it freehand. 

Make the petal cuts until you reach the other end of the folded quarter. Repeat two more times to create the first three layers of the first section.  Here's what it will look like unfolded. 


Since flowers in nature aren't perfect, I didn't worry about making mine perfect either. For the subsequent sections, it's the same process but you're going to make each section slightly smaller by trimming the filters down. 


Again, I eyeballed it and just trimmed the middle section down as shown before cutting the petals. Then did this once more for the top layers. You're building the flowers from the bottom up. 


For the top layers you just cut more off the filters than the middle layers. You'll end up with three sets of large (1), medium (2), and small (3). 

The quarter folds make a kind of natural well in each layer. Place a dab of Glossy Accents in the middle, then slightly offset the next layer atop the glue, then repeat with the last layer for this section. 


Repeat with the last large layer, then continue with all of the remaining layers until the last of the small top layers. Make sure to offset each layer. This adds to the fullness of the final flower. 


You can see the form start to take shape but with the second section I use the eraser end of a pencil to push down in the middle that helps the petals stick up a bit. I hope that makes sense. 


For the final layer of the top section, before you add it to the flower add a drop of the dimensional glue to the middle and pinch together from the bottom. Then add this layer to your flower. 


And there you are! For flowers 2 and 3, I'll show you what a difference changing up the petal cuts makes. 

Flower 2:


Quarter fold and then cut as shown with a deep curved V. Same concept. Large, medium, and small sections, three filters each, cut down in size before making the petal cuts as shown in Flower 1. Same process of offsetting each layer as glued, and using a pencil to push down / deepen the well in them middle. 


And just as with the first flower, when you get to the final top layer, pinch the middle before gluing to the flower. 


Flower 3:

For this style I just used a basic petal shape on the quarter fold. Large, medium, and small sections, cutting down as shown in Flower 1. Offset as each layer is glued and pinch the middle of the final top layer. 


If you wan to make smaller flowers then just trim down your filters accordingly. There are so many possibilities. You don't have to keep them white. You could dye the layers for example. But I would do this and make sure they're dry before you build your flowers. I hope you found this helpful! They're addictive once you make a few. 

If you make these shapes or come up with your own, I'd love to see!!