Showing posts with label Home Decor. Show all posts

Monday, November 10, 2025

Fall Decor: The Only Way I'll Do Centerpieces Now...The Pool Noodle Hack


I tried my hand at the pool noodle hack for creating centerpieces with Halloween, and I'm never going to do them any other way! If you aren't familiar, follow along to learn what I'm talking about. 

Supplies

  • Foam Pool Noodle
  • Assorted Silk Flowers, Picks, etc. 
  • Fairy lights (Optional)
  • Table Runner (Optional)
  • Wire Cutters, Zip Ties, Wire Cutter

This was an early Fall find from Dollar Tree, and I knew it was an "if you snooze, you lose" item, so it was a no-brainer to buy. 


The basic construction steps are:

  • Fold pool noodle in half (or you can cut into two pieces if you want)
  • Secure with zip ties or wire (I used the extra long ties from DT)
  • Thread candleholders through the middle 
  • Go wild


I started with the pumpkins shown in the first pic just to give myself some sense of balance. I had these pumpkins in my Thanksgiving decor already so I just used them differently this year. This is my favorite part about DIYing things. You can reuse your existing supplies in different ways!

I tend towards non-traditional colors mixed with traditional ones. When I saw these lavender leaf bunches, I fell in love. I really love how they worked with the copper and other Fall colors. I cut each "branch" from the stem, and this is the best part: you stick the ends directly in the pool noodle. It provides the perfect surface. And when you're ready to change it out? Equally easy. Just pull them out! 


I already had the white and taupe pumpkins. I picked up other stems from DT and Michaels. This is a great way to use the bunches they have every season, since you end up cutting everything apart anyway. I spent less than $10 on florals I didn't already have, between 60% off florals at Michaels and $1.75 stems from DT. 


Keep filling in blank spots until you're satisfied wit hw things look. 


You can use candles or not. If you don't want them, skip the earlier step of threading candle holders in the middle of the pool noodle. The next step I did is also optional. All up to you! I found some remote control fairy lights for a good price online so...


I threaded them throughout the centerpiece and...


I'm so happy with the outcome! I loved my Halloween centerpiece. I love this one even more, and I can't wait to play with Christmas! The pool noodle hack allows for dimension and depth. 

Have you tried the pool noodle hack? 

Sharing At:
Vintage Charm Party 516


Sunday, January 19, 2025

Home Decor: Repurposed Paint Pour Double Heart Canvas


I've had a paint-poured canvas I saved thinking I'd paint over it but then I found these very cool heart frames at The Dollar Tree and an idea came to me that works for Valentine's or all year round for two long-time married people! 

Also, DT has upped their game and I got some other great-looking finds you'll see soon!

Supplies:
  • Blank or Previously Painted Canvas 
  • Heart Frames (Dollar Tree)
  • Coordinated Paint (I used Craft Smart Radiant Gold)
  • Paint Brush
  • Hot Glue and Glue Gun

They were just my style as-is but what Maker can leave something as-is? I decided to go with just a little dry brushed gold. 


I went with Radiant Gold Craft Smart Multi-Surface paint and just dry brushed it over the beaded parts and sides of the frames. I also removed the hangers from the back so they'd lay flat against the canvas. 


Of course, once you start embellishing...I added these bright silver (the pic doesn't do them justice) self adhesive "rhinestone" stickers which I added to each of the knobs on the frame. Since I used gold on the frames to pick up the gold on the canvas, these worked well to pick up the silver. 


To finish, I used hot glue to attach the frames to the canvas! 

Wednesday, March 13, 2024

Home Decor: Layered Bunny and Egg


Mr. Chocolate now gets why I stop at different Dollar Tree locations. (And yes, I saw where they're closing stores!). We were out and about the other day and there was one next to a place we were going so of course I had to stop and I found some things I hadn't seen at other stores like these thicker "wood" eggs and Buffalo check bunnies! This idea instantly popped into my head. 

Supplies 
  • Dollar Tree Wood Egg
  • Dollar Tree Buffalo Check Bunny Garland
  • Dollar Tree Mini Wood Blocks
  • Hot Glue Gun and Glue
  • Ribbon
  • Acrylic Craft Paint
  • Coordinating Ribbon


The bunny garland would be cute as a garland but I already had this idea in my head. I painted the top of the eggs and left the sides bare. 


It only took one coat but I let it dry overnight. I took two of the bunnies off of the twine and replaced it with coordinated ribbon. 


I pulled the ribbon through the holes from the back, tied a square knot, then trimmed the ends as shown. I had some mini-wood blocks in my stash that I used to create depth to glue the bunnies to the eggs.


After I glued the block to the back of the bunny, I used more hot glue to attach the bunnies to the eggs.


Easy Peasy Dollar Treesy! But what to do with the remaining bunny garland? I decided that the remaining four would make two cute 3-D bunnies. 


I had these mini pom poms in my stash and went with the light turquoise ones to cover the holes from the twine. Then I glued two more of the wood blocks to the back and attached another bunny to the blocks. 


Be careful to make sure the bottoms are even so they'll stand up. 


They go with some eggs I did years ago!


And of course, now, I wish I'd bought another garland! 

Monday, January 30, 2023

Home Decor: Beaded Wood Wreath and Tag


I love how you never know what you're going to find a Dollar Tree. When I turned the corner of an aisle and found not only a Wood Bead Wreath form but in black? Squeal! And then when I saw a tag to match? Double squeal!

Supplies
  • Wood Bead Wreath Form (Dollar Tree)
  • Wood Bead Strung Tag (Dollar Tree)
  • Faux Leather (On Hand)
  • Silk Flowers (On Hand)
  • Hot Glue and Glue Gun
  • Twine


I remembered I had some faux leather in my stash from JoAnn. Decided this project needed a center bow and that this was perfect for it. I chose a bow image from those I have saved, sized in Cricut Design Space, and cut. 

When you cut faux leather, you need to use a strong grip cutting mat (I use Cricut's purple one) and you also want to lay your leather right side down. 


All of the faux leather I've seen has this woven backing so you want to cut through the back side to minimize fraying.


Here are the bow pieces cut out. I opted out of using the tail. Back in the stash for something else!


To assemble the bow, use hot or other strong glue (eg E6000) and fold in each side. Since this is a layered bow, repeat for the other layer. 


Layer one bow atop the other, then using the rectangle strip from the bow pattern, wrap around and glue to secure. 


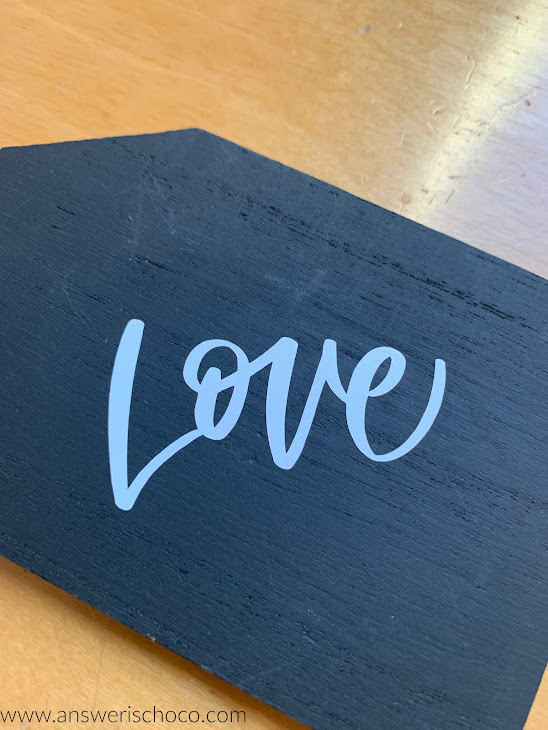
The flowers I had on hand from a post-holiday 80% off sale so they were like, $2? I stripped the leaves, cut the stems to where I wanted them, bound them together with floral tape and hot glued to the wreath, then glued the bow on. I left the tag pretty much as-is, just adding the word "Love" cut from white vinyl. 


I decided to angle it just because that's what my brain decided to do. Once I had it positioned the way I wanted, I burnished with my scraping tool and ...


In hindsight, I probably should have attached the tag before gluing the bow on but, I didn't! So I grabbed some twine and used the existing twine loop on the tag to secure it to the wreath. 


Simple. Inexpensive. Love! 

Sharing At: 


Tuesday, January 17, 2023

Home Decor: Family Chinese Zodiac Wall Art


Lunar New Year, most popularly known as "Chinese New Year" (but celebrated in other Asian countries) is this coming Sunday. This year is the Year of the Rabbit which is my Chinese Zodiac sign and also happens to also be a milestone year for me. For as long as I can remember, I've always loved rabbits. Even before I knew I was one! In thinking about doing a project I decided to do one that incorporated my sign, as well as my husband's and son. Since this is the first project I'm sharing in the New Year, it makes sense that it's a New Year project, right? 

Supplies:
  • Wood Art Boards (I used 11x14 and 8x10)
  • Acrylic Paint
  • Chinese Zodiac Images (Designbundles)
  • Vinyl (Cricut Glossy Black)
  • Cutting Machine (I used my Cricut Explore Air 2)
  • Gold Leaf Adhesive and Gold Leaf (I used Mona Lisa)


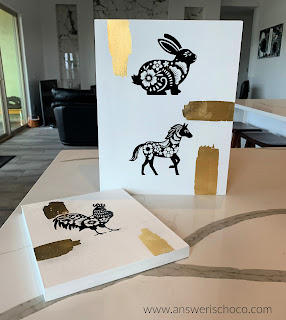
You can find wood art boards in the fine arts sections of craft stores and at art supply stores. I have a few leftover from when I found them on clearance in the arts and crafts section at Target. I wanted a clean graphic look so while red is customary, I chose to match my neutral home decor and painted the boards white and used black vinyl with gold leaf accents. 


A couple of coats of paint (Apple Barrel, White) and you're all good. Allow to dry thoroughly or else your vinyl won't stick properly and the transfer tape will pull up the paint. 


Confession time! I initially planned to put all three Zodiac signs on one board and thought I'd given myself enough space between when I sized the images. I didn't. So after cutting and weeding and not wanting to do that over, I just painted the smaller board and put mine and my husband's on one, and our son on it's own. The two of us made him so this worked in my brain! 


This was a great project that let me test some new skills I learned in a workshop by Abbi Kirsten which was how to use a PNG file to create an SVG file in Inkscape! I bought the graphics from designbundles.net.  


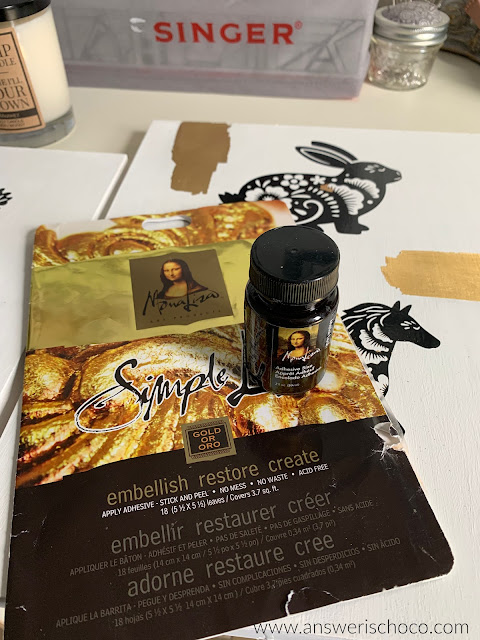
Since gold is another color you see in Chinese art, I decided to add some splashes of gold leaf. I love the Mona Lisa products (Michaels) which are easy to use. I just did some freehand brushstrokes where I wanted to gold leafing, let dry per the instructions on the bottle (actually a little less since the air is so dry where I am) and then applied the leafing using a strong bristled stencil brush. 


Wishing everyone health, peace, and prosperity in the Year of the Rabbit / 2023!

Sharing At: