Thursday, December 14, 2023

BFF Open House


Happy Friday Eve, all and how is it time for another party already? It feels like the last one just started! Time is flying by and we have ELEVEN days left til Christmas! PLENTY of time for more Elfing, right?

This week I shared a fabulous thrifty find I turned into a Christmas Vignette:


along with an "old" canvas I repurposed into a Textured Winter Painting:


You all shared some wonderful projects last week so let's take a look at a few.


I had so much fun making my own paper bag snowflakes/stars. Imagine my great honor and surprised to be mentioned in a post by Fresh Vintage by Lisa S when she not only shared hers, but also added Book Page Snowflakes/Stars


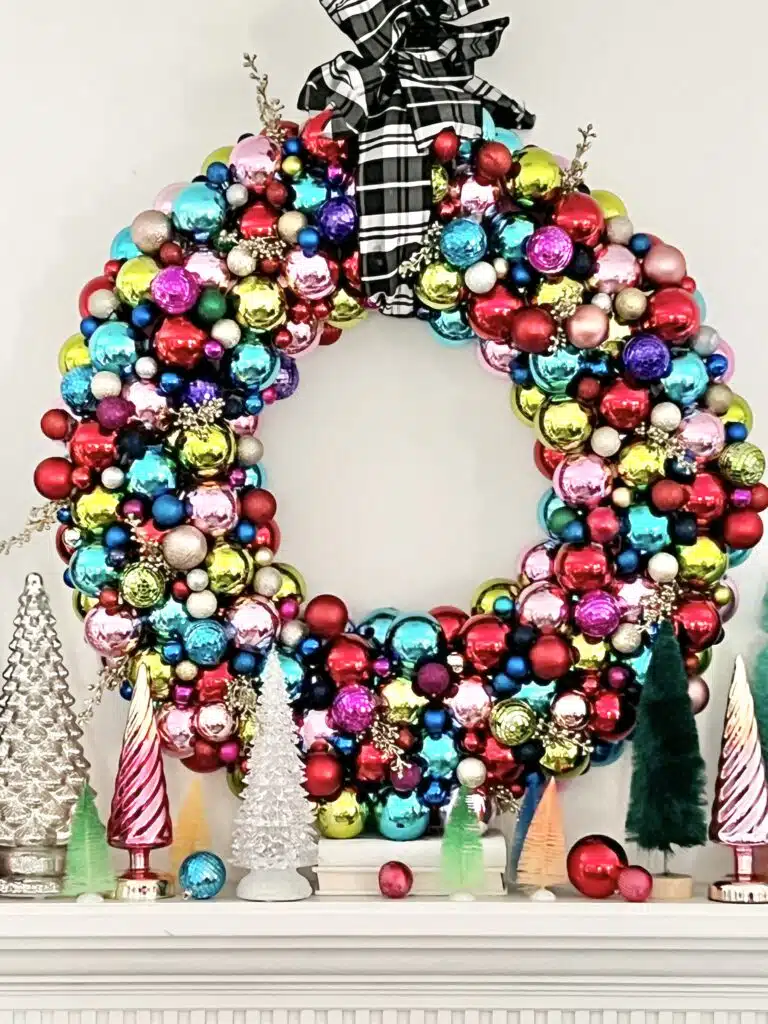
Sonata Home Design shared a great tutorial on how to make one of my favorites: A bold Statement Ornament Wreath using pool noodles! 


Creatively Beth shared this adorable Polymer Clay Gingerbread Man that can be used for so many things from a keychain to a package topper. 


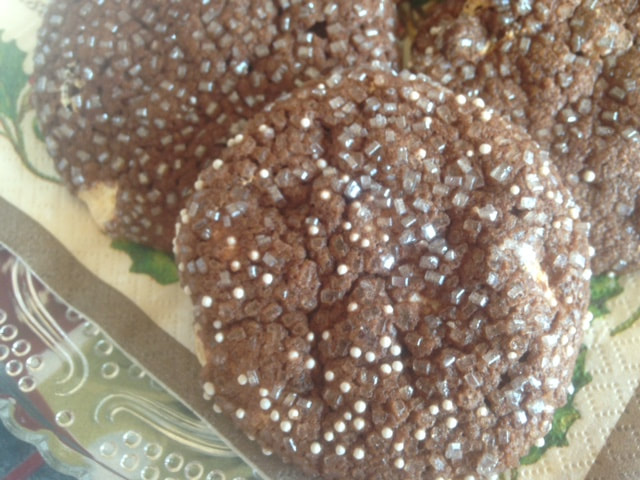
Finally, Cindy's Online Recipe Box shared these Hot Cocoa Marshmallow Cookies with Silver non-pareils. 

Thanks to all who shared and as always, can't wait to see what you've been up to this week! 


You are invited to the Inlinkz link party!

Click here to enter

Wednesday, December 13, 2023

Repurposed Canvas: Textured Winter Tree


When we moved last year, I didn't find a place for a couple of paint-poured canvases I had but I didn't want to get rid of them. I was looking through some supplies and found some OLD Martha Stewart Glitter Texture Paste I'd never played with. I wasn't sure if it was even still good but you don't know if you don't try, right? 


Supplies

  • Texture Paste (Pinterest is filled with ways to make your own. I'm going to try after the holidays!)
  • Painting Knife 
  • Acrylic Paint for Trunk
  • Canvas
If you don't have a canvas to repurpose, you can use a blank one or paint one without paint pouring, or of course, you can pour one to use!


Here's the canvas. I didn't do anything more to it other than make sure it was dust free by wiping it down with a dust cloth.


Then, I just went for it, using a paint knife to spread the texture paste into a tree shape. 


I just kept going until I was satisfied with the shape of the tree and used the edge of the paint knife to add more texture. I did a simple trunk with brown acrylic paint. I let dry overnight, then added a plain wood snowflake at the top and finished with a self-adhesive rhinestone (I did tack this down with glue just to make sure it stays stuck!)


Sometimes, I just have to remind myself to go for it when I'm out of my comfort zone! 

Tuesday, December 12, 2023

Thrifting: Tiered Tray Vignette


I got out of the habit of hitting thrift shops during COVID and then just hadn't picked it back up until last week when I stopped at a Dollar Tree and there was the cutest shop next door. I wasn't in there 30 seconds before I spotted something I've wanted for a while, a very cool tiered tray. 


The price tag said $5.49. SOLD! Then I got to the register and the cashier said "Oh it's on sale!". $4.12 with tax. Then I got home and was curious, Googled it, and found the EXACT one on Mercri selling for $58! Happy dance commenced. It had a little tarnish and a water spot but for the idea I had in mind, it didn't matter. I grabbed some Barkeeper's Friend and cleaned it up!


Good enough for me and $4. I'd found some mercury glass trees at Target that I bought just because and glad I did because they went FAST. I had some other things on had that worked perfectly for this idea.


Mr. Chocolate found these lovely Nutcracker Ornaments when he visited his dad earlier this year. They're handmade by women in Kenya as part of a collective empowering women. 


I found these little wood trees at Michaels.


And these shiny silver Merry Christmas ornaments at a Japanese Dollar Store (OK $1.75 store). I placed the bigger items, filled in with the smaller ones including some mini bottlebrush trees and ornaments, then added some epsom salt for snow. 


I didn't want to cover the tray base completely. I like how it shows off all the components as well asit's own beauty! I was so excited, I forgot to look for a couple other things.Oh well, guess I'll have to do some more thrifting!


Thursday, December 7, 2023

BFF Open House


Happy Friday Eve all! Finally finished decking my halls and I don't know about you, but sitting in the dark with the Christmas trees (yes, I said trees) twinkling is my favorite. I know Buddy the Elf says smiling is his but this is mine. There's something calming and comforting to me. What is your favorite part of the season?

This week I shared another idea I saved last year...a Dollar Tree Duster Mop Wreath 


You've all been busy elves and shared some inspiring ideas at last week's party so let's have a look at a few!


The Apple Street Cottage has a beautiful solution for any jewelry pieces you may have stashed in a drawer and don't know what to do with: A Unique Jewelry Tree. As the family Maker, guess who gets these and this is one I'm saving to do next year! 


Crazy Little Love Birds shared this Frosted Glass Candle Display. I love how spray painting different pieces the same way unifies them. 


Condo Blues shared this ingenious idea of using tomato cages to make Outdoor Gnomes! The best part? They're slipcovers that can come off, be tucked away, the cages used in the Summer, and back again for the holidays!


Finally, Rose Bakes shared yet another creative take on a charcuterie board with this Rudolph the Red-Nosed Reindeer dessert board.

Thanks to everyone who linked up and can't wait to see what you've been up to this week! To those lighting the first candle of the Hanukkah Menorah tonight, I wish you Peace, Love, Latkes!


You are invited to the Inlinkz link party!

Click here to enter

Wednesday, December 6, 2023

Papercrafting: Layered Letter Hanukkah Banner and Dreidel Card


Hanukkah begins tomorrow and I am honored to have a friend who appreciates my craftiness. I try to come up with something new each year and I realized I'd never made her a banner. So I did! It was easy to do using these amazing layered letters I was able to download for FREE (sign-up required) from Gjoa at Special Heart Studio.


Supplies:


I downloaded the file, imported into Cricut Design Space, and sized, then chose gold glitter, white, black, and blue glitter cardstock for the layers. Working from the bottom up, I attached the white layer to the gold base layer with foam squares, used a tape runner for the black, and second gold layers, then attached the blue (top) layer using spray adhesive. 


Here are the first three letters done! Once all of the letters are complete, assemble the banner using ribbon. I used Offray "Galena" Ribbon (Walmart) and strung the letters as shown, tying knots on the ends of the ribbon to prevent fraying. 


Of course, I had to make a card too! Hubs gave me the "she's off her nut" look when I told him I was quilling our holiday cards this year. Challenge accepted! I finished Hanukkah cards first, choosing a dreidel outline as the base. 


Then I selected coordinating colors from my quilling strips and just coiled away! I got so busy I neglected to take pictures but Pinterest and You Tube have TONS of how tos! You can check out my Quilling Board on Pinterest as well. 


I made one to go with this gift, and another for another friend whose family celebrates both Hanukkah and Christmas. I had this handmade star paper in my stash...the stash I save for special cards and it worked perfectly with the colors! To finish, I added gold sequins as shown using Glossy Accents dimensional glue. 

Wishing all those celebrating, Love, Lights, Latkes! 


Sharing At:

Monday, December 4, 2023

Winter Decor: Dollar Tree Duster Wreath


This is another project I saw last year and pinned to make this year. Who'd a thunk a few dusters from Dollar Tree would make such a pretty fluffy wreath?


Supplies

  • Wreath Form/ I used a wire one but you can use the styrofoam ones they sell at DT.
  • For Duster Mops
  • Glue Gun and Glue Sticks
  • Bottlebrush Trees
  • Wired Ribbon
  • Ornaments
  • Pom Pom 


I was only able to find four of these Mop Pads across a few stores and would rather have had at least five but made it work! Your best bet is to order a box of them online. 


Cut each pad in half. You will get some fluff that falls off but you're going to be gluing these down so it doesn't matter. 


If you're using a wire wreath form, turn it over and work from the back side. If you're using the styrofoam form, doesn't matter. Cut each pad in half then glue each side to your wreath form with hot glue. Keep adding your halves until you've covered your form.


Once you've covered your form, you could stop there but what fun would that be?!


I hit JoAnn when they had a buy one get three free sale on ribbon and found this pretty snowflake ribbon. I already had some silver bottle brushes on hand that went perfectly with the ribbon.


I made a bow and glued down on the wreath. 


I wanted to put the bow on before I added the trees to make sure things were centered. 


To finish, I added two pinecone ornaments and a white pom pom I already had on hand. Once you're done with adding things fluff and hang!


Sharing At:

Sundays on Silverado