Thursday, November 11, 2021

BFF Open House


Happy Friday Eve once again and welcome back to another fun party here at The Answer Is Chocolate. I hope everyone's had a great week and survived the changing of the clocks.  We don't change here in AZ but we do get confused about what time it is everywhere else. 

We are already almost mid November with American Thanksgiving (I had Canadian colleagues who trained me well) two weeks from today! My mom will be spending the holidays back east with her sister and while we'll miss her, I think this is a fabulous opportunity to do something she hasn't done in forever. 

I had a ton of fun with girlfriends at a "Candle Bar" last weekend. Check out the details here: Light and Bark Candle Company and got my Thanksgiving cards done which you can see here

Lots of festive Fall goodness shared at last week's party. Let's take a look at a few ideas! 


Can you tell I'm in love with yarn based pumpkins? I just think they look so cozy. This herringboned patterned one is from Howling Liz


This DIY Long Box from Thrifting Wonderland is one of those pieces that can stay out all year round and be updated seasonally. PERFECT for the holiday season and I'm picturing it filled with everything from mini gourds to bottlebrush trees, ornaments and greenery, paperwhites, amaryllis...you get the idea!  


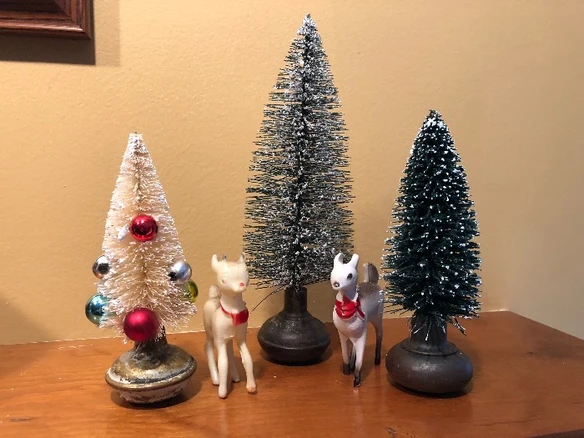
Speaking of bottlebrush trees, check out this ingenuity from Junk Journal who used vintage doorknobs as their base! 


Finally, if you're looking for a star addition to your Thanksgiving dessert table, look no further than this pretty Pumpkin Caramel Trifle from The Kitchen Is My Playground! She just keeps coming up with amazing desserts! 


Thank you as always to all who linked up and can't wait to see what you've been up to this week!


You are invited to the Inlinkz link party!

Click here to enter

Wednesday, November 10, 2021

Fall Crafts: Layered Leaf Cards (Intermediate to Advanced Skill Level)


My first love was and remains card making. And the more I play with my Cricut Explore Air 2 and layered SVG files, the more I stay in love with card making. SVGs are Scalable Vector Graphics which means they can be re-sized easily in things like Design Space. 

Supplies: 
  • Layered Leaf Images (I used a bundle from Creative Fabrica)
  • Cutting machine (I used my Cricut Explore Air 2)
  • Scrapbook Paper (I used CraftSmart "Dark Elegance" which I bought last year at Michaels and is no longer available but you can use comparable dark papers)
  • Recollections Gold and  Copper Foil cardstock (Michaels)
  • Coordinating Plum Cardstock (Stash)
  • Cream Recollections 110lb Cardstock (Michaels)
  • Copper Foil
  • Fall Themed Embellishments ( I used K&Co border stickers from my stash)
  • Coordinating Sequins (Michaels
  • Foam Squares
  • Dimensional and Double Sided Adhesive
  • Paper Trimmer and Scoring tool
The first step was to decide on the focal image for my cards. I knew I wanted a leaf theme, especially since living in the desert, I miss the changing leaves of my former Pacific Northwest home. I found this set of layered leaves at Creative Fabrica.  If you do choose to purchase, full disclosure...I get a small benefit if you go through my affiliate link


Download, extract, and import chosen design into your machine's software, in my case Cricut Design Space. If you don't have a cutting machine you can print out the PNG images and hand cut using scissors and an X-Acto knife. 

I selected the leaf from the bottom row, leftmost image. 


I deleted two of the 5 layers in my Design Space Software because I liked how just three layers looked. Then I cut each layer from the colors I chose ( plum, foil gold and copper). 


To assemble, attach the middle layer ( gold ) to the base ( plum ) using foam squares. Since the top layer is more delicate, I used a spray mount. 


Here's the middle layer mounted to the base. Since you need to work fast with the spray adhesive, I didn't take pics of the top layer but you get the idea...spray the back, lay atop the middle layer and done. 

Once I had my leaves assembled, I made my cards by cutting the cream cardstock to make 5x7 cards, cut panels of the copper foil cardstock to 4.75x6.75 then selected papers from the Dark Elegance Stack and cut to 4.5x6.5. I added the Fall themed border stickers and then mounted the leaves to the cards. 

To finish, I grabbed some coordinating sequins from my stash and added them along the stem of the leaf using Glossy Accents dimensional glue. 

But of course I wasn't done! Copper is such a fall color to me that I wanted a touch more so I'd picked up some copper foil on a trip to Michaels and thought I'd do the interior sentiment using the foil tool that works with my Cricut. 


For this step, you need to make sure you get the foil as taught as possible atop the paper you want to foil so I used painter's blue tape to tack it down. The Cricut foils also come with tape strips to do this. 


It still needs a little give so don't worry if it's not absolutely flat. Then select a font or image for whatever you want to foil, follow the instructions for the tool / in Design Space and send to your Cricut. 


I chose the word "Fallsgiving" since this time of year for me is about celebrating the gifts of Fall. It was also a great way to use up the copper, and plum scraps from this project which I used to mat the sentiment! I adhered these to the inside of my cards using my tape gun. 

My way of giving a little bit of Fall to friends and family! And the pictures don't do the metallic goodness of the colors justice so if you are seeing this on here first and know you're getting one, just wait! 


Monday, November 8, 2021

Shop Local Phoenix: Light and Bark Candle Company


I tend to be a homebody as I think a lot of us Makers can be. We've got stuff to make right? But I'm not a total hermit and do actually get together with friends sometimes! I did so this weekend and I had so much fun because we went to a bar...(no not that kind!).  This was a Candle Bar! Well what's a Candle Bar you're asking? Well I'm going to tell you! 

We went to this absolutely lovely shop located in "Old Scottsdale". If you're not local Old Scottsdale is a great area filled with tons of restaurants, fun bars (the usual kind), and LOTS of shops filled with handmade and Native art, clothing, souvenirs etc. There's also lots of history to be found as you walk through the area. 

What is Light and Bark? 

L&B is woman owned business where you can buy ready made soy candles or you can make your own at...the candle bar! Jenni is the owner and she's knowledgeable and helpful and funny! It's located at 7227 E 1st Ave, Scottsdale, AZ 85251 and the website is here: Light and Bark Candle Co.  If you're not local, you may not be able to make your own candle but you can easily shop online! 

You can probably figure out the light part of the store's name, but what's the bark part? As a dog mom (like everyone in our group was) I absolutely love the bark part which means that...well let me have Jenni tell you in her own words: 


I love and support businesses that give back! Jenni volunteers with rescue dogs and has a life long love of candles so putting the two together in a business? Dream come true. Even better? Light and Bark donates a portion of its proceeds to the Maricopa County Animal Care & Control shelter

Our group was big enough to need a reservation and Jenni accommodated us with an after hours event. Individuals or smaller groups can do walk ins during normal business hours. 


These are some of the pre-made candles you can buy. Jenni also offers seasonal ones. All candles are clean burning and made from soy wax. The focus of our evening was the Candle Bar where you can select your glass jar, lid, and fragrances. I thought I got a picture of the scented oils but everyone was so excited about smelling everything, I guess I didn't! There are pre-made candle samples from all of the oils you can use to make your candle so you can see (or I guess smell would be more accurate!) how your finished candle will smell. The ladies I was with were hilarious holding 2, 3 and 4 together and wafting them below our noses to test combinations. 


Shown here are the different glass holders you can choose from and at the bottom, the lids you can choose from to complete your chosen look! Once you've decided on your holder and your fragrances, it's time to get busy! 


Jenni had trays laid out for us with everything we'd need. The measuring cups for our oils, a mixing cup for mixing the oils into the wax, stir sticks, wicks, stickers to place the wicks, labels and every Maker knows how invaluable a tool wood clothespins are, so those we used to center our wicks once we poured our candles! You can choose wood wicks or cotton wicks, both of which are shown here. The first thing you do is "stick your wick" which means using the double sided sticker to adhere your wick to the glass holder. 


Now for the mad scientist part! For the larger candles Jenni told us we should use no more than 1 oz total for our oils. So if you used more than one fragrance, you needed to make sure the total was no more than one oz. We were busy heads down pouring a little, smelling, adding another, smelling, until we were satisfied. The fragrance choices are AMAZING! Traditional things like vanilla, mint, lavender, etc. to things like flannel, worn leather, cactus sea salt, peppercorn! Truly something for everyone. 

The next step was to mix the oil into the candle. Jenni brought us each our container of wax and told us how long we needed to stir the oil before pouring into the holder. Once poured: 


After that, you just want to make sure your wick is centered which is where the clothes pins come in to hold your wick in place while your candles solidify. That takes a couple of hours so since none of us are night owls, we opted to pick up the next day. I mention that so that you can plan your time accordingly. Then all that's left is to name you candle if you choose to by writing it on the provided label or you can leave the label as is and it will be put on the glass holder once the candle is completely cooled. 

I'll also mention that even though the oils may make your melted wax look one color, the candles all dry white. 


Here's a picture of them starting to solidify. 

I've toyed with making candles for a while (because I really need to get into something else right?) but now that I've done this it's a perfect solution to my Maker's itch! The small Candle Bar candles are $25 and the larger ones are $38. Pre-made candle prices vary based on style. The larger candles burn for 70 hours which is a long candle life, and because I'm nerdy like that, it comes out to $.54 per hour. 

We were already talking about doing it again and Jenni is so knowledgeable about everything. There wasn't a question she couldn't answer and we're an inquisitive bunch! If you're in the area and want to do something fun, highly recommend! As always, all opinions expressed here are mine and mine alone.


Thursday, November 4, 2021

BFF Open House


Happy Friday Eve all and hope everyone had a safe and happy Halloween weekend! We thought we might get a few trick or treaters this year but...not sure if it's a good thing that I bought the kind of candy we like! Hey, I was a Girl Scout : "Always be prepared!" right? Got the Halloween decorations down and the "Fallsgiving" decorations up. I put up a Halloween tree this year. Mr. Chocolate was initially skeptical when I told him I was going to and then fell so in love with it he asked if we were going to keep it up once Halloween was over. So being a Maker, of course I swapped it out for the season and made some layered paper leaves to go on it. 

Halloween Tree

Fallsgiving Tree


Welp! We are full steam ahead into the holiday season. Hanukkah comes REALLY early this year starting the Sunday of Thanksgiving weekend. The Christmas commercials have already started and Hallmark was playing Christmas movies in October. Honestly, I think they just need to add a year round Christmas Movie channel to their lineup. 

Lots of wonderful ideas shared at last week's party so let's take a look at a few!


It's still VERY much pumpkin season and The Apple Street Cottage has an ingenious way to make a Sweater Look Pumpkin. Truly, I never would have guessed! 


I've done some paper quilt projects but this wood Barn Quilt from The House on Silverado is absolutely STUNNING! 


Wondering what to do with old windows you may stumble across? Check out what Saved From Salvage did with one! I've seen similar in home decor boutiques for big $$$. 


And finally, The Kitchen Is My Playground is back with a wonderful and easy addition to your Thanksgiving dessert table: Crescent Pecan Squares using crescent rolls! Don't have to be a baker to make these!

Thanks as always to all who linked up! This is our time of year Makers. We were made for this! let's see what everyone's been up to this week!


You are invited to the Inlinkz link party!

Click here to enter

Thursday, October 28, 2021

BFF Open House


Happy Friday Eve and Hallo-weekend! We may actually get a few trick or treaters for the first time in forever so anxious to see. Is everyone ready? More wonderful ideas shared at last week's party. There may not be time to make but definitely there's time to pin for next year! 

Shared my 2021 Halloween cards here. OK let's take a look at some of the ideas from last week's party! 

Wishing everyone a safe and Happy Halloween! 


How cute is this Halloween Gingerbread House from Saved From Salvage?! I planned on making one this year but definitely saving this for next year! The Cheez-It roof is brilliant!

If you're going to "BOO" your neighbors or friends or have a gift to give, this adorable bag from I Teach Stamping is perfect! 


And if you need a card to go with your gift bag on with Thanksgiving coming, this one from Paper Seedlings just screams Fall! 


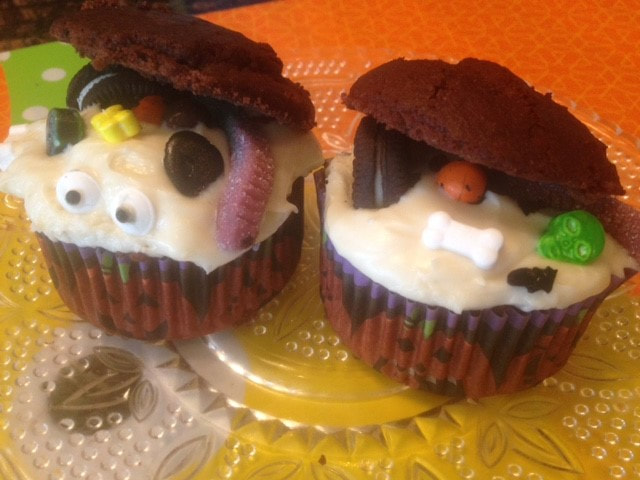
Finally, if you are looking for one more treat for your Hallo-Weekend dessert table, check out these Marshmallow Cream Filled Coffin Cupcakes from Cindy's Online Recipe Box

Have a BOOtiful weekend all! 


You are invited to the Inlinkz link party!

Click here to enter

Wednesday, October 27, 2021

Halloween: Haunted Mansion Inspired Cards


"Welcome foolish mortals". I miss Disneyland so much, especially when it's decorated for Halloween. We'd hoped to go this year but COVID...

Anyway, one of my favorite rides any time of year is the Haunted Mansion. I love all the detail they put into the attraction and at Halloween it's totally decorated with a Nightmare Before Christmas theme. If you ever get a chance to do Disney for Halloween, it's so much fun! So when I saw this collection of layered cut files at Creative Fabrica included a "Haunted" Castle, I had my theme for this year's Halloween cards. Disclosure: I am an affiliate so if you buy this file here, I do get a small benefit. 

Supplies: 
  • Halloween Background Paper (I used the Spook Hill collection from Michaels)
  • Metallic and Glitter Scrapbook Paper
  • Black Cardstock (Recollections 110 lb)
  • Halloween Words ( Tim Holtz )
You can buy pre-made cards or cut your own. I cut my own from the Recollections Black cardstock measuring 7x10 to create a 5x7 card. Score down the middle. 

Cut background papers 6.75x4.75. Attach to cards. 

Download cut files and import design of choice into your electronic cutter's software. I used my Cricut Explore 2 and the Design Space software and deleted a couple of the layers, leaving 3 layers to cut. 

I did a combination of colors and mirror and glitter papers. 


Once you have your "houses" assembled, then layer onto prepared cards. Add the chipboard words. I also embellished with a couple of self adhesive rhinestones which the post office just loves! 


Enter if you dare!