Thursday, December 7, 2017

BFF Open House Link Party


Happy Friday Eve all!!! The countdown has truly begun with 18 days left until Christmas, and Hanukkah is next week! Yikes. But we're makers right? We are the people who can whip stuff up in no time and make it look like it took all year. We're the ones who pinned stuff a year ago that we planned to have done in July and..... Just me? I think not! 

Let's see some great ideas from last week's party. 


How about this buffalo plaid Farmhouse style wreath from Vintage Paint and More? CUTE and easily doable. I love how the plaid pops against the white pom poms. 


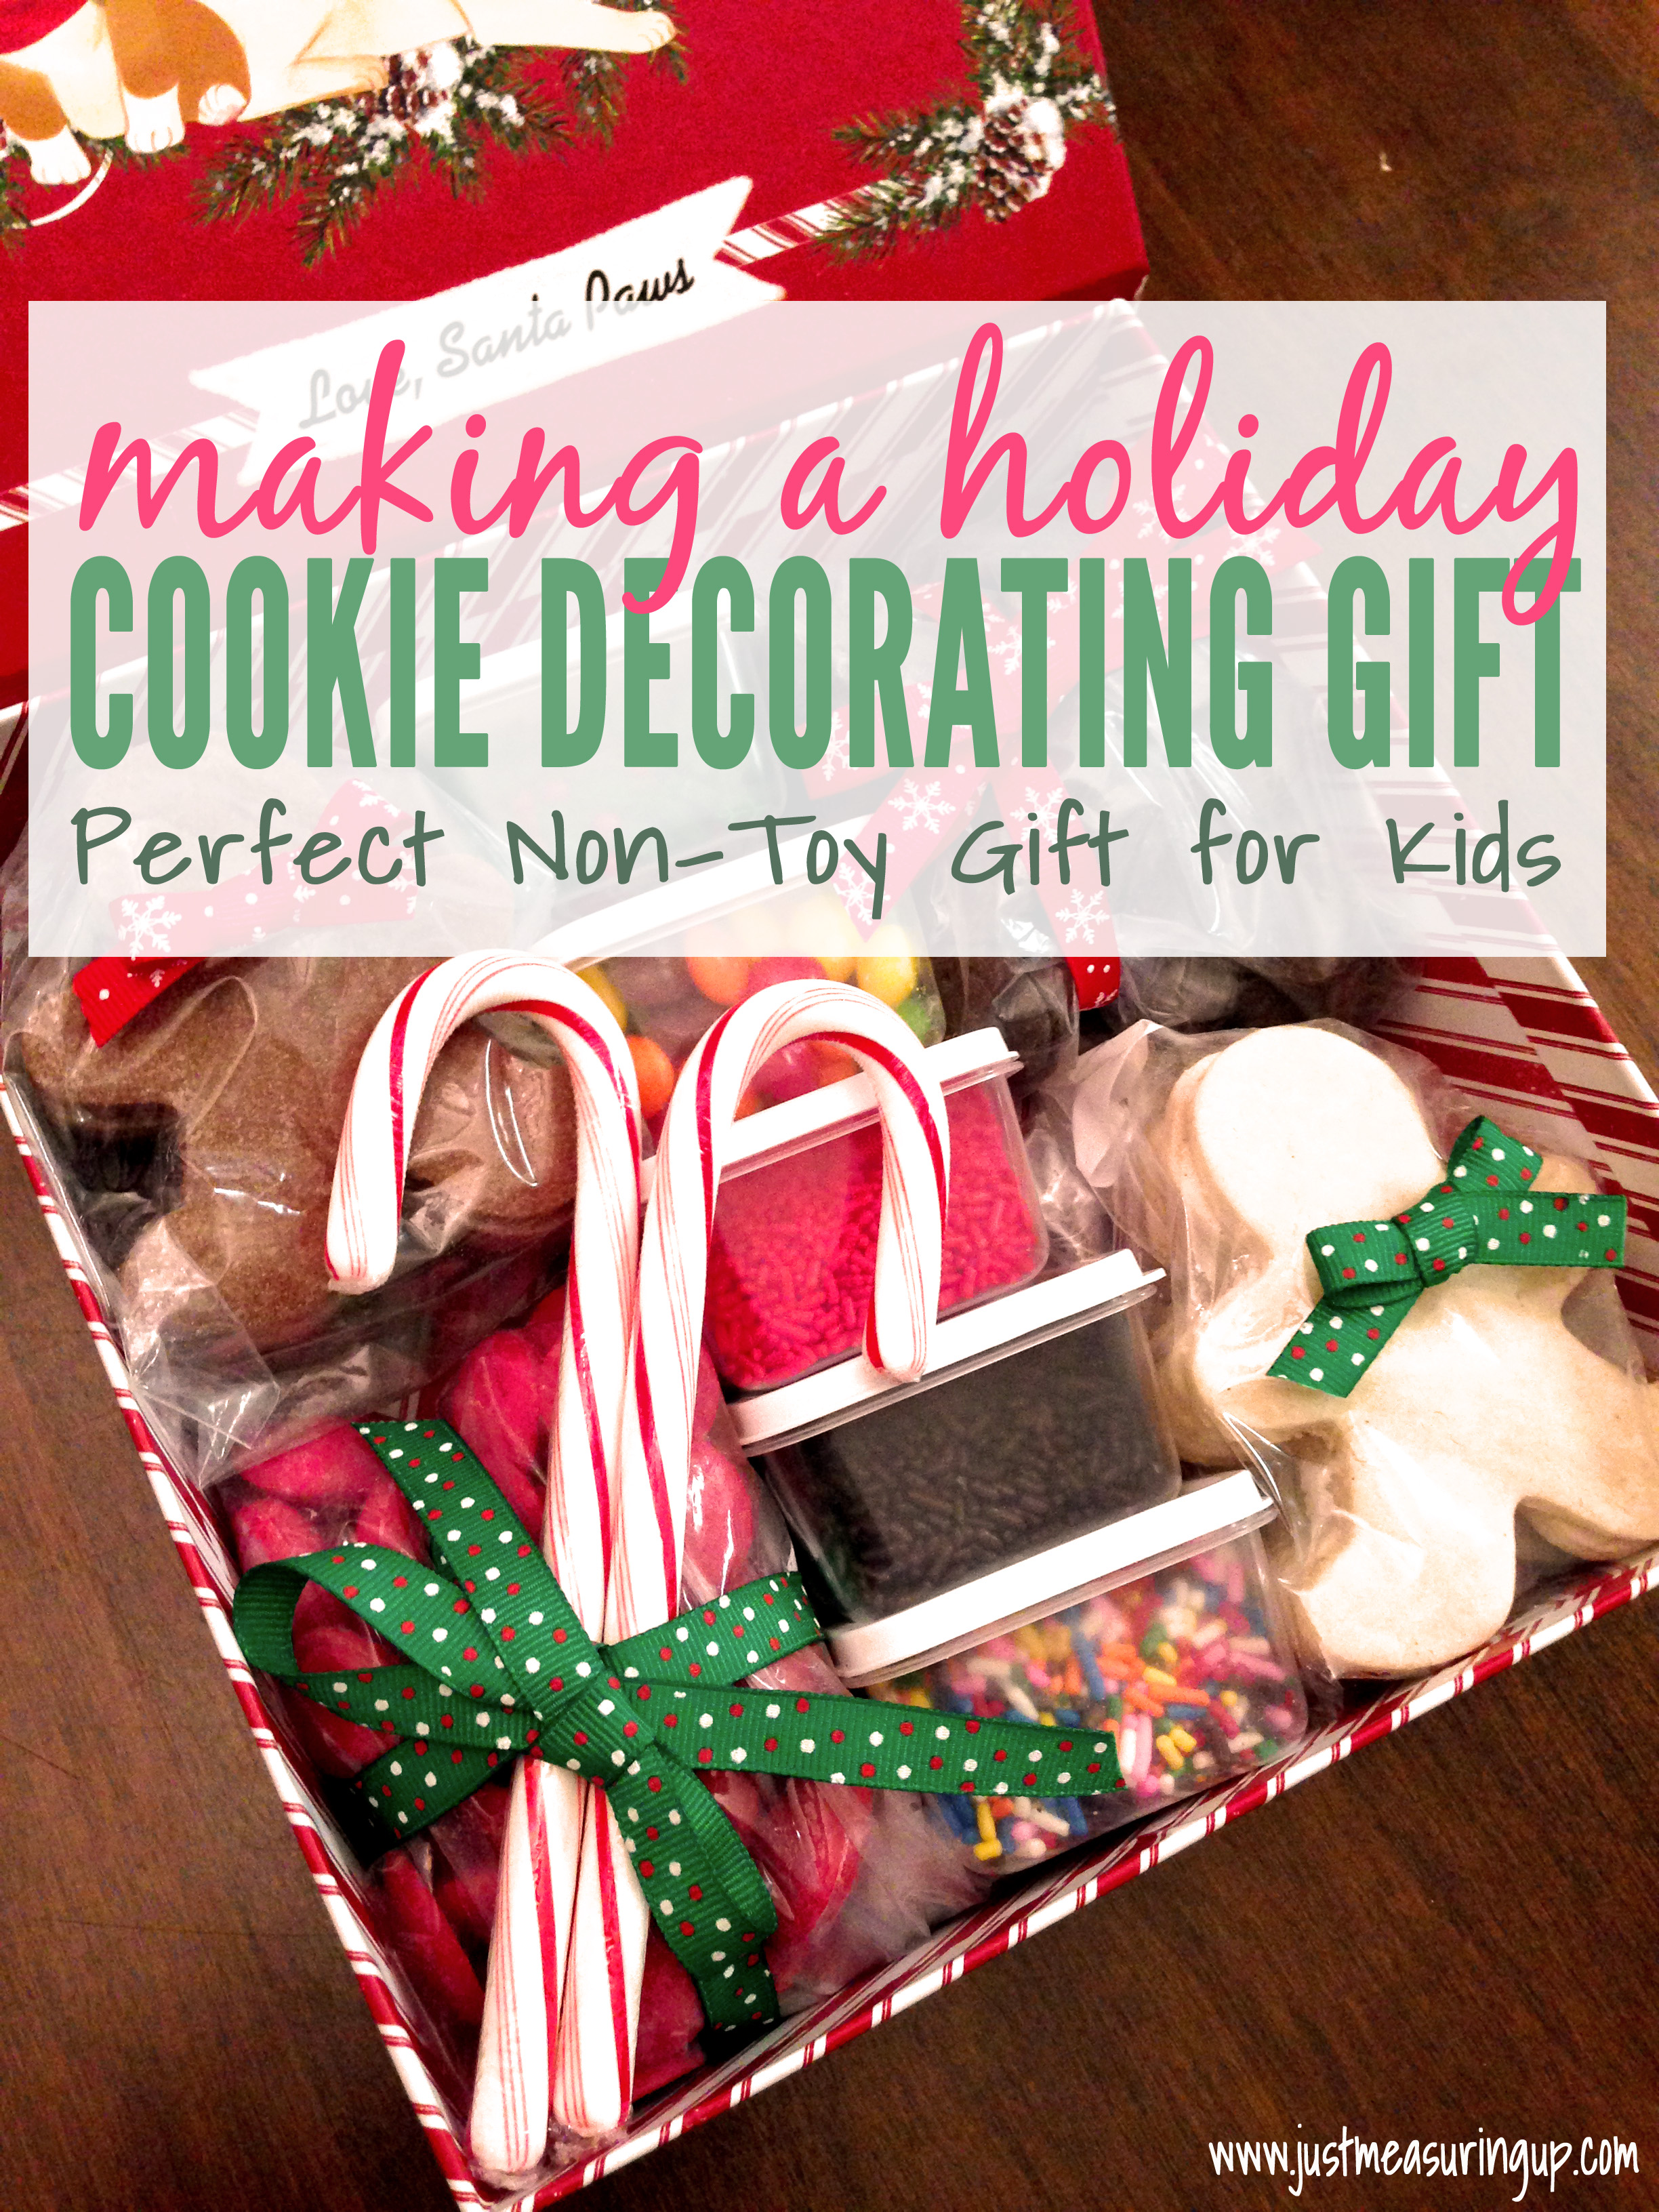
I really love this idea. If you love to bake and know someone who either doesn't or doesn't have time, how about putting together a cookie decorating gift box for them like this one from Just Measuring Up


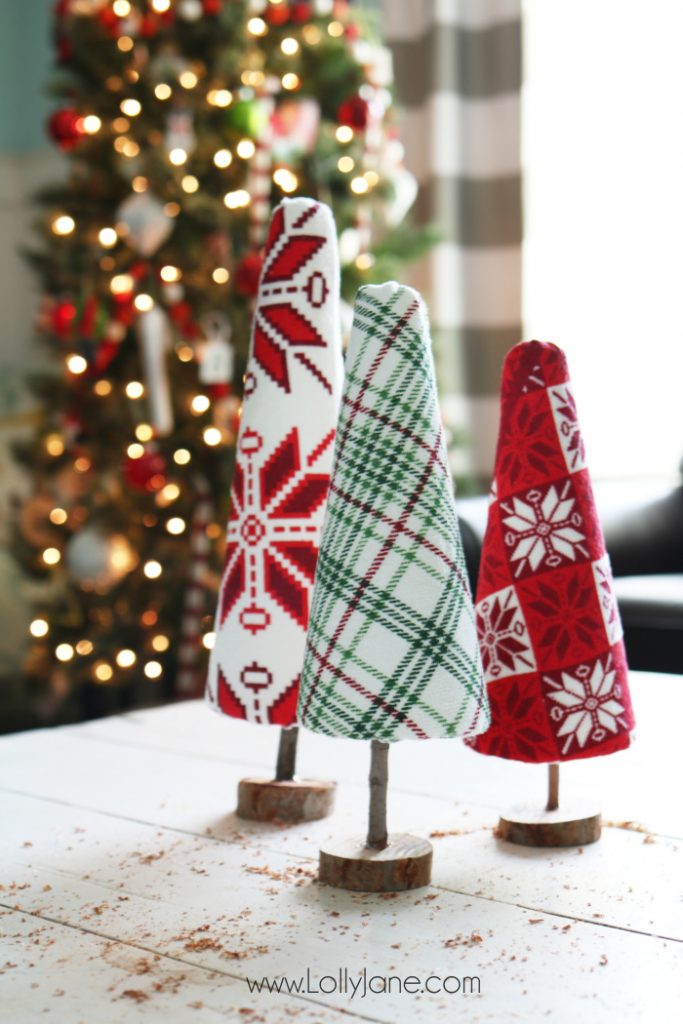
Even though the ladies from Lolly Jane call these  "Ugly Sweater" trees, I think they're adorable. Just shows they can't make ugly things if they try!


Finally, how can you go wrong with 12 Days of Treats from a blog called Mrs. Kringle's Kitchen. I mean c'mon! 

OK let's see what you've been up to this week!


Wednesday, December 6, 2017

Handmade Gifts: Stenciled and Gold Leafed Hanukkah Treat Plate


Hanukkah begins next week and each year I try to make a gift for a special friend to celebrate. This year I went with what I'm calling a Hanukkah Treat Plate that can be used each night to share the goodies of the season. 

Supplies: 
  • Clear Dinner Plate ( I got mine at Cost Plus)
  • Mod Podge Super Gloss Formula
  • Acrylic Paint
  • Gold Leaf
  • Gold Leafing Glue
  • Clear Contact Paper
  • Stencil ( I made my own using my Cameo 3 but you could use a ready made stencil)
  • Paint brushes and foam applicators
The plate is food safe since everything is done from the underside. You can bake it to "cure" it so the paint won't come off or if you think ahead like I did for once in my crafting life, you can make 21 or so days ahead and it will cure.

Let's get started! 


Clean the underside of your plate with alcohol to make sure you get all the oils store dust etc off and you get good adhesion of your materials. I cut my own menorah stencil using my Silhouette Cameo and contact paper from the dollar tree. This is my favorite stencil material. It cuts great on a digital cutter and you can't beat the price for a roll ( $1).  I also covered the areas I didn't want to paint w/ contact paper. 


Using foam applicators, paint your stencil. I used metallic silver for the menorah and gold for the flames and did 3 coats. 


For this kind of project, you have to reverse your brain because you're building the layers in reverse. So start with the focal image and then do the background. Once I was satisfied w/ the menorah, I added the gold leafing.  Apply the glue per directions ( you'll find this in the fine art section of the craft store) and then apply the leafing. I remind people every time I do a leafing project IT'S MESSY. The gold leaf will fly everywhere as you apply it so be prepared. 


Yes this looks like a hot mess but keep going. Once you're done w/ your leafing ( and clearly I didn't want a perfectly covered plate...I wanted a streaky look) then mix your acrylic paint ( I used Deco Art Navy) with the Mod Podge ( I did 1/2 and 1/2 because I didn't want this part to be opaque) and apply with a flat brush. 


I did this for the whole plate then filled in the center with just plain paint. Sealed the whole thing with a coat of just the Mod Podge. 

NOTE: Mod Podge formula matters! Use the Super Gloss for projects like this. 


Once your plate is dry, flip it over and imagine it filled with chocolate rugelach

A few years ago I included some gift tags with my friend's gift and the following year her relatives were asking if she was getting more so I've done them ever since. 


The black and gold foiled paper is my current addiction. Better yet, I got a stack of it ( ok I bought 2 stacks) when Michaels had one of their $5 Hot Buy stack sales. And of course, I made a coordinating card: 


Monday, December 4, 2017

Handmade Gifts: Brushed Gold Geometric Tile Coasters


Like all makers, I'm sure you're in full fledged Handmade Gift mode. This is actually one that wasn't  on my list but which I was thrilled to make. Here's why.  

When my son came home for Thanksgiving, he was telling us about a party he and his roommate had thrown just before. Last year, I'd made and given him a set of coasters and he'd used them for the party but nicest of all, one of his guests wanted to know where he'd gotten them. "Um , my mom made them". Awww! She really liked them and I was so honored that of course I had to make a set for her! 

Supplies: 
  • Ceramic Tiles . I got mine at Lowes for $.16 ea ( and a weird look from the Lowes guy when he asked if I was replacing tiles and I told him I was making coasters)
  • Vinyl / Foil. I used Cricut Brushed Gold Adhesive Foil
  • Die Cutter or Digital Cutter. I used my CAMEO 3 ( yep I use Cricut stuff on my Silhouette Cameo. I'm a riddle wrapped in an enigma). 
  • Images to cut. Mine came from Silhouette Online Store
  • Aluminum Tape
  • Vinyl Bumpers ( Clear self adhesive dots to put on the bottom of the coasters)


Clean your tiles with rubbing alcohol to make sure you remove all the warehouse dust and fingerprint oils etc. 

Choose, cut and weed the images you want to apply. I wanted to do a coordinated set so I went with varying geometric images. I used a couple of the same ones I'd used for my son's, but I added the heart for the ones I made for his friend. 


I went with three images and made two of each.  Using transfer tape, apply the images to your tiles. 


To finish, I wrapped adhesive aluminum tape ( I bought a huge roll of this at a stamp show years ago but I believe it's from the electrical aisle of the HW store so your Lowes guy can look at you funny too!)


Finally, I put clear vinyl bumpers ( the kind you use to prevent cabinet doors from slamming) on the bottoms since I wasn't finishing the bottoms with cork or felt which are a couple of ways I've seen people complete these. 

Easy peasy and inexpensive gift that's pretty and functional. Can'tbeat that.


Thursday, November 30, 2017

BFF Open House Link Party


Yikes! It's the last day of November and the Christmas countdown begins in earnest starting tomorrow. Here are some ideas from last week's party that might come in handy! 


From Hazel and Gold Designs , this gorgeous inlaid wood Christmas tree tray! I have a friend w/ mad woodworking skills and I have to show him this! 


Repurpose and Upcycle shared her beautiful rustic farmhouse decor with links to some of the DIYs. Love this vignette!


How much fun are these Edible Candles from All That's Jas? Would make a great centerpiece that you get to eat as dessert! 


Printables make seasonal decor so simple. This one from My Busy Beehives is ready to print and frame! 

OK let's see what everyone's been up to this week! 


Tuesday, November 28, 2017

DIY Vintage Christmas Sign


I will start decking my halls this coming weekend and wanted to add some new items to my Christmas decor. This sign was easy to make starting with a ready to decorate sign I found at Michaels 70% off! 

Supplies: 
  • 11x24 Sign or Board. Mine is Art Minds which I got for $5 
  • Vinyl of choice. I used Cricut Glitter Red
  • Images / Phrase to cut. The ornaments and "BELIEVE" phrase were in my library, previously purchased from the Silhouette online store. 
  • Electronic Cutter. I used my Cameo 3


Size and cut your images and text. I used the "BELIEVE" and ornament images I got from the Silhouette online store. For the rest of the sentiment, I just chose fonts from my library. 

The ornament image is designed with the snowflakes to be cut separately and layered. I wanted to change that up so I un-grouped everything and then put the snowflakes inside the ornament. 

This is the original: 


This is how I reconfigured it: 

Once you have your  images cut out, then take a deep breath, have a Harry Potter marathon on in the background, and "proceed to weed" your vinyl. Once that's done then apply the transfer tape and prepare to apply to your sign. 


I applied the "BELIEVE" vinyl first, then the rest of my phrase and finally the ornaments. It has a vintage / farmhouse feel to it! 


Thursday, November 23, 2017

BFF Open House Link Party


Hi all, hope you've had a wonderful Thanksgiving! No features this week ( will resume next week), but having my party for those who may not be out braving Black Friday shopping ( not me!). 


Happy Thanksgiving !


From our home to yours, wishing you a very Happy Thanksgiving filled with family, friends, food, and lots of love and laughs.