Thursday, February 25, 2016

BFF Open House

The Answer Is Chocolate

Happy Friday Eve all! Hope everyone's had a good week. So hard to believe that we're in the last week of February. Short month ( even with an extra day) or no, time is flying. Here are some features from last week's party. 


This project from Morgan Manages Mommyhood could not be more timely since I have recently been bitten by the hand lettering bug. I'm not ready to show my efforts yet but it is so addicting and fun.  I love that she didn't use any fancy tools. I can attest that they key is practice practice practice! 


Doreen from Altered Artworks shared this vintage suitcase makeover. I love that it still looks old and careworn but that it's a new makeover. 


Jessica from Lou Lou Girls shared how she made these gorgeous Roman shades.  Love the fabric too! 


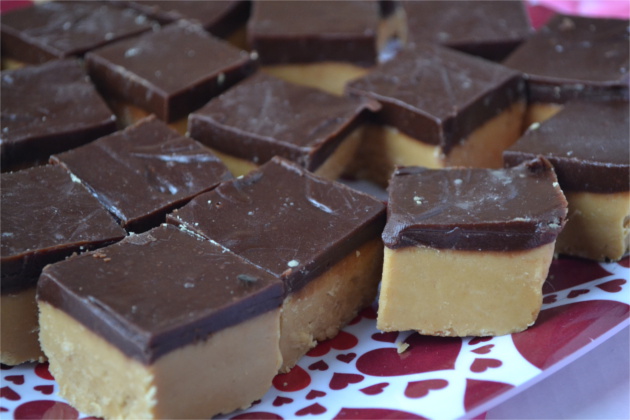
And with St. Patrick's Day right around the corner, Andrew and Dennis aka The Crafty Lumberjacks have a perfect treat: 


YUM! 

Now, on to this week's party!


Thursday, February 18, 2016

BFF Open House Link Party

The Answer Is Chocolate

Happy Friday Eve all. Hope everyone had a very Happy Valentine's Day and a great week. Back with features this week. Even though Valentine's Day is over, it's never too late to pin for next year or to show someone some love whenever right? 


Much More Creative shared this fun altered Love Potion  bottle. Change up the paint colors and embellishments and you could have a different kind of potion bottle for Halloween! 


You wouldn't guess that this Valentine block from Artsy Va Va started out from wood scraps from her husband's shop. Salvage everything!  In keeping w/ my Valentine's to Halloween transition ( where that came from I don't know) you could easily do this with a pumpkin instead of a heart and change the background papers. 


Sugar Spice and Family Life shared these delicious and pretty Chocolate Peanut Butter hearts. Who wouldn't love a bunch of these any time of year! 


Speaking of Chocolate and Peanut Butter, One Little Project At A Time shared these Chocolate Heart Peanut Butter cookies and for those of you who are gluten sensitive, they're even gluten free! 

Now on to this week's party! 


Thursday, February 11, 2016

BFF Open House Link Party

The Answer Is Chocolate

Image result for valentine's day clip art


It's just been one of those weeks so no features this week, but wanted to wish everyone a Happy Valentine's Day! 


Wednesday, February 10, 2016

Pretty In Pink Valentine's Cards


I've never been a big pink person. Maybe it was because I was supposed to like it as a girl and being the contrarian that I am, I didn't.  But for this year's Valentine's cards I was kind of drawn to the idea of it, especially when I found pink glitter paper at Michaels. 


For these cards I combined the pink glitter paper with gold foiled paper I picked up during the holidays and used Paris themed stamps by Tim Holtz. What's more romantic than Paris?

Supplies: 
  • Cardstock for base card ( I used Stardreams black metallic)
  • Craftsmith Gold Foil Paper
  • Pink and Black Metallic Glitter Papers
  • French Themed Stamps ( I used Tim Holtz)
  • White cardstock for stamping
  • Black pigment ink ( I used Recollections)
  • Pink and Gray Inks ( I used Fresh Ink)
  • Punches, embellishments,stickers


I stamped the images in black pigment ink, set with a heat gun and then dusted pink and grey inks on top. Trimmed and mounted as shown on the black and pink glitter papers, then embellished with punched hearts and the black, white, and gold "LOVE" stickers ( Recollections, Michaels). 


I used foam dots to mount the focal images to the front of the card and embellished with self adhesive pink pearls. Also Michaels in their 2 for $3 section. My name is Carol and I spend too much time at Michaels. 


Thursday, February 4, 2016

BFF Open House Link Party

The Answer Is Chocolate

It's party time again! Hope everyone's had a great week and looking forward to seeing  what everyone's been up to, but let's start with some features from last week's party. 


This  re-purposed box with paper roses from Lynda Creates is just stunning! What a great keepsake this would make. 


I love this Valentine's snow globe idea from Crafty Lumberjacks (which also now has Billy Joel's "New York State of Mind" stuck in my head) . Lots of possibilities. 


What's Valentine's Day without some delicious goodies? I am drooling over this peanut butter fudge from Fluster Bluster

OK now on to this week's party! 


Monday, February 1, 2016

DIY Wall Art


Art is subjective and therefore it's subject to what you like. I don't want Art majors and MFAs after me so that's my humble but subjective opinion but as a result, I'm not one to spend a lot of money on it (mostly because of reality!)  and my walls tend to be decorated with things I make. This project is no different. 

I wanted something for a bare wall in our master bath so when canvases were recently 50% off at Michaels I decided to play around with some paints and some gold leafing. I'd seen a couple of ideas on Pinterest that inspired me. 

Supplies Needed: 
  • Pre-stretched canvas  (I used 18x24 from Michaels)
  • Paints ( I used Acrylics)
  • Glue (ideally, specific to leafing)
  • Gold Leaf  (Art supply section of craft stores or where art supplies are sold) 


I went into my paint drawer and just pulled out a bunch of stuff. I gravitate towards neutrals and our bathroom is very neutral but I decided to stretch a bit and pulled out some blues as well. 


Next I applied the gold leaf to my canvas. There is a specific type of glue you're supposed to use with the leafing but I forgot I was out and wasn't going to the store. I used Mod Podge and let it get tacky but not dry and applied the leaf. Not perfect but it worked. 


Then I just kind of went to town with the paints. I brushed some and stippled some. And then brushed some more and stippled some more until I was satisfied. In some cases the gold leaf got a little muted by the paints ; in some cases not. After the paint was dry I added a little more leaf here and there. 


And since my canvas came in a two pack, I have another one to play with!

Sharing At: 


Thursday, January 28, 2016

BFF Open House Link Party

The Answer Is Chocolate

Happy Friday Eve all and how oh how can it possibly be the last weekend of  January already?! Here are some fantastic ideas shared at last week's party.


Only Artsy VaVa could upcycle a piano! If not only her, she's one of very few who could pull it off. Upcycle. A. Piano. 


Speaking of repurposing or upcycling etc. check out this lap tray from Altered Artworks! It's so pretty I wouldn't want to set anything on top of it. 


Paper Seedlings shared the most gorgeous card using a detailed die cut. Isn't it beautiful? 


Finally, One Little Project At A Time shared an incredible Valentine's Cupcake Roundup. If you can't find a cupcake idea here, it doesn't exist. 

Onto this week's party! Hope you all had a wonderful first month of the year. 


Monday, January 25, 2016

Harry Potter Birthday Card


I am a huge Harry Potter fan and have a couple of friends who are also so it was a no brainer to make this birthday card in the Gryffindor house colors. I modeled it on the scarves the characters wore in the films using gold glitter paper to make the stripes to alternate with the base card stock color. 

I found two fonts (free for personal use)  to use for the sentiment. "Lumos" and "Parry Hotter"  to create the sentiment and played around with them until I was happy. Then printed on white cardstock, trimmed, mouned on black and gold papers as shown and decorated with punched stars and rhinestones. 


As the huge fans we are, we all have the "adult" ( HA!) coloring book! I finished the card with some self adhesive star strips I had in my stash. 


I think the Sorting Hat put us all in the right house. 

Thursday, January 21, 2016

BFF Open House Link Party

The Answer Is Chocolate

Friday Eve once again friends. Time to show off what you've been working on and see some highlights from last week's party. 


Let's start off with this fabulous transformation from Doreen at Altered Artworks. I adore what she did with this  100+ year old Secretary desk. 


With Valentine's Day quickly approaching, this Valentine's Countdown idea from Steph at Crafting In The Rain is a wonderful way to mark the days. 


Who says bottle brush trees are just for Christmas? Not the guys at Crafty Lumberjacks. See how Andrew and Dennis incorporated these into their Valentine's decor. 


These Mini Market Peanut Butter Balls from Heather at Woods of Bell Trees would be perfect for Valentine's Day or, as she shared in her post, for a movie night dessert. 

Onto this week's party! 


Thursday, January 14, 2016

BFF Open House Link Party

The Answer Is Chocolate

Happy Friday Eve all !  Time to link up, visit, and ooh and aahh over each other's creations. 


If like me, you're still transitioning from holiday to Winter decor here's a fabulous idea from Much More Creative you'll want to check out. Simple, elegant and fun! 


If you're done decorating, how about a new necklace for yourself? I see another trip ( and a confused store employee) to the HW store in my future with this Rustic Copper Washer Necklace from Jewelry Making Journal.  


Speaking of jewelry, if you wear a lot of Silver one thing I'm sure you hate is having to polish it. Woods of Bell Trees has some great hints on storage that minimizes tarnish so you can spend less time on polishing and more time on fun stuff! 


I think all of us are trying to eat better but if you're like me, it doesn't work when you feel deprived. How could you feel deprived with this single serve Peanut Butter Brownie from Sam at Pancake Warriors ( and how could you not love a blog named for Pancakes?!). Have you heard of Peanut Butter powder? I hadn't but DEFINITELY want to check it out. 


Monday, January 11, 2016

Game Board: Necessity Is The Mother of Invention


It was great having our son home over the holidays and we spent a lot of time just hanging out, watching movies, playing games, even doing some crafty things.

We played Yahtzee one night and spent the first part of the game chasing the dice as they skidded off of our marble table. Then we tried using a Tupperware lid which worked but the whole time I kept thinking "I can make something better than this" so I did.


 Supplies:

  • Wood surface with lip ( you can always count on me for the technical terms).  I found this at Michaels...it's technically called a Wood Plaque. OK. 
  • Paint ( I used Burnt Umber)
  • Glazing medium
  • Paint brush
  • Template 
  • Felt 


Pretty straightforward. Paint the wood with as many coats as you are happy with. I wanted a stained look more than a painted one so I thinned with glazing medium.  When dry, I sealed it with a coat of Mod Podge glossy. 

Measure the inside of your wood surface and cut a paper template to fit. I rounded the edges with a pair of edge rounding scissors. Use template to cut out felt. Glue felt to painted wood. I just used a spray adhesive. Pay closer attention to rounding the edges. My fancy scissors didn't cut through felt so I had to do this manually and oops'd.   


This is still better than the Tupperware lid! I had everything on hand except the wood piece so my total cost for this was $2.99 less 40% coupon! 


Thursday, January 7, 2016

BFF Open House : First Party of The New Year!

The Answer Is Chocolate

Happy New Year and welcome to the first party of the year. I'm still working out my blog goals for 2016 but keeping this party going is still among them. We'll start with just the party today and resume features next week! 


Tuesday, January 5, 2016

Bright and Shiny Cards for The New Year


Happy New Year! Little slow getting started but have some cards to share. Sometime between Thanksgiving and Christmas I picked up a steal deal at Michaels. Their "Hot Buy" paper pads were on sale for $5 and of course I couldn't resist. I picked up two gorgeous metallic 12x12 pads ; one in gold and one in silver. These papers are so gorgeous that I let them stand alone and didn't do a lot of embellishing. 

January brings several occasions so this week it's a Birthday, a Retirement, and a Thank You note. 


I was able to make all three cards using two sheets from the deck. One was an embossed quatrefoil pattern that I used as the background and the other was a sheet with sentiments (12 on one page) that  you can cut down and use for multiple projects. For the Birthday card I chose this one that says "Happy" and mounted on dark silver metallic and glitter paper before adhering to the card using foam dots. I love love love metallics. I hate hate hate photographing them. Things to work on in 2016!


For the Retirment card, I used the same idea, choosing this sentiment "Live A Beautiful Life" . I did embellish this one a bit with some silver glitter washi tape , sequins, and buttons. 


The Birthday and Retirement cards are 5x7. With the paper I had left, I made a Thank You card (5.5x 4.25) using another sentiment "My Favorite Things"...perfect since this was a Thank You for a chocolate gift basket I received! 

For my big $5 investment, I still have 29 more sheets of paper and 9 more sentiments from this one page to play with ! 

Supplies Used 
  • Craft Smith Silver Foil Paper Pad 12x12
  • Cardstock
  • Double Sided Adhesive
  • Foam Dots
  • Misc. Embellishments