Thursday, October 2, 2014

BFF Open House Link Party #178


The Answer Is Chocolate

Happy Friday Eve once again and welcome to the first party of October. We are in full on Halloween mode and crunch time! Here are some ideas to inspire you. 

From Artsy VaVa, I am in LOVE with these brilliant Halloween cuffs. She shares the how to and it's easier than you think! 


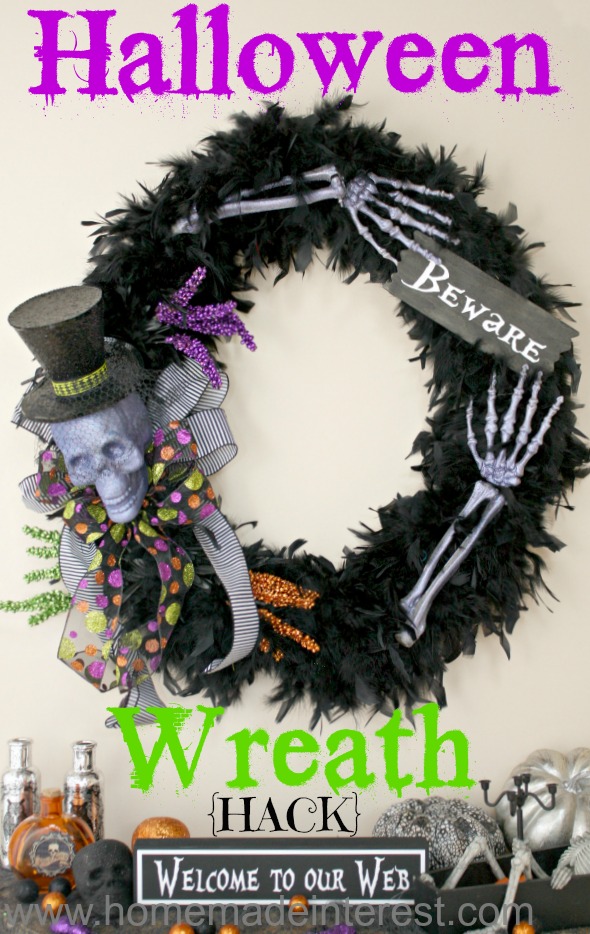
I am wild about this copycat wreath from Homemade Interest especially given that the price of the wreath she knocked off was $259! She did hers for less than 1/4 that and the result is just as stunning as the original. 


This spooky vignette from The Crafty Lumberjacks is perfect for a mantle or any flat surface: 

This week's chocolate feature would be a perfect addition to a Halloween dessert table ( or any dessert table, or just because they're awesome!). From the ladies at LouLou Girls


Now on to this week's party!


Monday, September 29, 2014

Copper and Gold Metal Bead Bracelets

Copper and Gold Bracelets

They say that imitation is the highest form of flattery. For me, it’s having your son’s friends ask “Do you think your mom would make me a bracelet?” Uh SURE?!  What better combination than being part of a design team for a bead company, loving to make things, and having a kid who likes to wear your stuff?
For these I used copper and antique gold metal beads from Blue Moon Beads. The colors are perfect for Fall.

Copper and Gold Metal Beads

Simple projects. Beads and stretchy cord.

BMB Amulet

I remembered that I had this little amulet in my BMB supplies and the antique gold went perfectly. Added it to one of the bracelets using a jump ring.

Copper and Gold Bracelet

For the other bracelet, I used some leftover metal beads from my stash .
Copper and Gold Bracelet 2

Sharing At: 
  homework


Thursday, September 25, 2014

BFF Open House Link Party #177

The Answer Is Chocolate

Happy Friday eve all. Can you believe it's the last weekend of September? Me either. And to put you in a scary mood for Halloween, Christmas is three months from today. BOO!

Here are some highlights from last week's party. 


With prime gift giving and entertaining season upon us, Bonnie from The Pin Junkie has a great tray makeover that's perfect for your own entertaining or to give as a hostess gift. Gorgeous!


Boot season is also upon us. Love how Bianca from Being Bianca dressed up these rain boots that she found on sale. I need a pair of rainboots so can't wait to try this. 


With Halloween lurking around the corner, I love how Jamie at Some of This and That shows us how to transform photos into versions of our scarier selves. Spooky selfies anyone? 

I couldn't decide between these two cupcake ideas for this week's chocolate feature so here are both of them! 


Sarah, a contributor at This Silly Girl's Life shared peanut butter Oreo and cream cupcakes YUM!


And Cami from TitiCrafty shared these Oreo Surprise Cupcakes. You're welcome! 

Now on to this week's party!


Monday, September 22, 2014

Halloween: French Gothic Coffin Boxes

Gothic Coffin Boxes

A couple of years ago I had so much fun altering these little coffin shaped boxes I found at Michaels. Darn if they don’t keep stocking them and darn if I don’t keep finding ways to play with them.

It helps ( or doesn’t help depending on whether you’re Mr. Chocolate) that I love digging through clearance aisles and 50-60% off bins which is where I found the embellishments that inspired this project.

Gothic Coffins Embellishments

The metal Fleur de Lis and Crown pieces were in the $1.50-$3 bins and were 60% off when I found them. On a previous hunting expedition, I’d found the Jolee’s Boutique embellishments on sale. 

We went to France several years ago and while there we toured the Catacombs which are not for the faint of heart but an amazing piece of history. The ornate metal embellishments brought back memories of that trip and the coffin boxes brought back memories of the Catacombs so voila. Gothic Coffin Boxes. Welcome to my brain.

Gothic Coffins Prep

I left a couple of the boxes unpainted and painted the others black. Using the boxes as a template, traced around them and cut out coordinating papers and Mod Podge’d them onto the boxes.

Gothic Coffin Boxes Back

I love it when  a plan goes awry. I intended to use the polka dot paper on the BACKS of each coffin and oops…one made it on the front. Oh well. Lemons / lemonade.

Gothic Coffin Boxes 3

You can’t really see it but I crumpled the skull and bones paper before applying so it would be a little wrinkly. And for once, I was patient and let the boxes dry overnight so the paper would be good and stiff when I sanded the edges.
TIP: Package of emery boards from the Dollar store work great for this

Gothic Coffin Boxes 2

I glued the metal embellishments to the front and added the Jolee’s embellishments as shown. Edged the boxes with torn pieces of  coordinating washi tape.

Gothic Coffin Box Skeleton

Sharing At These Fun Places


Thursday, September 18, 2014

BFF Open House Link Party #176

The Answer Is Chocolate

Happy Friday Eve everyone. Can you believe we're already past the mid point of SEPTEMBER? Neither can I. Halloween and Fall crafting are in full swing (even though I'm behind!) Here are some ideas to inspire you :) 


Always a fan of book page crafts, I love what the Crafty Lumberjacks use book pages for in this wreath alternative. 


Heather, from Woods of Bell Trees shared another great leaf themed project that would be fun to make for yourself or to give as a gift or both! Nesting leaf bowls made out of clay. 


Fall is back to school / off to school time and Brooke at Artistic Endeavors 101 shared the tin ceiling tile memo board she and her daughter made for her daughter's dorm room. 


Even if you're not a football fan you will be a fan of these Dark Chocolate and Peanut Butter cupcakes from Tackling Life

Now let's see what everyone's been up to this week! 


Tuesday, September 16, 2014

Thrifty Finds at Michaels: Easy to Make Birthday Card


I've always loved the "used to be a dollar" section at Michaels ( yep...still bitter that it's now the $1.50 - $3 section). So when I find things there that are 50-60% off, I'm ecstatic. 

If you've been a reader of this blog you also know that I just shake my head at the price of cards when it's so easy to make your own. 

On a recent trip, I stumbled upon some finds from Spring. Papers and pre-made tags 60% off which turned out to be $.60 per package. So for a whole $1.20, you can make at least 16 cards from these two things. 


The paper pack had 12 8x8 sheets of 6 different patterns. The gift tags came in a pack of 16 and coordinate with the papers. 

For the birthday card I made I used :
  • Light metallic gold cardstock
  • White cardstock
  • Embossing folder and embossing machine ( I used my Cricut Cuttlebug)
  • 2 papers from package
  • 1 gift tag
  • Self adhesive  pearls
  • 3-D Cupcake , candles, metal sentiment stickers from stash
Cut gold cardstock to 7x10 for 5x7 card. Score down the middle
Cut patterned paper 4.75 x 6.75 , attach to card
Cut white cardstock 4x5 and run through embossing folder
Mat on solid paper as shown
Tear solid paper scrap, adhere to middle of white panel
Attach tag, 3-D stickers as shown
Embellish with self adhesive pearls 


Even if you don't have extra stickers in your stash ( a concept with which I am completely unfamiliar!) picking up a package of birthday themed stickers will still put you way ahead of what you'd spend on a single card. 


Thursday, September 11, 2014

BFF Open House Link Party #175

The Answer Is Chocolate

Hi all. I debated whether to post the party tonight or wait til tomorrow given the 9/11 Anniversary. I'm going to skip features this week but wanted to still make the link up available.