
Thursday, November 8, 2012
BFF Open House Link Party #78
Happy Friday Eve everyone! Hope it's been a good week for all. Can't believe it's time for another party already but here we are so let's get right to it.
Wednesday, November 7, 2012
Punched Leaf Wreath for Cards, Packages, Etc.

For this project you will need:
- Paper scraps
- Leaf punch
- Glue


This one I adhered to a card using foam dots. The one below I used on my gift bags.

Sharing At:

Tuesday, November 6, 2012
Got Lunch Bags? Wrap Your Gifts In Them

For this project you’ll need:
- Plain brown paper bags
- Inks
- Brayer
- Cosmetic sponge


Randomly scatter drops of inks on your surface. The goal here is not perfection! I was going for a natural look mimicking Fall leaves.


Finished with a punched leaf wreath. I’ll show you how I did that in another post.

Sharing At:


Monday, November 5, 2012
My Super Cool Magic Box Birthday Present
I mentioned last week that I had a chance to get together with one of my besties for a belated birthday celebration. This is the same friend who last year made the cutest gingerbread house Christmas “card”. Well she surprised me with this incredible magic box.The photos don't do it justice.

I’ve seen this done on a smaller scale as a card but she went big and did three levels.

Knowing my love of black and white and grey, she picked some gorgeous papers and made it so the lid and the sides alternated patterns.

Using more coordinating papers, she lined the inside of each layer and made a pocket for quotations that she printed in black and white and laminated. Each pocket contains a different quote.


This is one of my favorites! My party pants are right next to my Big Girl Panties!
I will treasure this treasure forever!


In the very center was a birthday crane with a Happy Birthday Wish. I love all of the fibers and embellishments she used.

This is one of my favorites! My party pants are right next to my Big Girl Panties!
I will treasure this treasure forever!
BFF Open House Link Part #77 Wrap Up and Features
Thanks to everyone who linked up to last week’s party ! You all are way ahead of me on Thanksgiving and Christmas ideas! Here are just a few to share:
Let’s start with this gorgeous burlap wreath from My CreativiT:

I am in love with all of those gorgeous ruffles!
Would you believe these leaves are made from brown packaging paper? Me either!

Go visit Twigg Studios to learn how to make some of your own.

Jenn, over at One Thrifty Chick, gave out mulling spices to teachers for Halloween. I love this idea as something you could send home with guests at Thanksgiving ( or take as a hostess gift).
Rachel over at Holy Craft shared how to make these lovely twine and book page pumpkins:

Jumping ahead to Christmas, could this be more adorable? The idea and the model? Visit Cherished Bliss to get the hat pattern. You’re on on your own for the model.
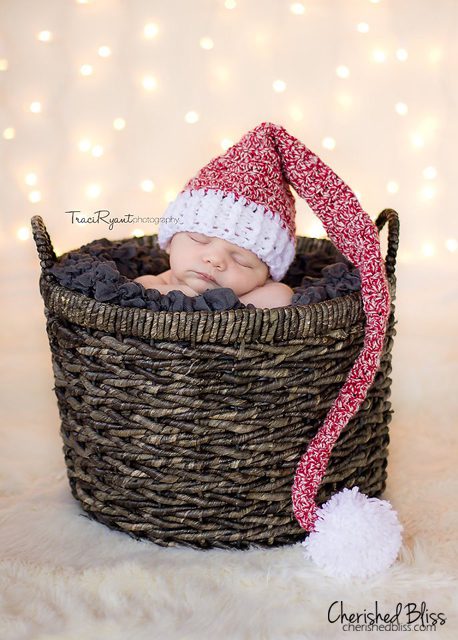
Awwwwwww!
And finally, this week’s chocolate feature. OMG:
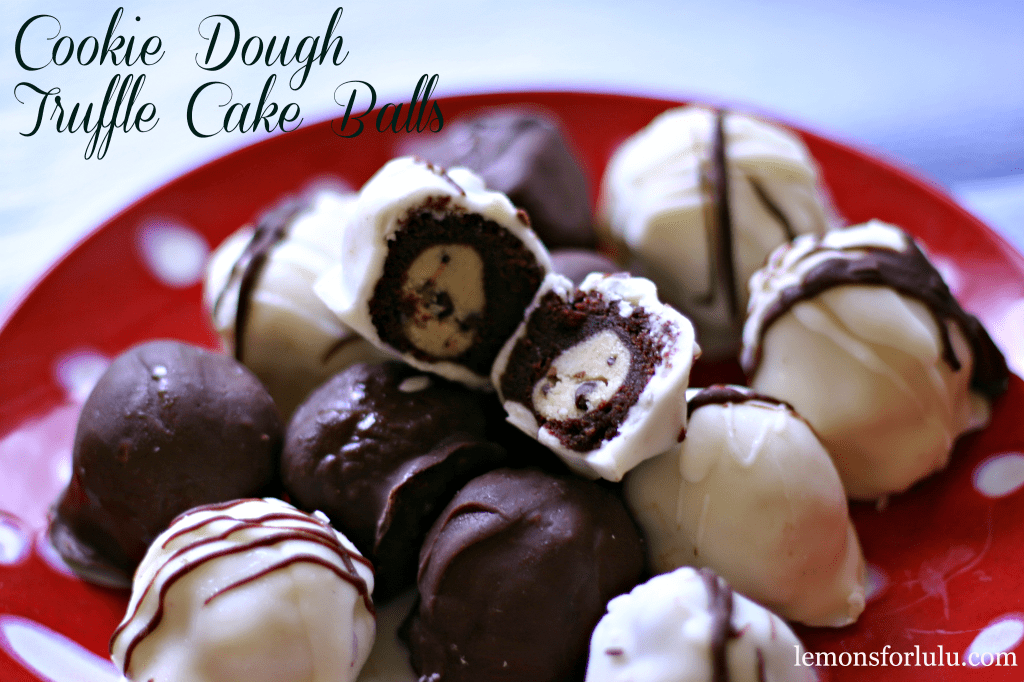
Cookie Dough Truffle Cake Balls from Lemons for Lulu. There are no words to describe how yummy these look!
Thanks again for choosing to share your creativity here at The Answer Is Chocolate. Make it a creative week!
Let’s start with this gorgeous burlap wreath from My CreativiT:
I am in love with all of those gorgeous ruffles!
Would you believe these leaves are made from brown packaging paper? Me either!
Go visit Twigg Studios to learn how to make some of your own.
Rachel over at Holy Craft shared how to make these lovely twine and book page pumpkins:
Jumping ahead to Christmas, could this be more adorable? The idea and the model? Visit Cherished Bliss to get the hat pattern. You’re on on your own for the model.
And finally, this week’s chocolate feature. OMG:
Thanks again for choosing to share your creativity here at The Answer Is Chocolate. Make it a creative week!
Thursday, November 1, 2012
BFF Open House Link Party # 77
Happy November 1st everyone. How surreal does it seem to be typing that? I hope everyone had a wonderful Halloween, and also that those whose Halloween was delayed by Sandy are continuing to recover from the storm. Fess up, how much candy did anyone raid from their kids haul?
With Halloween behind us can’t wait to see what Thanksgiving, Christmas, and Hanukkah crafts people are working on! Or if you have Halloween ideas people can pin for next year those are great too. So let’s get the party started!
With Halloween behind us can’t wait to see what Thanksgiving, Christmas, and Hanukkah crafts people are working on! Or if you have Halloween ideas people can pin for next year those are great too. So let’s get the party started!
Softball Charm Necklace

Her daughter is a college softball player so when I saw these baseball / softball charms, I knew what her gift was going to be.

I made this just like the two ribbon necklaces I’ve previously shared. I put extra large jump rings on the necklace, then decided where to add the charms. I used three: one on each end and one in the middle.


Stay tuned to see the amazing thing she made me!
Subscribe to:
Posts (Atom)