Sunday, April 17, 2011

English Moss and Cappuccino Card

How’s that for a combination? I fell in love with Colorbok’s “English Moss” collection when I was in JoAnn’s one day ( fortunately with a 25% entire purchase coupon since I might have bought several things from that collection). Then, when The Twinery was donating proceeds from their orders to Japan Relief, I ordered an assortment of twine (LOVE LOVE LOVE). One of the colors included is called “Cappuccino” and when I needed to make a birthday card for a friend recently, the two just clicked!
Colorbok English Moss
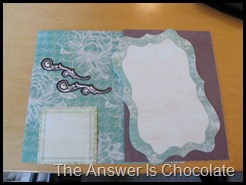
The 12x12 paper pack contains reversible paper so it’s like getting twice as much. OK in my head it is!  I chose this green floral that has a shabby brown on the other side.
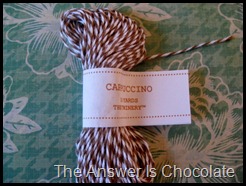
Twinery Cappuccino
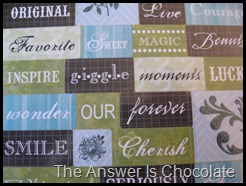
The cappuccino twine from my sampler pack. The English Moss collection also had these great wordy glitter stickers:
Colorbok Glitter Stickers
The great thing about this card is you don’t have to be a stamper to make a beautiful card. A package of paper, die cuts, stickers, and embellishments and you’re off!
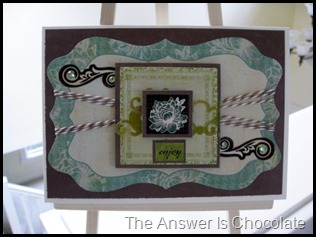
Colorbok Twinery Card
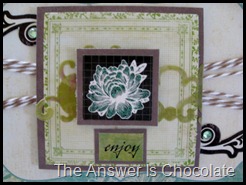
I layered a couple of die cuts from the English Moss pack onto papers from the collection and mounted in the center of the card using foam dots. I wrapped the biggest die with the twine and then added a couple smaller dies as accent pieces and finished with the word “enjoy” in the center. Closeup:
Colorbok EM Closeup
IMG_5345And that was only one piece of my paper pack! Squee! ( OK I make up words) Lots more to play with.
Linking Up @


Paper Issues Blog Design

Friday, April 15, 2011

BFF#16: Charm Bracelet Diva

This week’s BFF is Kathleen from the blog Charm Bracelet Diva.


Despite her blog name, she’s not a diva at all at least not in the celebutante / rockstar kind of way! No, she’s  a diva in the sense that she rocks her charm bracelet designs, finding and incorporating vintage pieces with new materials making each one unique and beautiful. Every single one is a work of art.

I have to include this bracelet called “Divatude” not only because I love the name and  it’s stunning, but it has a chocolate feel to it !
Or this gorgeous piece in which she included a vintage brooch:
Or her entire collection of Irish Dance Charm Bracelets :
But while her jewelry creations are brilliant, so are her non-jewelry creations. Check out this elegant  monogram pillow:
Humble materials, transformed into an elegant accent piece that goes so well with this upcycled chalkboard tray:
You have to see what this started out as! And of course, with my affinity for altering pillared prayer candles, I can’t help but love these:
Not only is Kathleen’s place a visual treat due to her talented creations, but her blog space is calming and inviting and she’s a wonderfully supportive blogger! Do go visit!

Thursday, April 14, 2011

Beth’s Homemade Peanut Butter Cups

I was clicking through my reader one night and what to my wandering eyes did appear but the words : “How To Make An Emergency Reeses Cup”. I was a Girl Scout and believe in always being prepared, and one should always be prepared in the event of a chocolate peanut butter emergency!

Beth. from Home Stories A2Z had a tutorial on how to make these and not only did they look delish, they looked fast and easy and really fit the description of something you could make when that craving hits you.
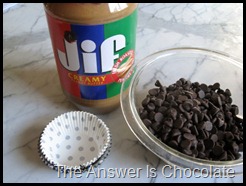
You know it does. You know sometimes you sit there and think “I need a peanut butter cup”. I made them that very night! Now here’s the problem. Mr. Chocolate liked them. A LOT. And the “in case of emergency, make one” thing wasn’t going to work. So her tute is for making these one at a time but in the  casa de Chocolate  aka my house, mass production was in order! The ingredients remain the same and they are SIMPLE. Peanut butter, choc chips, cupcake liners.
Chocolate Chips Peanut Butter
While she melted her chocolate chips right in the cupcake liner, since I was making multiples, I melted mine in a bigger bowl. Zapped for 30 second intervals for a total of about a minute and a half. For scientific reasons I don’t understand and past experience, don’t just set for 1:30 because it mucks up your chocolate. Stir into creamy melted goodness:
Melted Chocolate
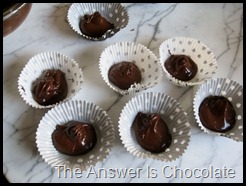
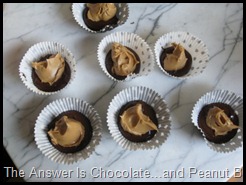
Spoon your chocolate into cupcake liners. I used a teaspoon and plopped a good dollop…enough to coat the bottom. Follow this with about the same size dollop of peanut butter.
Chocolate in Cupcake LinersPeanut Butter Layer
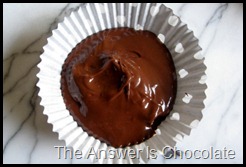
Cover the  peanut butter with another spoonful of chocolate and use the back of the spoon to smooth over. You can either refrigerate for about 20 min or freeze for 5 or ten. It all depends on the state of emergency!
Peanut Butter Cup
Peanut Butter Cup Side
Most importantly, DO NOT advertise how easy these are to make or husbands and children will throw those words back at you! Make husband and son write thank you note to Beth!

Tuesday, April 12, 2011

Bias Tape Rosette Ring

I’ve seen a couple of simply gorgeous fabric rosette rings recently. One style from the Queen of The Anthro knock-offs, Bev, over at Flamingo Toes:

Arent’t these gorgeous?! And I also love this one from Vanessa at V and Co :
These were on my mind when I was at JoAnn’s and found myself in the rick rack/ bias tape aisle. Light bulb! Bias tape is already in strip form and wouldn’t that work? Let’s see:
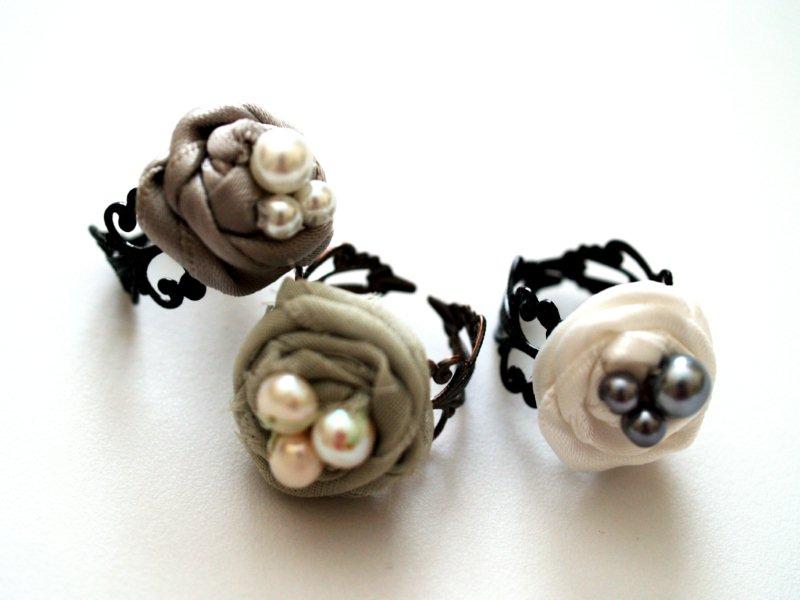
Bias Tape Rosette Ring
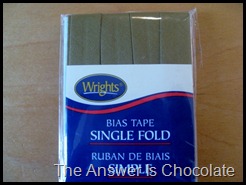
Started with dark khaki Wrights Bias Tape ( 1/2”):
Wright's Bias Tape
And a ring blank :
IMG_5393
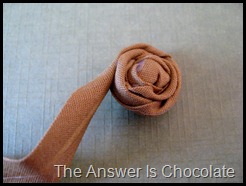
I didn’t cut a specific length of bias tape but worked right from the card planning to cut whenever my rosette was the size I wanted. Started with a knot at one end:
Rosette Knot
Put some hot glue in the middle and then start twisting gluing, twisting gluing:
Bias Tape Rolled Rosette
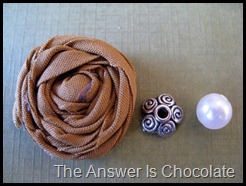
When I liked the size I trimmed it. I thought about leaving it plain which would work but I can’t leave well enough alone! So I got a bead cap and pearl out of my stash:
Rosette, Finding, Pearl
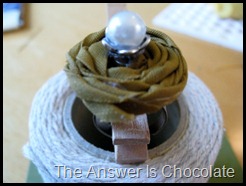
Hot glued the bead cap to the rosette, and then the pear inside the bead cap and glued the whole thing to the ring blank:
Bias Tape Rosette Ring (2)
And definitely go check out the tutorials that Bev and Vanessa have here and here!

Linking Up At :
Anything Related
Photobucket


Monday, April 11, 2011

This Week At The Answer Is Chocolate...

Actually, its should read "this next coupla weeks" at TAIC! Normally, this Friday would be my monthly Open House Link Party but I'm going to cancel it. I'm cancelling it because....starting Friday May 6th, I'm going to do a weekly link party!!!! I know, there are a lot of weekly link parties and several take place on Fridays but it's a big internet and we'll see how it goes by adding one more. This way I get to show off all my "BFFs" every week! YAY!

Here's a brand new button ( that I can't seemed to get centered!)


I'm extra excited about it because that's the same week that my little blog will be a year old so look for what I hope will be a fun way to celebrate!

I have had such fun and positive feedback about the weekly "BFF Blog Feature Friday" series so that will continue and  introduce the weekly party.  Since the following Friday (April 22) is Good Friday, I won't do a BFF feature then.

That's it for now! I'd love it if you share the upcoming new link party with all your BFFs so we have lots of great ideas to peruse ( while eating our favorite chocolates of course) on May 6th!

Sunday, April 10, 2011

Let’s Talk Dirt: Home Ec-101

Through my affiliation with One2One Network, from time to time I get the opportunity to participate in projects, reviews etc. I had one such opportunity to review a new book called “Home Ec-101: Skills For Everyday Living” by blogger and author Heather Solos.


Heather blogs at http://www.home-ec101.com/ where she covers real every day skills for real everyday people. What made me excited about reviewing this book was the description of it being perfect for a variety of people including new college grads. While I’m not quite there, I hope to have one of those in four years ( FOUR mister…did you hear that?!) but he will be moving out this fall and quasi living on his own.

We think we’ve made sure he won’t be the roommate who has science experiments growing under the bed, but it’s never too soon to start preparing  your child not to move back home with you and live on their own after you’ve put them through college please oh please let that happen!

What I loved about this book, in addition to Heather’s biting wit and snarky style, is the way she’s broken down household realities into manageable chunks. There are four sections, divided into several chapters each:
  • Clean It
  • Wash It
  • Fix It
  • Cook It
She takes you through each section starting with the basics of each, infusing reality and humor throughout. For example before you get started in the “Clean It” section, you need to take the following oath:
I solemnly swear to always read the label, test in an
inconspicuous area, not feed the mogwai* after midnight,
and never mix chemicals without research.
(The mogwai comment refers to the movie Gremlins). Scattered throughout the book are “ Dear Home Ec-101” letters and answers. I really hope my son doesn’t have to deal with this one from the Clean It section in a dorm or future apartment: 
Dear Home-Ec 101,
What is the best way to clean diarrhea off of carpet? I’ll spare you the exact details, but let’s just say it’s pretty heinous.

Signed,
Poopy in Peewauket
I highlighted that one to show that there’s no cleaning question she doesn’t tackle!

In the Wash It section, I plan to have my son memorize chapter 9:
Odors: Rolling Down the Window Is Not Always an Option
Teenage boys SMELL. I only have one but I’m pretty sure he’s going to have a roommate. Double the smelly. Fortunately, we have taught him how to do laundry and he generally manages to remember before the underwear runs out. Usually. But still…he’s going to read this chapter!

The Fix It section is great for anyone from renters to new or veteran homeowners. When you’re just starting out you do not want to spend money you barely have on pricey service calls. Heather provides great tips on basic handy-person skills along with checklists of things every home should have. There are chapters on appliances, plumbing, repairing floors and walls ( “Throw Rugs And Posters Only Go So Far”) you name it. I haven't put the "D" in "DIY" as much as I'd like to, and there's ample information on that.

Finally, there’s the Cook It section ,because after you’ve done all that cleaning, washing and fixing, you’re going to be hungry! From terminology to utensils to reading and understanding a recipe, it’s all there starting with the chapter: “Burned Water? There’s Hope Yet”.  Heather sums it up this way:
While most young adults have a metabolism that can handle a diet of pizza and Mountain Dew, there comes a time when broccoli is a welcomed addition,and your colon will thank you.
There’s also great information I wish I’d had when we first got married about how to PROPERLY care for all those nice utensils and gadgets you tend to get as wedding presents. Let’s just say “live and learn”.

Whether you’re single, newly married, just starting out or continuing to learn how to do things, this book covers it all. It’s available from both amazon.com and barnesandnoble.com and I think I am going to include it in what I know will be a series of college graduation and wedding gifts in my future!

I was provided with a copy of "Home Ec-101" to review but the opinions expressed are my own. 
Saturday, April 9, 2011

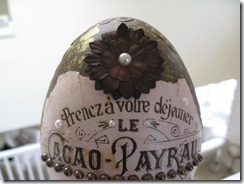
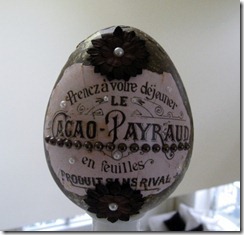
Faux Oeuf en Chocolat aka Faux Chocolate Egg

I thought I'd share a project I did earlier in the month for a guest post over at The Scrap Shoppe. It was inspired by a graphic that had been put up at The Graphics Fairy, a vintage chocolate label! Did that have my name written on it or what?
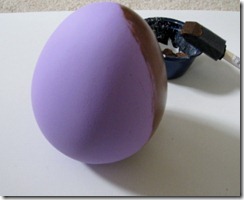

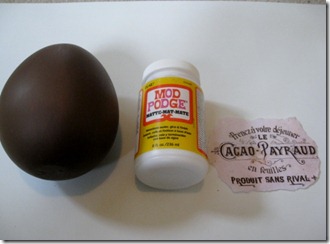
I started with a plastic egg from Michaels that I painted a couple coats of  a deep chocolate brown. I used Folk Art’s Coffee Bean.
IMG_4973
Once the egg was completely dipped in chocolate, I was ready to decorate!
IMG_4979
I printed out my image from The Graphics Fairy, sealed it with a Krylon matte finish spray sealer and then tore around the edges.

These eggs have a flat spot on the back so make sure you apply your pic to the rounded side! I used Mod Podge to apply. If only they’d make a chocolate scented Mod Podge!

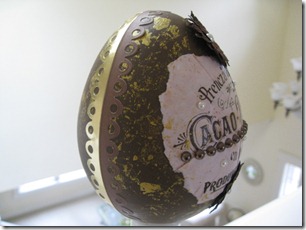
Once that was dry, I went over the whole thing lightly with some gold paint. I just scrunched up a plastic bag and dabbed the paint on all  over.

I had some brown and cream self adhesive pearls ( Michaels) and some dark brown paper flowers in my stash that I used to embellish the front of the egg.
IMG_4980
IMG_4985
IMG_4987
I put one whole strip of brown pearls in the middle of the label, and then used individual cream pearls as the centers for the flowers and randomly on the label.

Finally, I used self adhesive scrapbook borders by K&Co ( Sheer Simplicity , neutral collection) to go around the egg to finish it off. This collection contains neutral browns and beiges and metallic gold so I used the brown and gold of the same pattern, with the straight sides back to back.

IMG_4986

So there you have it, a chocolate egg with 0 calories!
Linking Up At: