Friday, March 25, 2011

Altered Vintagey Bottle Tutorial

Altered Bottle (3)
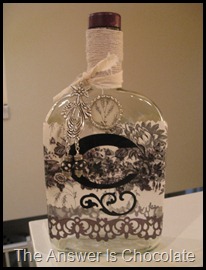
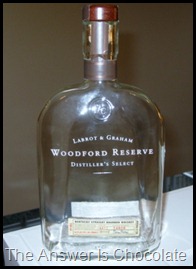
Most of the time I like upcycling things to use for for something like storage. But sometimes the shape of an item just intrigues me and I want to play with  it like a blank canvas. Bottles for instance. Like this one:
Altered Bottle
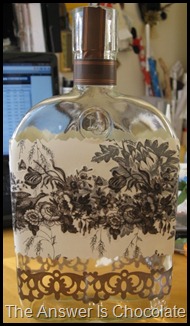
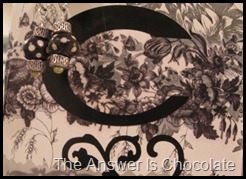
I loved the shape which is kind of square and flat. The writing is painted / etched on so I covered the bottle with some of the contact paper I’ve been having fun with from Dollar Tree. I also had a pack of K&Co scrapbook borders called “Flora and Fauna” . These are vellum and somewhat transparent. I layered one of the borders over the contact paper and another on the bottle itself:
IMG_5224
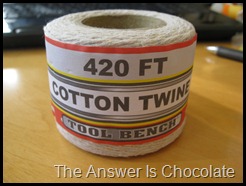
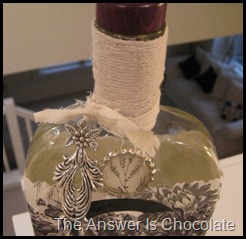
I didn’t feel like scraping the label from the neck of the bottle so I covered it with this cotton twine I got from Dollar Tree:
Dollar Tree Twine
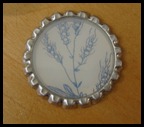
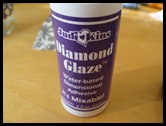
I had a vinyl monogram that I picked up at JoAnn’s on clearance a while ago for like $.25 and that went on the front. The bottle also had a seal that was part of the glass that I wanted to cover up so I punched a piece of the contact paper and put it in a flattened bottle cap which I then covered in Diamond Glaze:
Bottle Cap Diamond GlazeDiamond Glaze
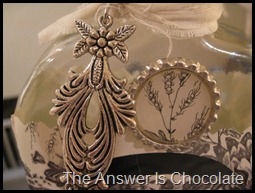
Finished the whole thing with a pendant thingy from the jewelry section ( also one of those poking around the clearance bin finds) to which I added some beads and tied to the neck with a scrap of torn muslin:
Altered Bottle Closeup (2)
Altered Bottle
Altered Bottle Closeup
While function is nice, sometimes so is just looking at something pretty. I hope this is that.
Linking Up At: 
UndertheTableandDreaming 


BFF#13 : Rook No. 17


Yay! It’s Friday! That means Mexican food for dinner and I get to feature another wonderful blog and blogger. This week’s Blog Feature Friday is the wonderfully creative Jenn and her blog Rook No. 17:
Photobucket
I can’t describe Jenn better than she does herself so I’m going to borrow from her :
CREATIVE DABBLER, LOWBROW JUNKIE AND HIGHBROW HITCHHIKER. Both punk and preppie, sweet and spicy, and irresistibly drawn to shiny, glittery objects. MAKER OF THE CUTE AND THE YUMMY, & PATRON OF THE ODD & OFFBEAT; ERSTWHILE CAKE SCULPTOR AND CHOCOLATIER. Teacher of the pastry arts, student of life, avid reader, collector, and decorator.
And she is all these things and more! I mentioned in my last post that her bunny topiaries were one of the inspirations for my own. Here are hers:
I love how she aged the pots and she shows you how she did it.
I also adore this gorgeous “Friendship Craft” she did to celebrate reconnecting with friends at back to school time last year:

Isn’t that GORGEOUS! And not only beautiful but tasty because she made the biscotti that went with the mugs.
Since I’m obsessed with altering prayer candles, it’s no shock that I think hers are amazing:
She did these for a hostess gift. You should totally invite her to your house. Imagine what she’d bring! She might bring one of her delectable chocolate goodies on a stick:
S’mores on a stick
Chocolate (yes that’s some special chocolate with GOLD STARS!) covered rice krispies treats on a stick
Chocolate Dipped Salted Tamarind Caramels
Jenn does make non-chocolate goodies too but hello, where are you? Smile
Jenn is not only a wonderfully creative artist and master of the foods on a stick ( as well as those that look simply gorgeous on a plate) and she also hosts a weekly link party every Tuesday called “A Little Birdie Told Me”. If you haven’t been before, now you have no reason not to!
It actually runs Tues – Sunday so there’s still time to link up to this week’s! I hope you’ll go visit Jenn. You’ll be glad you did!

Thursday, March 24, 2011

Those Pier 1 Bunnies…I Haz Them

If you haven’t seen them yet, you will. They’re making their way around blogland. I first saw them on Haley’s blog, The Autocrat, and then again at Jenn’s blog, Rook No. 17 ( where she may or may not be giving some of these away but you’ll have to go to see!) .
Had. To. Have. Them.
Pier 1 Bunies
I went to one Pier 1 only to find they hadn’t yet unpacked theirs and of course they were in the bottom box of a ceiling high stack of boxes and the stock people weren’t in yet. Curses. They called another store that had unpacked theirs. Had to wait a day. Not patient. I explained to the first store that craft bloggers are going to be looking for these and they better get busy. “Oh OK crazy craft lady…whatever you say”
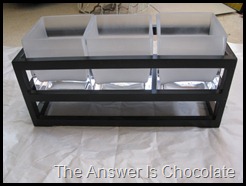
Jenn did hers in painted clay pots that sit in a crate. I was going to copy then I remembered a container Mr. Chocolate had given me flowers in ( awwwww) that had three frosted glass short vases and sat in a crate like thing. Knew I saved it for a reason. I say that a lot but you really have not seen me on an episode of “Hoarders”.
Pier 1 Bunnies
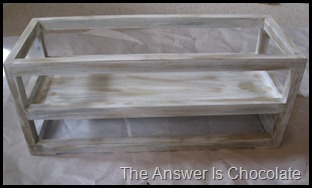
Wanted it lighter and less contemporary so I slapped some white paint on it ( not perfectly…going for a shabby look) and then dry brushed it with taupe:
Pier 1 Bunnies (6)
Pier 1 Bunnies (3)
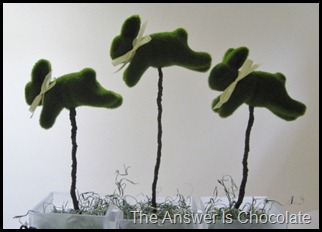
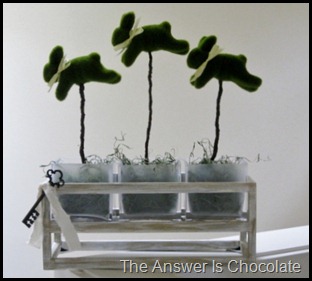
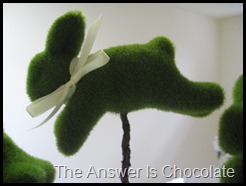
Much better I think. Filled each of the vases with Spanish Moss and floral foam and plopped the bunnies in. I bent the stems of the ones on the end so the middle bunny would be higher. I also tied pale yellow ribbon around their necks. Not too tight. I’m not mean!
Pier 1 Bunnies (7)
Pier 1 Bunnies (4)
I decided to keep things simple, but remembered I had a key I’d picked up in Michael’s dollar section ( now their $1.50 section grrrrr) so I tied that to one end of the crate with a torn piece of scrap muslin. Why? Dunno. Maybe the bunnies will get locked out and need a key.
Pier 1 Bunnies (5)
Probably on a watch list at Pier 1 now.
Linking Up At: 

A Little Knick Knack


Tuesday, March 22, 2011

Pottery Barn Inspired Easter Egg

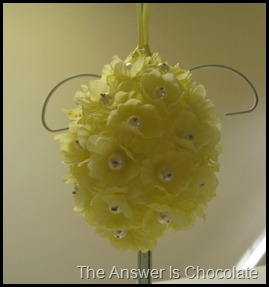
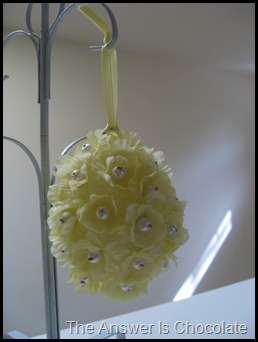
I hate it when I start to question my sanity. Like when I assume that something I see at PB will be on their website and it isn’t and then I start thinking well maybe that’s not where I saw it! I  know I saw some floral eggs at PB last week. I was short on time so I just figured they’d be on their website and I could take a closer look. Well no. But I wanted to make them! (insert big stamping foot pout here).  Here’s my take on a “I Know I Saw This @ Pottery Barn  / Don’t Have A Picture to Show You Egg”:

Pottery Barn Inspired Egg (3)
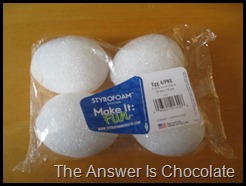
I started with a package of styrofoam eggs from Michaels. $4.49 before 40% for a package of 4.
Pottery Barn Inspired Egg (2)
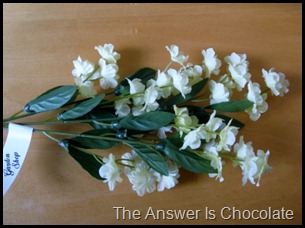
And a stem of these silk cherry blossom things for $1.49
Pottery Barn Inspired Egg
Other materials, straight pins and a ginormous bag of “pearls” from my bead stash.
I inserted a screw eye into the top of the egg. Then I popped one of the blossoms (they’re two layers each) off of the stem and threaded it onto a straight pin with a pearl and stuck it into the egg. Went around the whole egg until it was covered and threaded a coordinating ribbon through the screw eye.
Pottery Barn Inspired Egg (5)
Pottery Barn Inspired Egg (6)
So the next time I’m in PB I will remember to sneak  pics on my phone! And even though I don’t remember how much PB wanted, I know it was more than the $1.86 my egg cost me to make!
Linking Up At:
Beyond The Picket Fence
giveaways
Visit thecsiproject.com
 Catch a Glimpse Button
A Little Knick Knack