Monday, May 17, 2010

Table Makeover

So we have this corner of our bathroom that's been bugging me. We have a LOT of space around our tub and it's become home to this and that because it's a flat space and flat spaces tend to do that. I wanted to make it look more cohesive and put together. When I saw this for $3.99:


on one of my "Goodwill hunting" trips, I had an idea. I sanded it (during which I remembered to take the before pic and made a note to myself that if this is going to become a habit buy a small electric sander) and gave it a spray of heirloom white:
I didn't care too much if it was totally covered because I knew I was going to do more to it and I'd rather work inside anyway.

After bringing it in and giving it a coat of an antique linen, I  got cracking, or crackling, by covering the top and bottom shelf with crackle medium. After that was dry, I went over it with an antique white ,  crackle crackle , and voila:


I dry brushed the legs with the antique white to give them a worn look. The finished product (with a couple of 40% off baskets from Michaels):

Linking up at :

Visit thecsiproject.com
Beyond The Picket Fence


All Thingz Related


Friday, May 14, 2010

The Days Of Twine and Coffee

Twine is such a versatile thing to work with, especially when you find a big roll of it in the $1 section at Tar-jay ( my name for Target with a faux French accent) . Mr. Chocolate thinks I'm a little wreath crazy ( emphasis on the last part) but I was playing around with coffee filter flowers and then I got the idea to put them on a wreath and the twine went perfectly with it so this is the result:


  • Wreath form from $1 Tree
  • Ball of twine from Tar-jay
  • Natural coffee filters from wherever they're pretty inexpensive 
  • Layered book page flowers left over from my topiary project
  • Buttons
Wrapping the wreath form in twine took the longest but that's what Lifetime Movie Network movies and a glue gun are for. To make the coffee filter flowers, I just crumbled them up then layered about 8 for each flower, layered the book page flowers and sewed through the button holes to secure the whole thing and glued them to the wreath. The flowers are a little big and if I make another one, I'd probably use a bigger wreath form.

It's on my office door ( I work from home and my office is also my craft room) so I can see it from my desk while I'm crunching spreadsheets :)  I think maybe I'll add a bow?

Linking up at :

UndertheTableandDreaming

Join us Saturdays at tatertotsandjello.com for the weekend wrap up party!
 

Monday, May 10, 2010

Dream A Little Dream


I've had this clear glass plate ( I forgot to take before pictures early in the process) for a while, thanks to my sis-in-law who would pick these up at Goodwill for me. Sometimes you have stuff and it takes a bit to decide what to do with it. I decided to combine paint, vinyl, silver leaf and paper and here's the end result:


  • First, tore a circle of scrapbook paper and then glued it to the underside of the plate
  • Then I applied leafing glue randomly around the plate, let dry and applied the silver leaf . I wanted this to be splotchy so that the silver leaf would peek through the paint layer but you could leaf the whole area so it's solid. Edged the underside of the rim with black acrylic paint


  • Painted over that with cream acrylic paint 


  • and over that with black acrylic paint and a coat of clear. 
  • When dry, flipped the plate over and applied a vinyl "Dream" sticker I found on sale at Michaels. 
Shared at:


Saturday, May 8, 2010

Happy Mother's Day

Wishing all moms a very happy Mother's Day!

Beautiful flowers from Seattle's Pike Place Market

Thursday, May 6, 2010

The Flower Power of Black and White

Flower accessories are everywhere as well as ideas and tutorials on how to make all kinds of fabric flowers. I've been in love with a lot of the layered flower ideas and loved those made from fabrics like organza and satin, but didn't want to hear from Mr. Chocolate about burning down the house if I tried to do the "burn it over a candle or with a lighter techniques " ( for anyone who doesn't know what I'm talking about you can see that HERE ). So I thought maybe my heat gun would work and it did ! Since I wear a ton of black and white, those who know me won't be surprised to see I started with those colors. I made these pins that I can wear alone or even all together on tee-shirts, jackets, whatever! Perfect for a last minute Mother's Day Gift!


  • Cut circles (descending in size) from synthetic organza...cut freehand they don't have to be perfect. I did 6. 
  • Carefully go around the edges with your heat/embossing gun and as soon as the edge starts to curl turn circle and go all the way around. 
  • Layer all completed circles, use button or rhinestone for center and sew together
  • Cut small circle of felt for backing and sew pin back


You can find more amazing fabric flower tutorials here at OOPSEY-DAISY

Speaking of black and white, check out this apron from a place appropriately called : FLIRTY APRONS
This one's called "Sassy Black" and I'd actually spend more time in the kitchen just to wear it. I learned about it from one of my favorite hangouts: Tatertots and Jello where there's an opportunity to win one of your choice of Flirty Apron's many cool designs.

Thanks for stopping by today !


Wednesday, May 5, 2010

Book Page Topiary

I decided to see if I could make a topiary out of some leftover book pages, which I made into layered flowers. Stuck them into a styrofoam ball and used bamboo skewers instead of a dowel. Upcycled a tin can by decoupaging scrapbook paper and another book page and set on a pedestal  from Gwill that I painted and glazed.

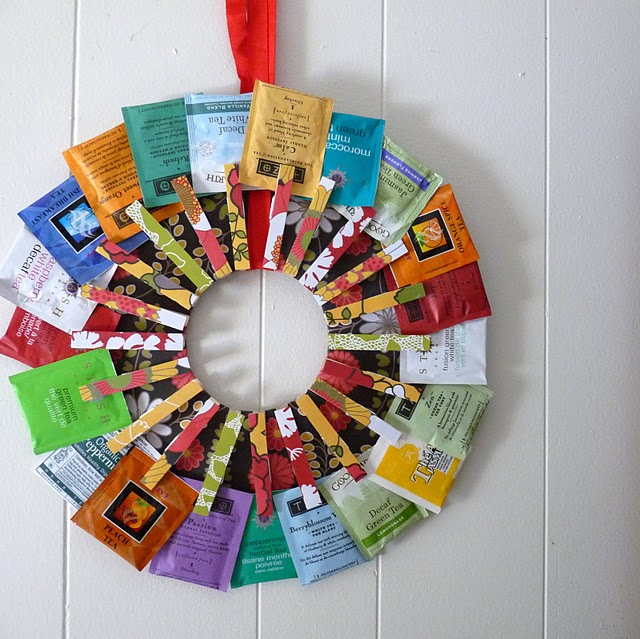
Totally Fabulous Tea Wreath from kojodesigns

I saw this on dollarstorecrafts and the tutorial is here from kojodesigns

This is definitely going on my list of projects!