Showing posts sorted by date for query cabinet. Sort by relevance Show all posts

Thursday, July 28, 2022

BFF Open House


Happy Friday Eve and end of July! The month's flown by and been a whirlwind getting moved in to our new home, unpacking etc. It's been a serious monsoon season this year with lots of rain, which is needed, and some amazing lightning light shows. It's also felt good to get back to being able to make some things. This week I shared another piece of DIY Modern Wall Art and have been playing with more. 

As always, the projects shared at last week's party were inspiring and beautiful. Let's take a look at a few. 


I've mentioned that I love combining modern and vintage. The Soiree Blog has an incredible roundup of re-purposed vintage sewing machine tables that do just this. I absolutely love this one with a natural wood top! They're all amazing. 


Artsy VaVa shared this AMAZING Corner Cabinet transformation. The color is fabulously named Cactus! 


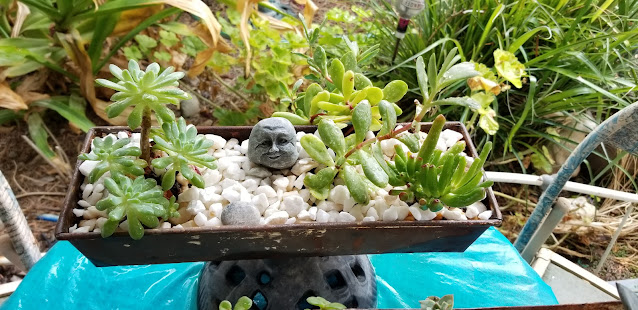
Dragonfly Treasure shared this lovely Succulent Garden made using old cement trays (molds). Aren't they fabulous?!


Finally, I love pickles almost as much as I love chocolate. When I was little and we went to the deli, I loved the pickle barrel and the crunch of a good garlicky pickle. My husband laughs at me and pickles because I will just sit and eat them standalone. These, from The House on Silverado inspire me to actually make some! 


Thank you to everyone who linked up and can't wait to see what you've all been up to this week! 


You are invited to the Inlinkz link party!

Click here to enter

Tuesday, July 12, 2022

Home Decor: Blending Traditional and Modern


 As I've mentioned, our new home is very modern. And while it would be fun to buy all new things, I live on a planet called Reality. Plus DIYing and making things over is what we do. Our prior homes have been more traditional and I wanted a way to make some pieces I still love fit in with this more modern aesthetic. Plus, it's better for the environment as well as the wallet to re-purpose right? These pieces were already thrifted finds I'd painted once so painting them again was no big deal. 


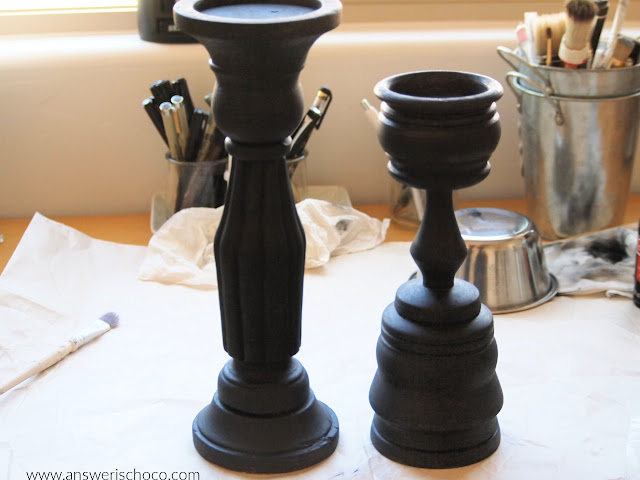
These were some candleholders I found several years ago at Goodwill. They didn't match so I painted them to match and painted them again! 


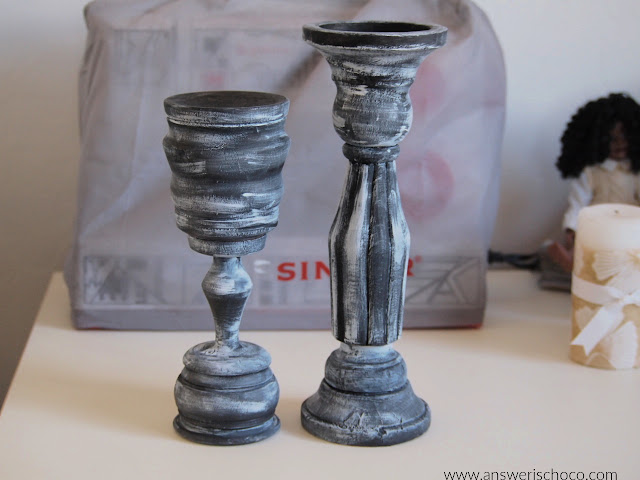
We have a lot of black accents in this house so I started by painting them with a couple of coats of black acrylic paint. I still love a vintage look so I didn't leave them solid, and dry brushed them with a little bit of white. 


To finish, I used Silver Leaf Rub N Buff to accent some of the raised areas to make them pop. Originally, I thought I'd re-do the candles too. They're decoupaged onto the candles but the powder room also has a wood cabinet and I decided I really liked how they went with it. 


I also knew I wanted to place a small table I'd also previously thrifted and painted. Again, I wanted to emphasize the black but again, I still like my vintage / distressed look. 


I originally painted it a light tan with white drybrush. I painted the legs solid black and  for the bottom did a crackle effect with white using my tried and true white glue crackle technique. 


I applied the same Rub N Buff around the edges of the top and shelf of the table. We had a Longaberger basket we bought years ago that matched the cabinet as well as a beautiful wood bowl from my husband's family that I thought would be perfectly displayed on this table, and the black captures the essence of the sink. 


I feel like the silver accents on the candleholders and table work well with our floors, the black and white with the sink, and the browns with the cabinet! We added a couple of black storage baskets from Target to hold extra supplies like toilet paper. I'm really happy with how it all came together mixing traditional and modern. 


Sharing At:


Thursday, March 11, 2021

BFF Open House


Happy Friday Eve once again Creative Peeps! It has been a busy week since we last gathered. Excited to announce that I have a Granddoggo. You can read about him here and see my latest project which was inspired by my son giving him a forever home. Also honored to have had my Layered Shamrock featured in Hometalk's Newsletter. But the most exciting news...by the time you read this, Mr. Chocolate and I will have received COVID Vaccines!!! So thankful. AZ lowered the age requirement so we qualify. Who says getting older is a bad thing? 

OK back to some of the inspiring ideas from last week's party! 


Pandora's Box shared her beautiful St. Patrick's vignette along with the meaning of St. Patrick's traditions. LOVE her MacKenzie Childs pieces. 


I love pretty and practical. This Functional Kitchen Sign from Unique Creations by Anita fits the bill and you are going to have to check out her post to see what she used for it. I'll bet you can't guess! I'll give you one clue. It's not a cabinet door. 


I love a good "green craft" and The Apple Street Cottage has a wonderful way to use up old jeans that have seen better days while staying organized with this Denim Pocket Organizer. Win-Win! 


Finally, St. Patrick's Day may be next week but I can never pass up Mexican food flavors and one of my fave faves is Mexican Street Corn. Can't wait to be able to go to my favorite restaurant that serves it and may just order a giant bowl of only that. Street Corn Chicken from Homemade On A Weeknight!

Thank you to everyone who linked up and if it was your first time sharing, WELCOME! 

Now let's see what everyone's been up to this week! 


You are invited to the Inlinkz link party!

Click here to enter

Thursday, March 4, 2021

BFF Open House


So many Happys this week! Happy March! Happy National Craft Month! Happy Spring! Hopefully the worst of Winter is over and Spring is around the corner. Both exciting and hard to believe that we're already into the third month of the year. Even harder is that it's been a full year of COVID but let's not talk about that except to celebrate that hopefully we're starting to see light at the end of the tunnel. 

OK you creative peeps! So many wonderful ideas shared last week. Here are a few to get you in full Spring mode!


Maybe you have an old piece of silverplate like this stashed away in a cabinet. I know I'm going to look for one next time I get the chance because I love these non-traditional Easter Baskets from Junk Journal. Perfect for any decor from Farmhouse to Contemporary. 


These Paper Butterflies from Priyam at Simple Joys just scream Spring don't they? Perfect for everything from garlands to package toppers. 


Linda, from Paper Seedlings made this adorable Name Sign for her grandson Enzo, whose name I love. I think it's such an adorable keepsake to treasure! 


Is it a Donut? Is it a Cake? It's a Giant Chocolate Fudge Brownie  Donut Cake! Perfect for St. Patrick's Day, a Spring shower (as in baby or bridal) or anytime! From Cindy's Online Recipe Box


Finally, this one hits home. Trinidadian Pepper Sauce from Kiku Corner. I grew up with this. There was always a jar of this on the table in my family's and extended family's homes. It was often a bit of a trick test when new people said they liked spicy food. We would watch as people took too much (after being warned) and then they proceeded to melt. Literally. This is extra special to me because the recipes my family had were never written down. There were always promises to but the elders were not so good at following through and the last person who could have shared, we've lost to dementia. So this is extra special to me. 

Alright! Let's see what you've all been up to this week and as always, thank you to everyone who linked up! 


You are invited to the Inlinkz link party!

Click here to enter

Thursday, July 12, 2018

BFF Open House Link Party


Happy Friday Eve all! Hope everyone's survived the week. Getting used to my first monsoon season here in the desert. We've been here for a few but nothing like this! Been distracted the past couple of weeks and looking forward to soon being settled in new digs. Here are some features from last week's party!


Artsy Va Va was back with another amazing makeover! Check out this gorgeous Record Cabinet Makeover! 


I have seen these stands at antique and vintage stores and they've been overpriced. I just discovered that they sell a version of them at Harbor Freight Tools so with a little spray paint, I can antique my own and have a cool tiered stand like this one from Penny's Vintage Home ! She found hers for 75% off at Hobby Lobby. 


There's nothing quite like German Glass Glitter but it can get pricey. Eco Friendly Saver has a great way to make your own using broken glass ornaments!


Finally, nothing says Summer like S'Mores but how about as ice cream? Better yet, No Churn Ice Cream from All That's Jas

OK now let's see what everyone's been up to this week!


Monday, December 4, 2017

Handmade Gifts: Brushed Gold Geometric Tile Coasters


Like all makers, I'm sure you're in full fledged Handmade Gift mode. This is actually one that wasn't  on my list but which I was thrilled to make. Here's why.  

When my son came home for Thanksgiving, he was telling us about a party he and his roommate had thrown just before. Last year, I'd made and given him a set of coasters and he'd used them for the party but nicest of all, one of his guests wanted to know where he'd gotten them. "Um , my mom made them". Awww! She really liked them and I was so honored that of course I had to make a set for her! 

Supplies: 
  • Ceramic Tiles . I got mine at Lowes for $.16 ea ( and a weird look from the Lowes guy when he asked if I was replacing tiles and I told him I was making coasters)
  • Vinyl / Foil. I used Cricut Brushed Gold Adhesive Foil
  • Die Cutter or Digital Cutter. I used my CAMEO 3 ( yep I use Cricut stuff on my Silhouette Cameo. I'm a riddle wrapped in an enigma). 
  • Images to cut. Mine came from Silhouette Online Store
  • Aluminum Tape
  • Vinyl Bumpers ( Clear self adhesive dots to put on the bottom of the coasters)


Clean your tiles with rubbing alcohol to make sure you remove all the warehouse dust and fingerprint oils etc. 

Choose, cut and weed the images you want to apply. I wanted to do a coordinated set so I went with varying geometric images. I used a couple of the same ones I'd used for my son's, but I added the heart for the ones I made for his friend. 


I went with three images and made two of each.  Using transfer tape, apply the images to your tiles. 


To finish, I wrapped adhesive aluminum tape ( I bought a huge roll of this at a stamp show years ago but I believe it's from the electrical aisle of the HW store so your Lowes guy can look at you funny too!)


Finally, I put clear vinyl bumpers ( the kind you use to prevent cabinet doors from slamming) on the bottoms since I wasn't finishing the bottoms with cork or felt which are a couple of ways I've seen people complete these. 

Easy peasy and inexpensive gift that's pretty and functional. Can'tbeat that.