Showing posts with label recycle. Show all posts

Wednesday, March 9, 2011

My Can Needed A Friend

And thanks to the garbage man who took out the utility pole that supplies power, cable, and phone service to our house today, I had time to make him one.
IMG_5102
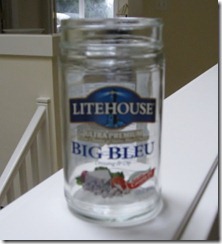
You know you’re a craft addict when you buy salad dressing because you like the jar:
IMG_5088
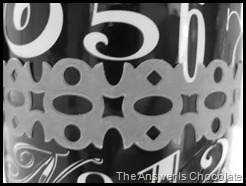
I also liked that the label came right off! Used my contact paper leftover from my can to cover the jar and then went around that with more of my typography tape (two strips). The white contact paper sets off the tape because the numbers are clear. Went around the middle with a K&CO scrapbook border.
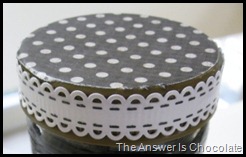
Mod Podged a scrap of polka dot paper to the top of the lid and went around it with another K&Co adhesive scrapbook border. Sealed that w/ Mod Podge too.
IMG_5100
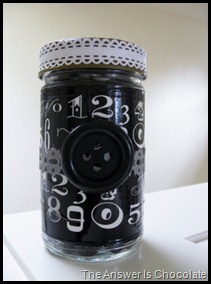
The whole reason for this “jarring” transformation was something to hold black, white, and neutral colored buttons that were here, there, and everywhere. Finished it off with a big fat black button in the middle:
IMG_5098
Did I mention I’m in love with this tape?!
Linking Up At: 
giveaways
Beyond The Picket Fence
Catch a Glimpse Button


Photobucket


Wednesday, July 7, 2010

What The Heck Wednesday....

I won! That's what the heck! What am I talking about? Jill over at Envirocraftiness has a feature called..."What The Heck Wednesday". In her own words:

It's going to be called "What the heck do I do with this?" Wednesdays.
Aka What the heck Wednesday!

This is where I pull something I want to use up from my stash and you all get to leave comments and let me know what you think I should do with it. 
 
I love this idea because her blog is focused on crafting and recycling and WTHW  requires using up existing supplies aka "stash busting" and generates creative ideas from followers about what the heck to do with some of the stuff  in her stash.  I commented on one of these about a tray she was trying to decide what to do with and I won the prize. I never win anything so can anyone tell what a treat it was for me to receive her email telling me I won? Lookie what I get: 
 which I can't wait to drool over.  So thanks Jill! For a great recurring feature,  for the prize ( I won..did I mention?)  and reminding us to use what we have (says the person who needs to work on that!)

Time In A Bottle

I'm no Michelangelo, who saw things in a block of marble, but when my husband finished off a bottle of his favorite adult beverage, I saw this idea in the bottle. No, I hadn't been helping him finish it off when I started seeing things!
I've been intrigued by bottles and this one was both old looking and had a great shape and made a fun backdrop. Keeping with the "time" thing ( which is perfect since Mr. Chocolate loves watches and clocks so "time" is a theme in our house). 
I started out with the bottle, Mod Podged some sheet music and painter's masking tape around it:


You know how you get into a project and then you forget to take pictures? Yep. I went looking in my stash o stickers and found a sheet of time themed ones by Kelly Panacci, one of which I used for the focal and then fought with, I mean super glued, the copper K&CO frame to it. A couple of weeks ago, I bought a jar full of chandelier crystals at an antique shop ( used some of them on my bird cage) and made a "stopper" from one. Wrapped the top of the bottle w/ twine and a muslin scrap ( this is usually the kind of thing Mr. Chocolate asks "What made you do that?" and I answer "No clue, next question").

A couple of months ago I picked up a magical bag of watch parts so I pulled one out and glued it to one of the containers I picked up at the same time, and then glued that to the front of the bottle. I took another piece from the bag, put it in a bottle cap, filled it with "Diamond Glaze"  and once dry, glued that to the bottle. Last but not least, I inked a vellum tag with black and linen ink, used some more of the "time" stickers, and glued some small keys to the tag, attached a bead and tied it to the bottle
Now the funny part. I picked up the most recent copy of "Somerset Studio" and lo and behold, what do they have featured? A "Time In A Bottle" project. So clearly I'm not the only one with visions of time and bottles :)

Linking Up At:
Photobucket


Sunday, June 6, 2010

NOT Headed for Project Runway...

but my creative / thrifty /  curious/ CHEAP / re-purposing mind continues to be intrigued and inspired by all of the amazing fashion re-style projects around blogland. For example a very cool denim skirt over at The Sewing Dork  (Dork must mean talented genius in some language I don't know, because she is). It's from an old pair of jeans.  I've seen other skirts made from jeans and it's been one of those projects I've wanted to try but have been afraid cutting up jeans I paid actual money for because I am not much of a seamstress.

Thing is...those jeans I paid actual money for ( which came from one of my favorite shops Chicos...) have been sitting in my closet unworn because they're actually too big (yay!). So yes, they could have been donated to charity ( if Mr. Chocolate reads this, no I'm not cleaning out my closet today) but I decided to go for it and try to make myself a skirt. I'm not going to get better at sewing if I don't ever do it right? So here's how it went:

Using the tutorial from The Sewing Dork ( I wish I was such a Dork) I cut off the legs.

and opened the seam right under the zipper placket I re-sewed that to make the front lay flat. The next step in the tutorial uses the legs you cut off which you use to make panels to attach to the upper part of the skirt. She used two but she is taller than me. So in addition to being a sewing goddess, there's that! Being shall we say "height challenged", I only needed on leg! Evened the leg material up and sewed it together.

I got wrapped up in trying it on and adjusting seams ( I managed to actually take the sides in and as long as no one ever, ever, looks at the reverse side, it looks OK!) and didn't take pics during this part.  Well I really oopsed  and missed part of the seam when I was sewing the bottom panel on but I was not about to rip the whole thing apart so I did some Frankensteinish top stitching to repair it and had an "aha" moment and decided I'd just slap a flower on top of it and no one would ever know. Unless they read my blog. Then I decided the flower was lonely and made two more. Being short has its advantages...I had another leg leftover afterall!


Here's a closeup of the flowers:


 Like I said, I won't win Project Runway ( Project Run-Away maybe) but it'll do for going to Safeway!

Monday, May 24, 2010

"Vintage" Bottle and Pillow

Vintage as in it's an empty Worcestershire bottle but thanks to The Graphics Fairy and a little twine and painter's tape....
Easy Peasy. Tore a strip of paper tape ( I got it at Home Depot in the paint aisle) long enough to wrap the bottle. Ran it through my 5" Xyron and adhered it to the bottle. Printed this beautiful French label from TGF and trimmed it around the edges, Xryon'd it and ahered. Wrapped the bottle cap in scrap of paper tape and then with twine. Tied a couple of strands of twine around the bottle with a charm I bought that I knew I'd use "someday" and voila.

I love the vintage looking burlap and linen pillows I see at home decor stores and figured I could do one myself. A linen dress in my closet has been sitting there and now I knew why I never got rid of it. Because someday, it would make a great pillow!

So snip snip and turned it into fabric ( re-use!) , downloaded this urn from The Graphics Fairy, printed it onto iron on transfer paper and trimmed really closet to the edges:

Sewed it together, stuffed it and :
Linking up at: