Showing posts with label mod podge. Show all posts

Tuesday, July 5, 2016

Altered Cigar Box In Honor of Our Newest National Animal : The Bison


Mr. Chocolate was especially excited when the Bison was announced as the newest National Mascot. He loves Bison. Like really loves Bison. 

For Father's Day we took a trip Northwest Trek, the Pacific Northwest's premier wildlife park, home to you guessed it : bison. 


Since Mr. Chocolate likes to collect brochures and this and that's wherever we go, I thought I'd make him something to remember the day and to keep his stuff. 

Supplies: 

  • Cigar Box (You can usually buy or even sometimes get for free wherever cigars are sold. Just ask)
  • Scrapbook papers ( I used papers from the Textured Printed Pack from Oriental Trading Company)
  • Mod Podge ( I used Matte)
  • Washi Tape
  • Vinyl
Fortunately I had everything on hand in my stash! 

After choosing my papers ( I went with two different textures from the same color palette) , measure and apply to the box using Mod Podge. I colored in some areas that weren't easy to cover with the paper using a paint pen and craft paint. 

Before covering the inside top of the box, I edged it with washi tape just to hide the box design. Once Mod Podged and dry, I aged the look using a Distress Ink pad ( Ranger). 


I cut the bison image using my Cameo using a scrap of gold vinyl. To tie the colors together, I added the word "Explore" using letters from the "Lost and Found" pack of Tim Holtz stickers. 


The papers coordinated with the wood inside the bottom and sides of  box so I left those bare. 

If you're ever in the PNW ( or live here and haven't been) I highly recommend Northwest Trek. You get to see majestic animals in a very humane and natural habitat and sometimes very VERY close up! 

Monday, March 16, 2015

Mod Podged Spring Basket Makeover


DCWV Primrose Stack Easter Basket

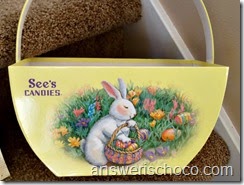
Sometimes you save something without a specific plan in mind for it but because you know based on the design that it’s a perfect candidate for a makeover. At least that’s the way my brain works and was the case with this project. Mr. Chocolate gave this to me a few years ago for Easter ( filled with chocolate of course) but ever getting it I’ve wanted to play with the basket itself because it was perfect for altering.

Sees Basket Makeover

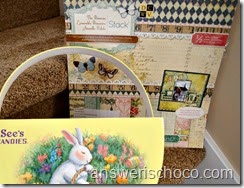
The shape and surface of this basket made it really easy to alter. I chose the Primrose Stack from DCWV which is a gorgeous combination of Spring designs and color.

Primrose Stack Basket

DCWV Primrose Stack


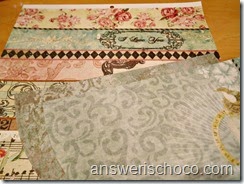
The papers are gorgeously patterned so there was no need to really stamp or alter them. I used a couple of the fully patterned sheets and one sheet with borders for the basket. Using the basket as a tracing template, I cut pieces to cover each side and then coordinated with pieces from the border sheet.  I used Mod Podge to apply the papers to the basket and then painted the sides and handle with white craft paint.
DCWV Primrose Basket 2


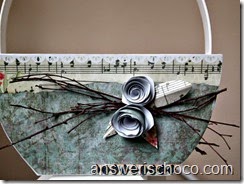
Unlike the rest of the country , we’ve had a mild Winter and early Spring and I’ve been picking up fallen twigs and branches while out on walks. I grabbed a handful of these and combined them with rolled roses and leaves made from the paper scraps to decorate each side of the basket.

DCWV Primrose Stack Rolled Flowers

I haven’t quite decided what I’m putting in my basket yet but I like looking at it just on its own.

Sharing At: 


Monday, February 2, 2015

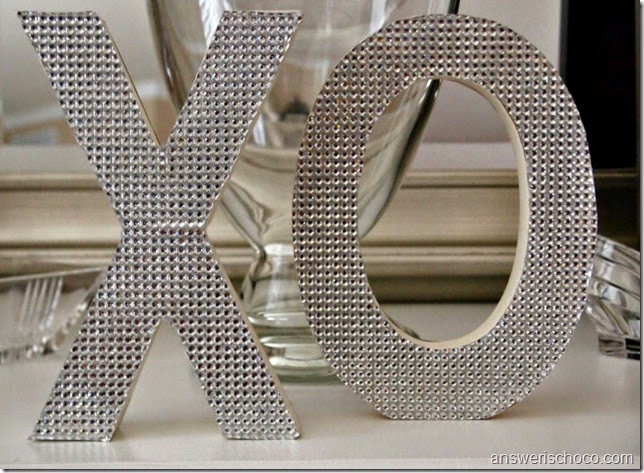
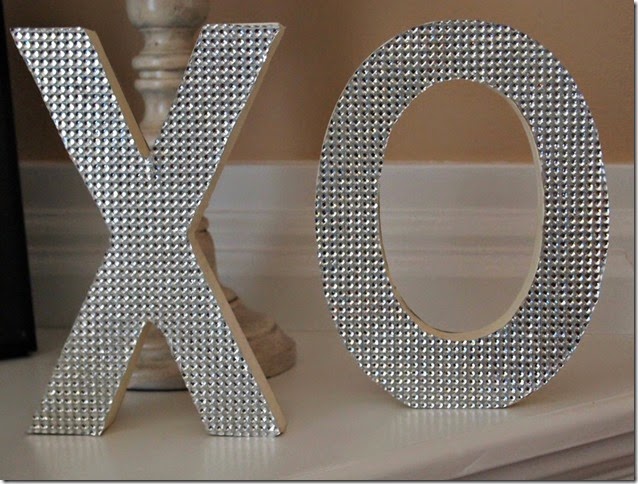
Easy Blingy Valentine Letters

DCWV Bling XO Letters

Happy Valentine’s month! Why stop at just the 14th? Love should get a whole month don’t you think? Not saying I’ll have a month’s worth of projects but I do think I will leave things up for the month ( attn Mr. Chocolate).
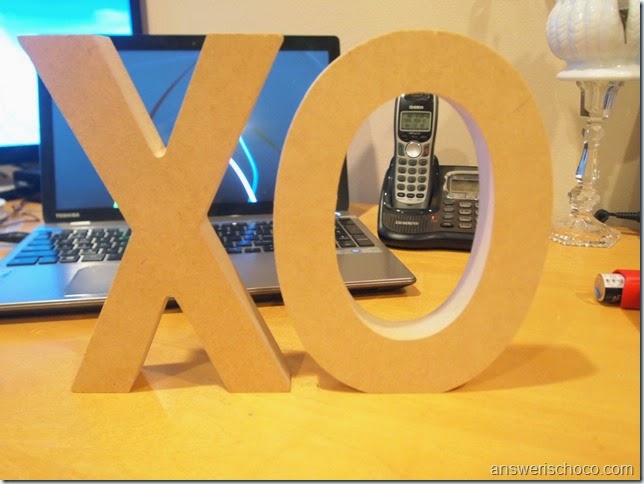
I was tired of my previous Valentine’s decor so set out with no particular idea in mind to change it up this year. While on a  stroll through Michaels I stumbled upon these letters in the clearance aisle and thought they’d be perfect for VDay.  They’re MDF or chipboard or something.

P1013344

In my DCWN stash, I had some self adhesive bling sheets that can be cut into different shapes and which I thought would be perfect for these letters:

DCWV Bling Sheet Letters

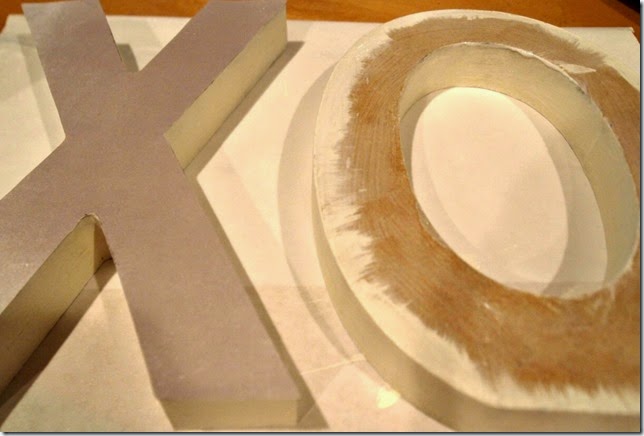
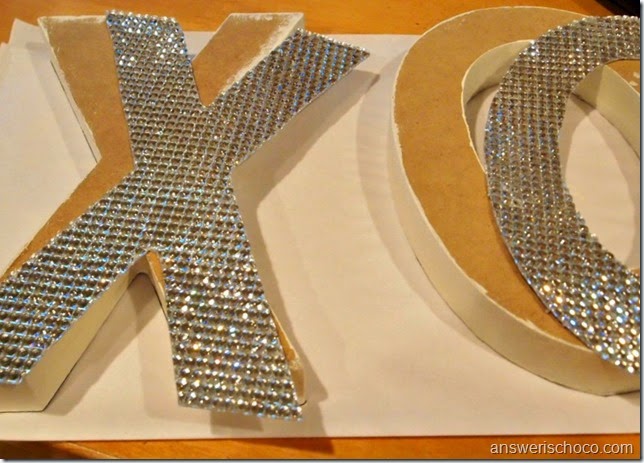
Trace the letters on the back and then cut out using plain old ( but sharp) scissors. Before I put the bling on, I painted the sides and edges of the letters and applied  scrapbook paper to the back with Mod Podge.

DCWV Valentine Letters

I like that I can mix up my letters by showing both blingy, or one blingy and one paper or both paper or….

DCWV Bling Letters 1

Then easy peasy, peeled off the backing from the bling sheet letters, applied, and trimmed with a craft knife.

DCWV Bling XO

Supplies used in this project:
  • Letters to decorate ( can use wood, paper mache, etc.)
  • DCWV Adhesive Jewel Sheet
  • Scrapbook paper ( I used DCWV Decor Noir Stack)
  • Mod Podge ( I used Matte)
  • Craft paint, scissors, craft knife

Sharing At: 


Thursday, November 20, 2014

Cornhusk Altered Candles


Sharing the details of the guest post I did for Mod Podge Rocks earlier this week. As you can see from a few projects, I'm a little obsessed with cornhusks this year! 

For this project you will need: 
  • Plain glass prayer candles ( I got mine at Dollar Tree)
  • Cornhusks ( wherever Mexican food ingredients are sold these are used for tamales) 
  • Mod Podge ( my go to is the Matte formula)
  • Dimensional Mod Podge ( I used gold) 
  • Craft Paint
  • Your choice of paper(s)
  • Ribbon
  • Coordinating paper scraps
  • Glue gun and glue sticks

Apply your choice of paper to your candle with what else? Mod Podge. I used paper from a roll I found in the paint section at the hardware store. I think it's normally used to cover glass when painting things but I love it because it's thin, absorbs the Mod Podge beautifully and is a neutral color you can paint or stamp or leave as is. Measure enough to fit around your candle. I tore the top and bottom edges of the paper because I like torn paper. I also scrunched the paper up to give it a more rustic feel. 


Apply enough Mod Podge to cover one side of the paper ( you can see the torn edges and "scrunching" ) and then attach the paper to your candle. I find it's easiest to leave the paper where it is, lay the candle on its side and then roll until it's covered. Once secure, apply another coat of Mod Podge to seal. 


While this is drying, you can make your cornhusk leaves. You may have seen that Mod Podge can be used to preserve Fall leaves. I figured it might work on cornhusks too! Cut leaf shapes ( I just did this freehand) from  your cornhusks. If they are really really stiff you can mist with water to make them more pliable. Apply Mod Podge to both sides and once dry, you can use as is or as I did which was to paint the tips with some glitter craft paint.  If they curl a bit wait until fully dry and you can flatten them out by bending them in the opposite direction.


Once the paper was dry on the candle I went around it with a piece of washi tape paper but you can also use a coordinating piece of scrapbook paper, book page etc.  Hot glue the leaves together as shown then glue to your candle. I added some scrap velvet ribbon at the top of the leaves. 


To finish, I grabbed some paper scraps from my stash and made rolled paper roses.  Waste not want not. I had some scrap cornhusk pieces so I painted those silver and glued the rose on top of them as shown. I edged the top of the candles with the ends left over from the washi paper.  Finally, I filled in the center with gold dimensional Mod Podge. 


Sharing At: 


Tuesday, November 18, 2014

Fairytales Do Come True...Guest Posting at Mod Podge Rocks


My dear readers, if you're a reader of my blog you know that next to chocolate the thing I love most is Mod Podge. Suffice it to say I am over the moon to be guest posting at the epicenter of all things Mod Podge: Mod Podge Rocks!! Sharing these altered candles featuring my Fall obsession, cornhusks. 

Thank you Amy for having me! 

Wednesday, December 18, 2013

Did You Know There Were Triple Double Oreos? Oh and Snowman Goodie Bags and Ornaments

College Treats 2013

By now my readers know that I love to send treats to College Boy whenever I get the chance. Those of you who’ve been here through "my" college journey have heard me say that college kids really do love being kids again especially during the stress of finals.

This year I went with a Snowman  / Winter theme and decided to go with dipped Oreos which are my go to treat. I actually screamed out loud in the grocery store when I saw these:

Triple Double Oreos

Triple Double Oreos! The regular filling and chocolate filling and three layers of the cookie all in one. Had to get!

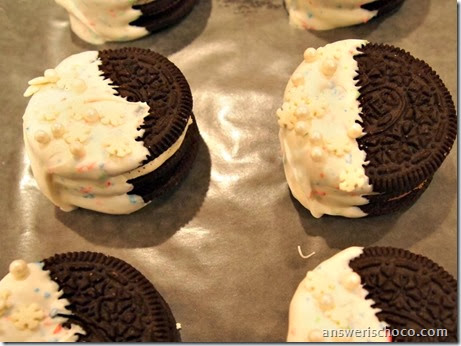
Dipped Triple Double Oreos

And because clearly there wasn’t enough sugar involved as is, I dipped them in confetti candy melts and sprinkled them with sugar pearls and snowflakes ( All cookie decorating supplies: Wilton). The look like they’ve been dipped in snow .

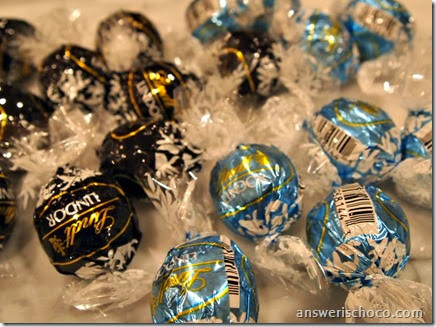
I found some Lindt Truffles at the store that matched the color scheme of the bags I had as well as the confetti candy melt:

Lindt Truffles

White chocolate and dark chocolate and the blue and black wrapping was perfect.

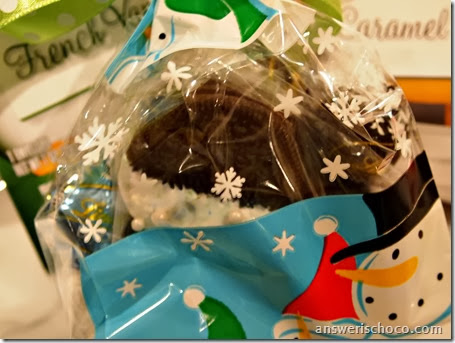
Triple Double Oreo Goodie Bags

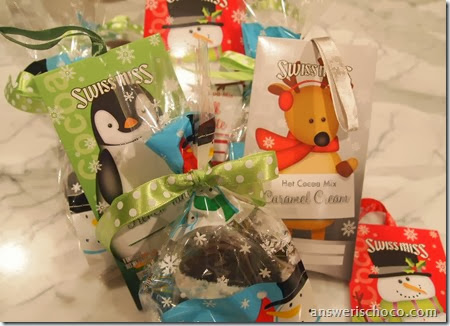
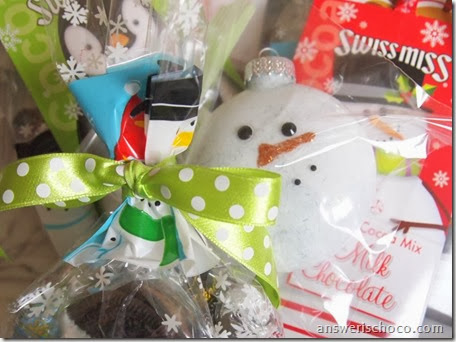
The dipped cookies and truffles went in cello snowman bags and then I picked up individual hot chocolate packages to go with each goodie bag. I finished everything off with a snowman ornament for each of the recipients.

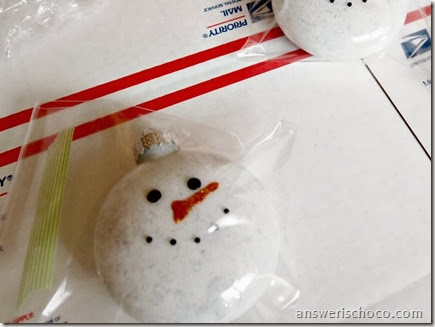
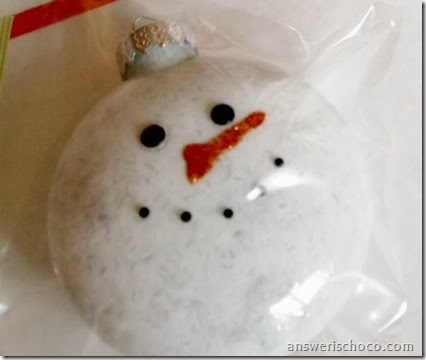
Frosty Ornaments

Snowman Treats

The ornaments were super super easy!

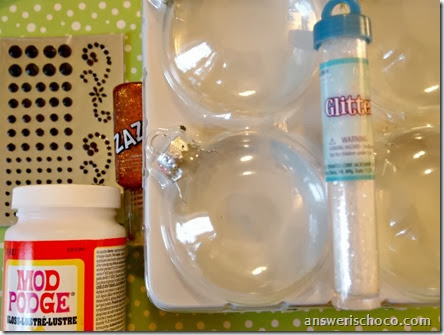
Supplies:
  • Clear Glass Ornaments ( I used the flat round ones you can find these at any craft store)
  • Mod Podge
  • Glitter
  • Self Adhesive Rhinestones
  • Glitter Glue ( I used ZAZZ Copper )

Snowman Ornament Supplies

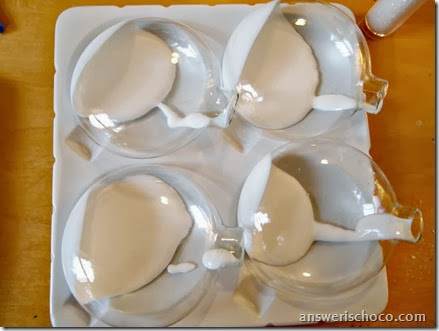
I swizzled the ornaments with a little alcohol and water to clean them and once dry poured in some Mod Podge:

Mod Podge Ornaments

Swirl your MP around inside the ornament until fully coated, pour in glitter, shake to coat. Turn your ornaments upside down in a cup to drain and dry.

I used self adhesive rhinestones for the eyes and mouth and just freehand drew the nose with the glitter glue tip. SO EASY!

Frosty Ornaments

Wednesday, December 4, 2013

Ghosts of Christmas Ornaments Past: Paper Mache Ornaments

You could say I love ornaments. Did you say it? I have all kinds but some of the ones I love the most were the simplest to make.

 One of the easiest types of ornaments to decorate are the plain paper mache ones that every craft store carries. They come in all kinds of shapes...the basic ones like circles, squares, etc can usually be found year round, and during the holidays there are lots of choices.

I thought I'd share some past projects using them . The original posts / tutorials are all linked. They are an easy and inexpensive way to add to your decor or to make as package toppers, gifts etc.


For these, I stamped directly onto the ornament and embellished with rhinestones and glitter. 


These were done the same way as the first but I added some beads to the end of the ornament. 


These use a combination of vintage sheet music, graphics from The Graphics Fairy, and Mod Podge. The only limit is your imagination!


These are a combination of the two. Mod Podged with sheet music and edged in glitter. The focals are metallic snowflake stickers. Again, you could use any combination of papers / stickers, buttons, jewels. 


These I actually used in a banner for Valentine's Day but the idea could easily be adapted for Christmas. PEACE, JOY, NOEL are all words that could be used. 


Each year when we get out the Christmas stuff I get to re-live memories of the years I made these. I hope you find some inspiration !


Sharing At:


Tuesday, October 1, 2013

Bewitchingly Vintage Witch Hats and A Giveway From Oriental Trading Company!

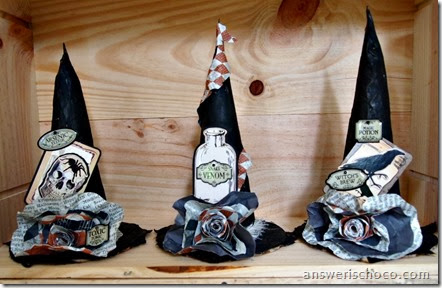
Vintagey Witch Hats

I continue to be drawn to more muted and vintage Halloween décor. I mentioned earlier that I was planning on switching up my mantle this year from Poe inspired to Shakespeare. It was the Three Witches from Macbeth that inspired this project.

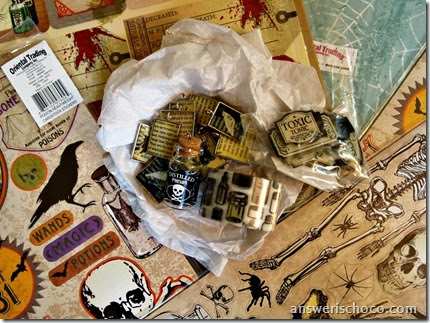
It was perfect timing when the folks from Oriental Trading Company gave me the opportunity to review and play with some of their Halloween crafting goodies. This post is sponsored by Oriental Trading Company. Project idea and opinions are mine.

Oriental Trading Company

If you're not familiar with Oriental Trading Company or haven't been there in a while, in addition to a great selection of party supplies and project kids that are great for kids, they have really really expanded their crafting supply section. I was able to go through the ordering process which was straightforward and easy, and my shipment arrived quickly.

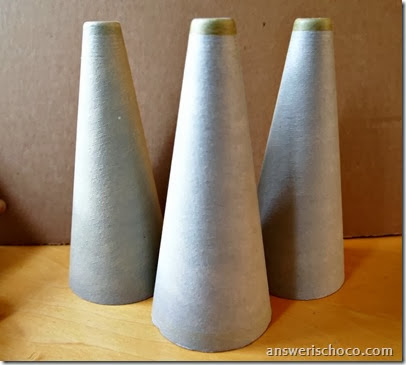
The hats themselves are not actually hats. They started out as these:

Paper Mache Cones

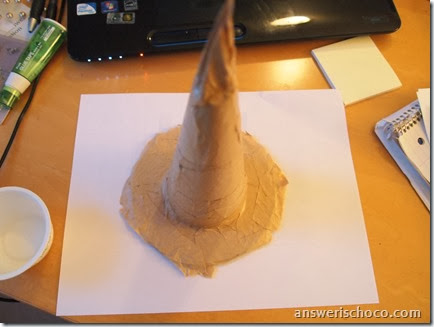
Plain paper mache cones. I covered them using torn and twisted kraft colored butcher paper and Mod Podge  and glued them to a cardboard circle base.

PA010958

Since I knew I wanted them to be old looking, I wasn’t precise and just kind of went over the form until it looked like a witch’s hat. When dry, painted with black paint. Now for the fun stuff!

Oriental Trading Co Papers

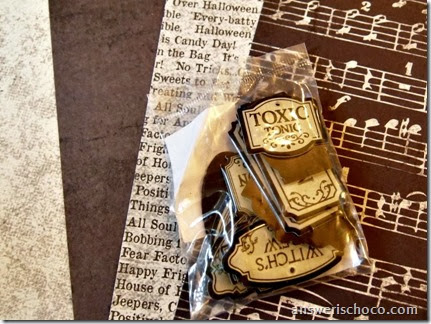
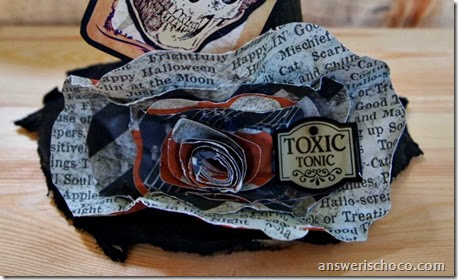
I chose some of the Halloween papers from Oriental Trading Company along with epoxy poison labels. I used the papers to make layered flowers that I scrunched and crumbled. After all, the witches from Macbeth would not be seen in pristine new hats.

Halloween Paper Flower

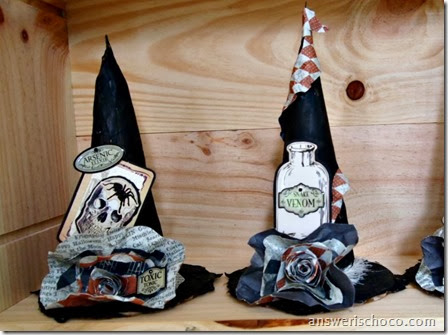
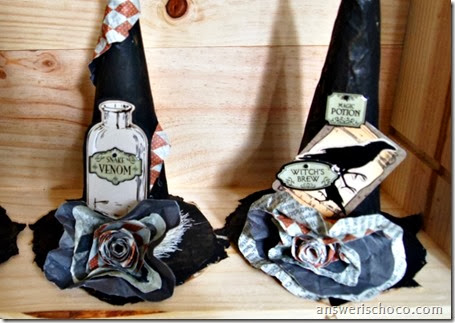
Using some of the die cuts and stickers I also received, I made accessories for my hats, keeping with a poison potion theme.

Witch's Brew Hat

Arsenic and Venom Hats

Waste not want not, so I used from of the scraps of paper to embellish the hats going around one of the cones, and one of the brims.

PA010962

Bewitching Hats

I had so much fun with these and cannot wait to play with some more of the goodies that were sent to me so check back!

The best part is,  one of you will get to play with some goodies of your own because the awesome folks at Oriental Trading Company are offering one of my readers the chance to win a $25 gift card to their site! It's easy to enter (using Rafflecopter) and winner will be announced next Tues ( 10/8). Good luck!