Showing posts with label mod podge. Show all posts

Tuesday, November 18, 2014

Fairytales Do Come True...Guest Posting at Mod Podge Rocks


My dear readers, if you're a reader of my blog you know that next to chocolate the thing I love most is Mod Podge. Suffice it to say I am over the moon to be guest posting at the epicenter of all things Mod Podge: Mod Podge Rocks!! Sharing these altered candles featuring my Fall obsession, cornhusks. 

Thank you Amy for having me! 

Wednesday, December 18, 2013

Did You Know There Were Triple Double Oreos? Oh and Snowman Goodie Bags and Ornaments

College Treats 2013

By now my readers know that I love to send treats to College Boy whenever I get the chance. Those of you who’ve been here through "my" college journey have heard me say that college kids really do love being kids again especially during the stress of finals.

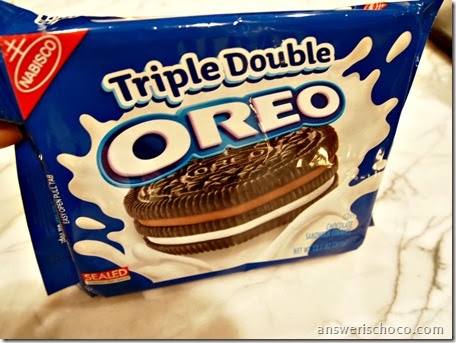
This year I went with a Snowman  / Winter theme and decided to go with dipped Oreos which are my go to treat. I actually screamed out loud in the grocery store when I saw these:

Triple Double Oreos

Triple Double Oreos! The regular filling and chocolate filling and three layers of the cookie all in one. Had to get!

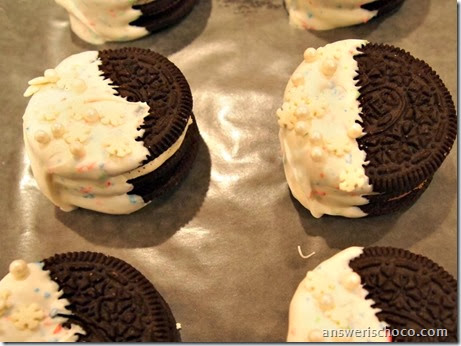
Dipped Triple Double Oreos

And because clearly there wasn’t enough sugar involved as is, I dipped them in confetti candy melts and sprinkled them with sugar pearls and snowflakes ( All cookie decorating supplies: Wilton). The look like they’ve been dipped in snow .

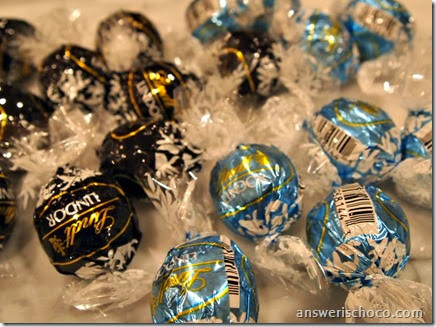
I found some Lindt Truffles at the store that matched the color scheme of the bags I had as well as the confetti candy melt:

Lindt Truffles

White chocolate and dark chocolate and the blue and black wrapping was perfect.

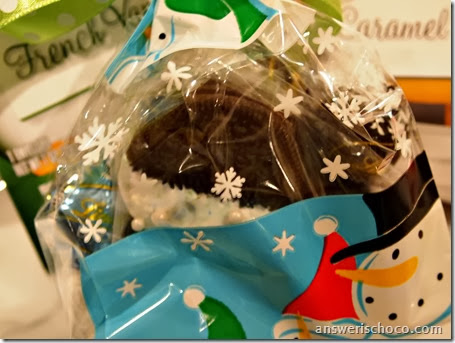
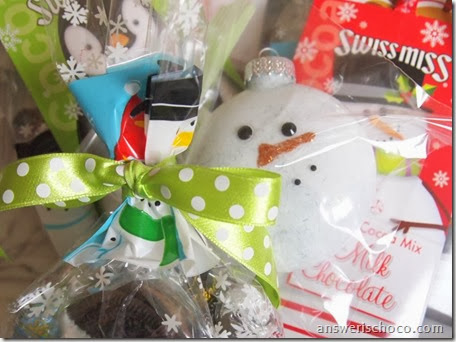
Triple Double Oreo Goodie Bags

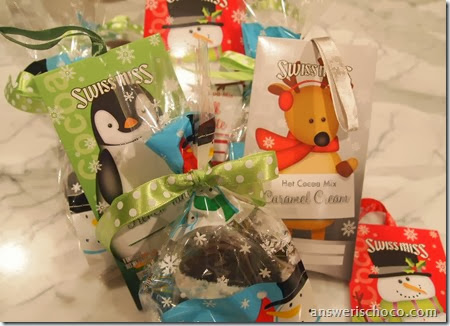
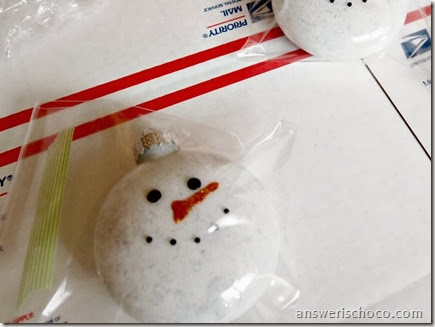
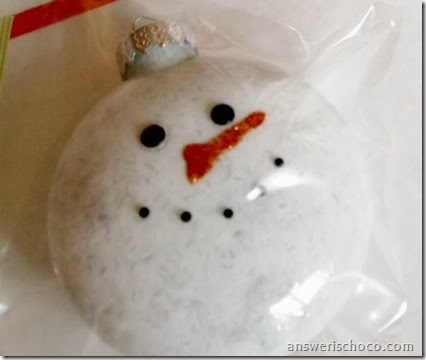
The dipped cookies and truffles went in cello snowman bags and then I picked up individual hot chocolate packages to go with each goodie bag. I finished everything off with a snowman ornament for each of the recipients.

Frosty Ornaments

Snowman Treats

The ornaments were super super easy!

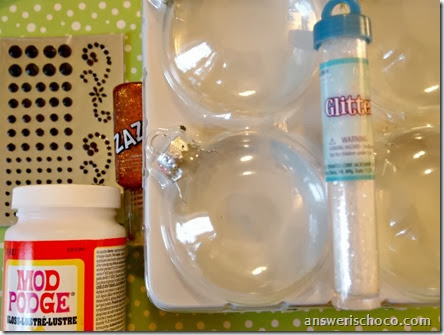
Supplies:
  • Clear Glass Ornaments ( I used the flat round ones you can find these at any craft store)
  • Mod Podge
  • Glitter
  • Self Adhesive Rhinestones
  • Glitter Glue ( I used ZAZZ Copper )

Snowman Ornament Supplies

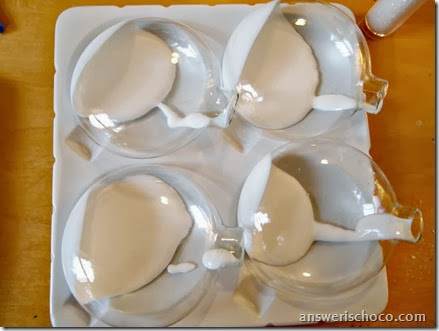
I swizzled the ornaments with a little alcohol and water to clean them and once dry poured in some Mod Podge:

Mod Podge Ornaments

Swirl your MP around inside the ornament until fully coated, pour in glitter, shake to coat. Turn your ornaments upside down in a cup to drain and dry.

I used self adhesive rhinestones for the eyes and mouth and just freehand drew the nose with the glitter glue tip. SO EASY!

Frosty Ornaments

Wednesday, December 4, 2013

Ghosts of Christmas Ornaments Past: Paper Mache Ornaments

You could say I love ornaments. Did you say it? I have all kinds but some of the ones I love the most were the simplest to make.

 One of the easiest types of ornaments to decorate are the plain paper mache ones that every craft store carries. They come in all kinds of shapes...the basic ones like circles, squares, etc can usually be found year round, and during the holidays there are lots of choices.

I thought I'd share some past projects using them . The original posts / tutorials are all linked. They are an easy and inexpensive way to add to your decor or to make as package toppers, gifts etc.


For these, I stamped directly onto the ornament and embellished with rhinestones and glitter. 


These were done the same way as the first but I added some beads to the end of the ornament. 


These use a combination of vintage sheet music, graphics from The Graphics Fairy, and Mod Podge. The only limit is your imagination!


These are a combination of the two. Mod Podged with sheet music and edged in glitter. The focals are metallic snowflake stickers. Again, you could use any combination of papers / stickers, buttons, jewels. 


These I actually used in a banner for Valentine's Day but the idea could easily be adapted for Christmas. PEACE, JOY, NOEL are all words that could be used. 


Each year when we get out the Christmas stuff I get to re-live memories of the years I made these. I hope you find some inspiration !


Sharing At:


Tuesday, October 1, 2013

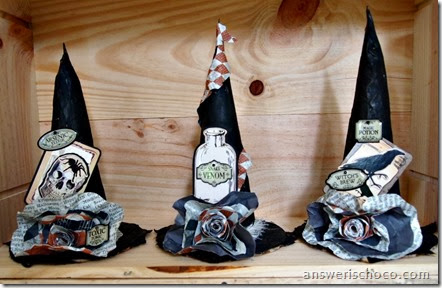
Bewitchingly Vintage Witch Hats and A Giveway From Oriental Trading Company!

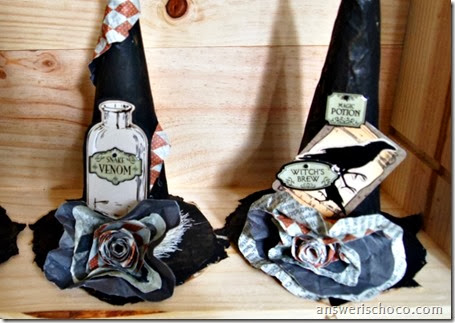
Vintagey Witch Hats

I continue to be drawn to more muted and vintage Halloween décor. I mentioned earlier that I was planning on switching up my mantle this year from Poe inspired to Shakespeare. It was the Three Witches from Macbeth that inspired this project.

It was perfect timing when the folks from Oriental Trading Company gave me the opportunity to review and play with some of their Halloween crafting goodies. This post is sponsored by Oriental Trading Company. Project idea and opinions are mine.

Oriental Trading Company

If you're not familiar with Oriental Trading Company or haven't been there in a while, in addition to a great selection of party supplies and project kids that are great for kids, they have really really expanded their crafting supply section. I was able to go through the ordering process which was straightforward and easy, and my shipment arrived quickly.

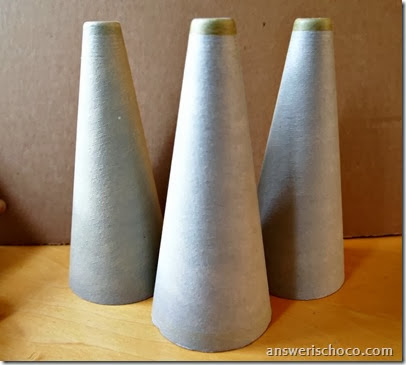
The hats themselves are not actually hats. They started out as these:

Paper Mache Cones

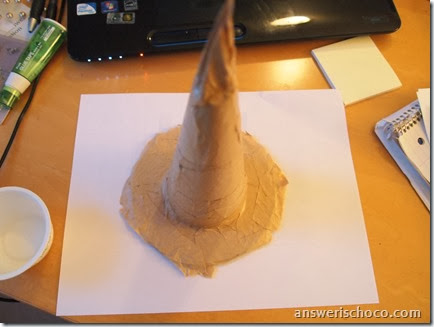
Plain paper mache cones. I covered them using torn and twisted kraft colored butcher paper and Mod Podge  and glued them to a cardboard circle base.

PA010958

Since I knew I wanted them to be old looking, I wasn’t precise and just kind of went over the form until it looked like a witch’s hat. When dry, painted with black paint. Now for the fun stuff!

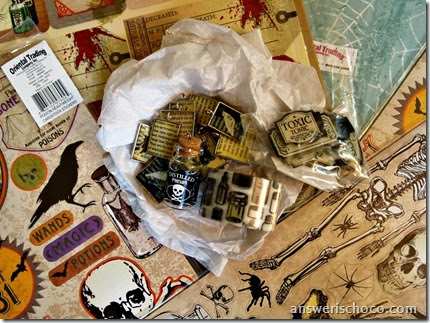
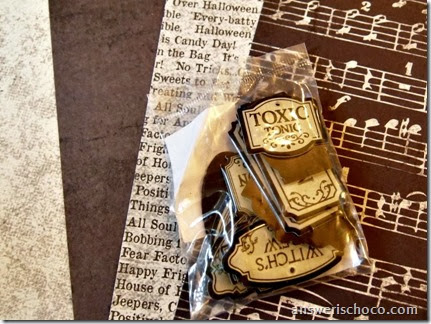
Oriental Trading Co Papers

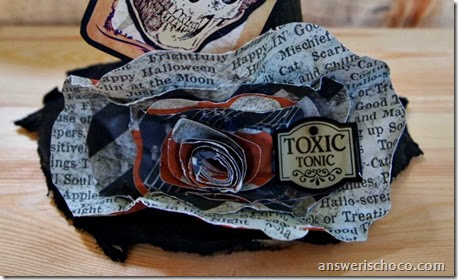
I chose some of the Halloween papers from Oriental Trading Company along with epoxy poison labels. I used the papers to make layered flowers that I scrunched and crumbled. After all, the witches from Macbeth would not be seen in pristine new hats.

Halloween Paper Flower

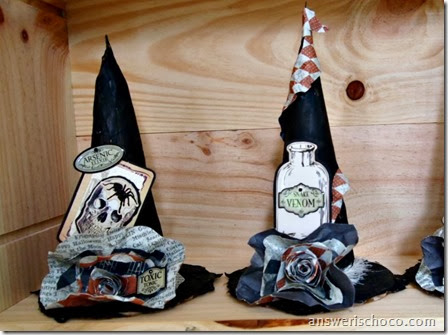
Using some of the die cuts and stickers I also received, I made accessories for my hats, keeping with a poison potion theme.

Witch's Brew Hat

Arsenic and Venom Hats

Waste not want not, so I used from of the scraps of paper to embellish the hats going around one of the cones, and one of the brims.

PA010962

Bewitching Hats

I had so much fun with these and cannot wait to play with some more of the goodies that were sent to me so check back!

The best part is,  one of you will get to play with some goodies of your own because the awesome folks at Oriental Trading Company are offering one of my readers the chance to win a $25 gift card to their site! It's easy to enter (using Rafflecopter) and winner will be announced next Tues ( 10/8). Good luck!

Monday, September 30, 2013

Birthday Present Idea: Card Kit In An Altered Box


Not only am I luck enough to share a birthday month with two of my oldest and bestest friends, as fate would have it, they share the same date! They both get to remind me that I am in one case, a few days older and in another, a year older, but September is our month. They also share the date with another friend of mine from work. 

Like me, one of my besties also celebrated her 32nd birthday for the 18th time. Every year when we get together to celebrate, she tells me that she re-purposes many of the cards I send her throughout the year into her own ( fabulous) cards. So I decided last year, I would make her a "card kit in a box" to include all kinds of goodies she could use to make her own cards, re-purpose mine etc. 

I started with a cigar box and for no reason other than I did, went over all of the edges with silver tape before I Mod Podged on the paper. Michaels recently had paper stacks on sale for $5 and I picked up a great one by Crate Paper in pinks, oranges, neutrals and browns. 


Since all of the papers coordinated, I just randomly chose patterns and tore pieces, used scraps did whatever felt right. Then I added some black and clear stickers in a vintage theme. 


To finish it off, I cut layers of flowers using a Tim Holtz die, and then used a scrap of the paper along with a Tim Holtz "Ornate Plate" and Glossy Accents to make a faux closure for the box. 


I filled the box with blank cards, embellishments, baker's twine and papers so she can play. I made her birthday card using some of the same papers and some KandCo 3D birthday stickers:


She and I celebrated on Saturday by going to one of my favorite places, Shipwreck Beads.  which is a creative person's candy store. Since we were celebrating a milestone birthday. I picked up these mini glittered top hats for us to wear ( and yes, we did wear them and no, I'm not showing you!) 


I used the same colors and papers to make birthday cards for my two other special birthday buddies.


Tuesday, May 14, 2013

Mod Podged Mini Dress Form Photo Prop

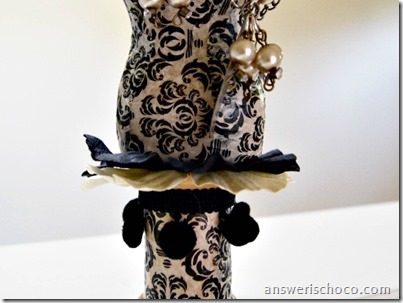
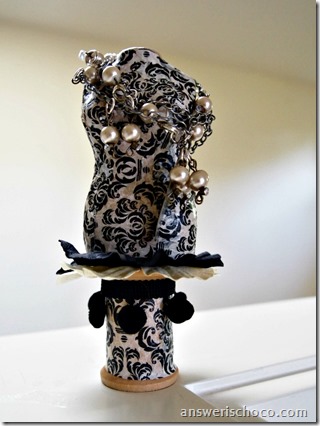
Mini Dress Form Photo Prop

Being a jewelry maker, I’m always looking for different ways to photograph my creations. I got this idea when I stumbled upon mini paper mache dress forms in the 2 for $3 section at Michaels.
For this project you will need:
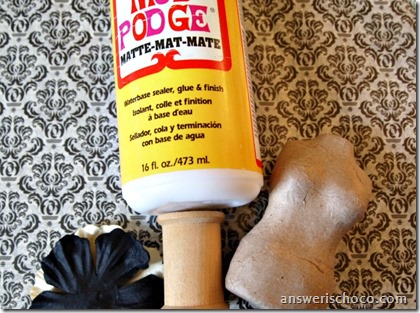
  • Mini Paper Mache Dress Form
  • Mod Podge ( I used matte)
  • Wood Spool
  • Printed Tissue ( I used a damask print, 5 12x12 sheets to a pack by Recollections also at Michaels)
  • Coordinating Trim and Paper Flowers
Mod Podge Mini Dress Form

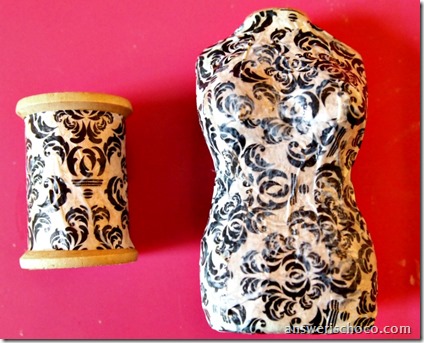
Cover your spool and dress form with Mod Podge; apply paper. When I’m working with tissue paper I like to “pre-scrunch” it since it’s likely to get wrinkly anyway. I find this keeps the wrinkles uniform. You can be exact and line up the patterns, or you can be me.

Damask Tissue Mini Dress Form

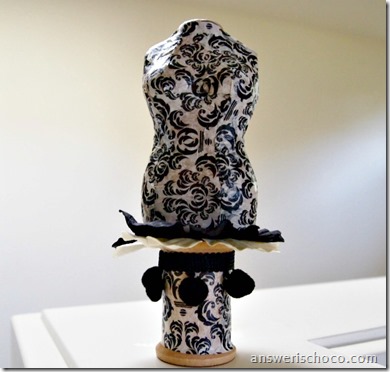
I trimmed the top of my spool with some leftover pom pom trim, hot glued two coordinating paper flowers to the top of the spool, glued the dress form on and DONE!

Mod Podge Dress Form Jewelry Holder

Now I have another little photo prop to use in my posts.

Dress Form Photo Prop

Sharing At:

Wednesday, April 10, 2013

Beachy and Botanical Altered Cigar Box

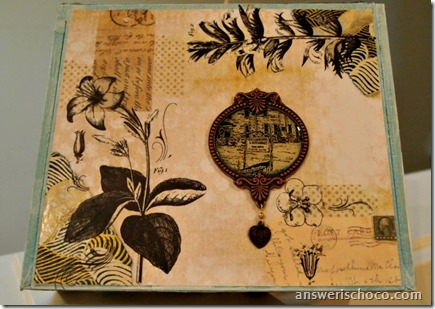
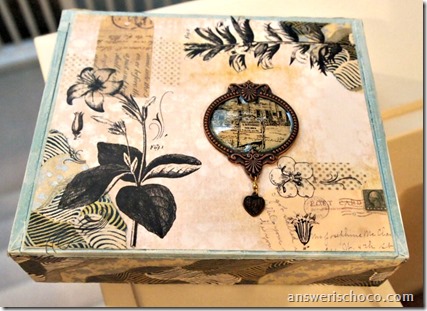
Altered Beach and Floral Cigar Box

I wanted something special to hold the earring and bracelet sets I shared in my previous post.

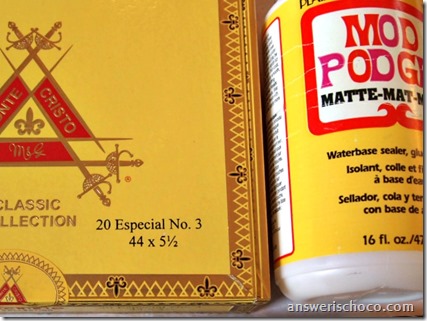
Not long ago, Mr. Chocolate came home with several empty cigar boxes for me ( and came home with MORE again this week!)  I grabbed one of them and got to work.

For this project you will need:
  • Cigar or wood box to alter
  • Paint ( I used Ceramcoat Paradise and Martha Stewart Wedding Cake)
  • Decorative papers (I used a piece of scrapbook paper and some washi paper I collect but rarely ever use)
  • Embellishments (I used botanical rub ons by K&Co, postage themed tag stickers, self adhesive copper frame, and coordinating washi tape)
  • Mod Podge
  • Clear drying dimensional glue

Altered Beach Box

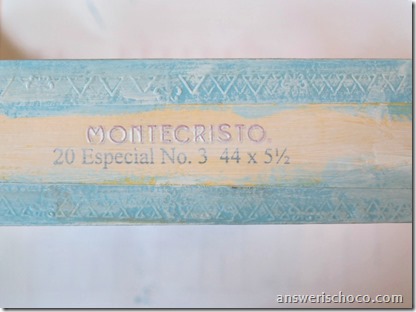
I started by painting the edges of my box with the beachy blue ( Paradise). I didn't sand or remove any of the paper that's on top of the wood. I liked the texture. Just painted right over it.

Altered Beach Box Dry Brush

After that was dry, I dry brushed it with the white paint. I was going for a weathered beachy feel.

Altered Beach Box Cover

I measured my scrapbook paper ( top, bottom, and inside lid) and the washi paper ( sides) and then applied them to the box with Mod Podge. Added scraps of the washi paper to the corners of the top and then added the postal tag stickers and botanical rub-ons.

Altered Beach Box K&Co Frame

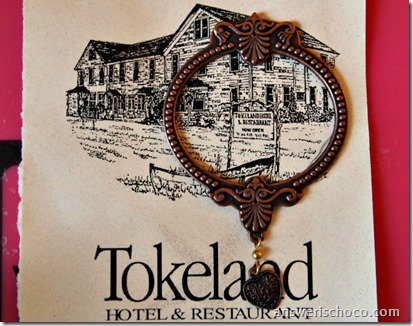
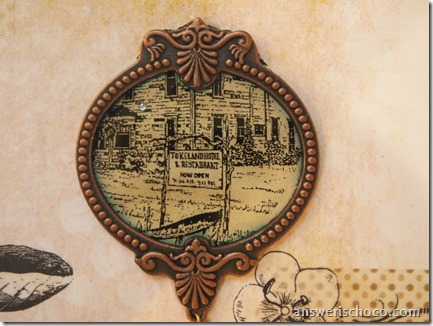
For the focal point of my box, I used the brochure from the hotel owned by the recipients. Placed an adhesive copper frame over the section I wanted to feature and added some super glue to get it really good and stuck. Trimmed using an XActo knife and filled with clear dimensional adhesive to give it a 3-D  look.

Altered Beach Box Dimensional Glue

Ooops I got a bubble in there but oh well. If you catch those before your glue is dry, you can pop them with a pin. Once the glue was dry, I superglued it to the top of the box.

Altered Beach Box Inside Lid

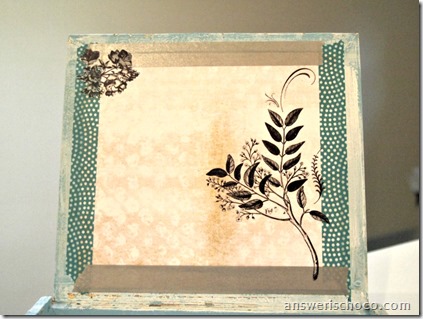
I finished up the box by applying the same scrapbook paper to the inside of the lid, added more washi tape and a couple more of the rub ons.

The owners of the hotel are avid gardeners so I thought beachy and  botanical worked out.

Sharing At: