Showing posts with label Thanksgiving. Show all posts

Wednesday, November 13, 2013

The Let's Put More Chocolate In Thanksgiving Roundup

When you think of "chocolate" holidays, I'll bet you Thanksgiving is not at the top of the list. Valentine's Day, Easter, Halloween, Christmas, check check and check. Hearts, Eggs, Pumpkins, Trees... easy to find. Thanksgiving? Not so much. What's a chocoholic to do? Most years I just complain about the lack of chocolate. This year I asked some bloggy friends to share some of their chocolate related Thanksgiving goodies and I also rounded up a few from around the internet.

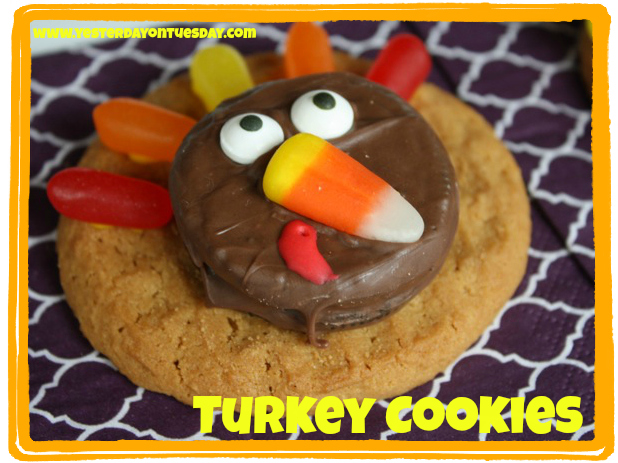
Malia from Yesterday on Tuesday shared these fun, gobble worthy ( and no bake!) Turkey Cookies which would be fun for younger guests:

Thanksgiving Treats


I am not a huge fan of pumpkin. I bake pumpkin pie and don't eat it. But Jessica from Mad In Crafts has a recipe I may just have to try and which I love just for the name: 

One Pan Chocolate Pumpkin Thanksgiving Wacky Cake

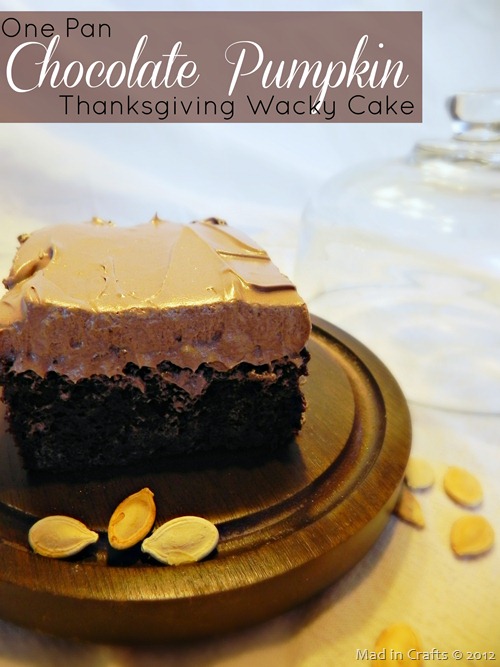
Say that three times fast "One Pan Chocolate Pumpkin Thanksgiving Wacky Cake". Look at that fudgy goodness! I may just be able to have my pumpkin and eat it too :) 

Viv, from The V Spot reminded me of an old episode of Friends where Monica tried to bring some more chocolate to Thanksgiving. I was right there with you Monica.  I think Viv's Mocha Brownie tart would be a great addition to any dessert table don't you? 


Do you have any leftover Halloween candy? Natalie from The Creative Mom has a wonderful way to use it up and decorate your Thanksgiving table with festive placecards. 


Here are a few other ideas I thought were fun to share.

mld104111_1108_candyybar.jpg
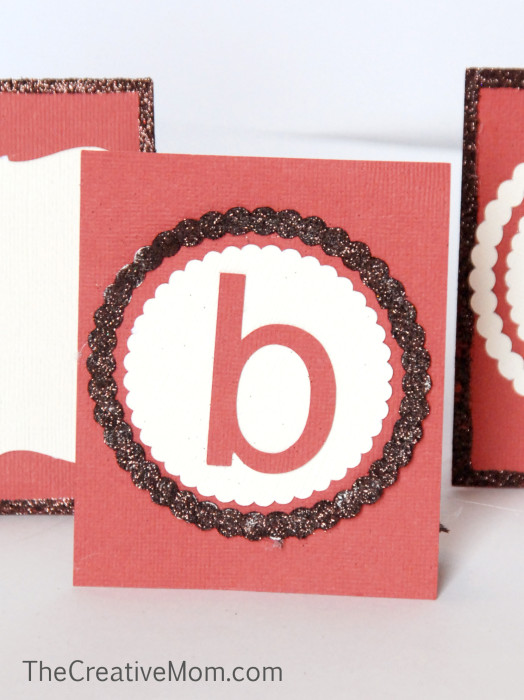
Your favorite candy bar can be wrapped up in this downloadable label from Martha Stewart (see Martha, we bloggers still reference you!)  and serve double duty as a place card. 


Pumpkin Spice Fudge Brownies - The chocolate lover's way to celebrate fall!  http://backforsecondsblog.com  #brownies #pumpkin #pumpkinspice

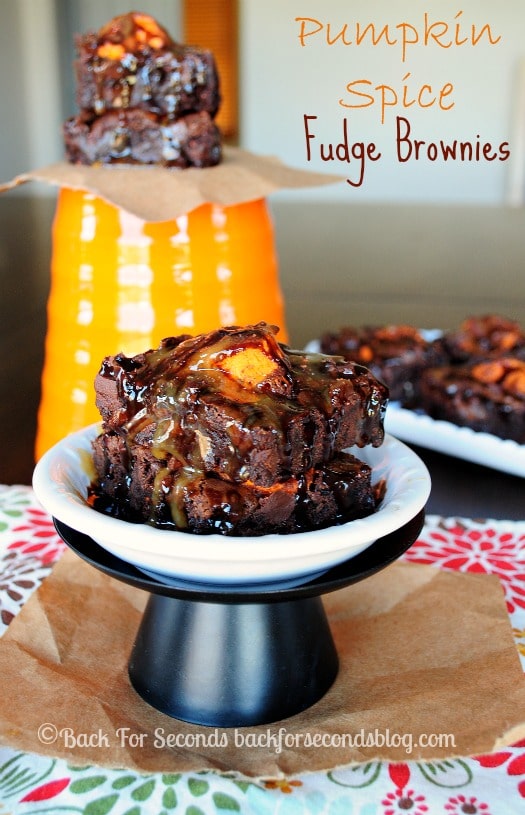
Stephanie from Back For Seconds blog guarantees you'll be back for seconds of these Pumpkin Spice Fudge Brownies. 

Chocolate Pecan Pie4

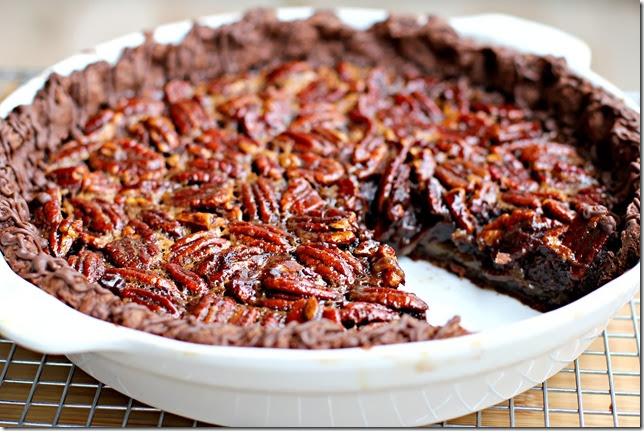
I stumbled upon a new blog I need to follow called Sugarplum where I found this Double Chocolate Pecan Pie. YUM!

I hope you've found some chocolate inspiration for your Thanksgiving table. 


Thursday, November 7, 2013

BFF Open House Link Party #130

The Answer Is Chocolate

Was Halloween already a week ago? November is already flying by! Just three weeks until Thanksgiving and the start of Hanukkah!  Then madness begins. Here are a few features from the last two parties ( kinda oopsed last week). 

An ugly light fixture gets a makeover with some paint, brushes, and painters tape. Easy!

With holiday entertaining season upon us, it's time to spruce up the homestead. Laura from The Shed has got a fantastic before and after  on some light fixtures that had seen better days ( I've got some of those too). Fantastic results!


Whether you need some additional seating or just a place to put your feet up, Kristina from ReMade Simple has a wonderful pouf idea using the sewing machine she got at Ikea. I didn't even know they sold sewing machines! 

Traditional apple pie got a make-over! Apple pie cups with cinnamon streusel topping from Roxanashomebaking.com

It's apple pie time! OK not that you can't have apple pie all the time but this time of year is what I associate with apple pie the most. Love these apple pie cups from Roxana's Home Baking. Bite sized perfection. 


I say this every year. Thanksgiving needs more chocolate. ( Um Reeses, you can make a heart, a tree, an egg...you can't make a turkey or a leaf? ) Here's a cute idea to bring chocolate to your Thanksgiving table . Hershey's Nugget Turkeys from The Pin Junkie!

OK now time to see what everyone's been up to lately!


Tuesday, October 29, 2013

Brown and Silver Paper Wreath

Paper Wreath

Mr. Chocolate and I were in a shop the other weekend and I saw a really simple but elegant wreath kit that inspired this project. He knows me so well because he said " I can see you thinking how you can make that". HA!

For this project you will need:
  • Wreath base ( I cut mine from a scrap of cardboard)
  • 6 sheets coordinating 12x12 paper
  • Strong double sided tape
  • Millinery paper roses
Cardboard Wreath Base

I cut the wreath base from a scrap piece of cardboard using a plate as a template and a lid for the inner circle.

PA291252

I chose metallic brown, grey and silver and white patterned  papers from my stash and made a template to use so all the pieces would be uniform. While I have electronic digital cutters, I just felt like doing this low tech. Cut my 12x12 papers into 6x3 pieces, folded in half, traced my template on the fold and then cut them out. The fold in the middle gives the wreath some depth.

Paper Wreath FIrst Layer

Using double sided tape, I went around the inner circle adhering the leaves as shown. You can see I wasn’t precise but it didn’t matter because you’ll add two more “layers” of leave which will cover the gap.

Paper Wreath Layers


When I got to the third (innermost) layer, I folded the ends of the leaves through the opening and taped the ends to the back of the wreath form. I originally thought I’d stop there then decided I wanted some more depth. I had paper roses left over from my “Cheap to Chic Pumpkin” project and since this was the same color palette, voila! Hot glued those around the center.


Wreath Center Paper Roses

Since I already had all my materials it’s hard to estimate a cost but fairly sure this was under $4 with the most expensive element being the silver patterned paper. I get most of my papers when there's a 5 for $1 sale at Michaels or JoAnns, so I'd splurged on that paper at a scrapbook show. Yes I do too know what's in my stash Mr. C!

Brown and Silver Wreath and Pumpkin

Sharing At:


Thursday, October 24, 2013

BFF Open House Link Part #128

The Answer Is Chocolate

Can you believe Halloween is a week from today? Guess what? I've got something even scarier. Two months from today is CHRISTMAS EVE eeek!!! Hanukkah comes early this year converging with Thanksgiving...barely one month from now. Scared? Mwaaaaaahhhhhhh. 

Now that I have you terrified, let's see some highlights from last week's party :) 


Amaranth and Kale shared these wonderful brown paper bag leaves. Would you have guessed that these started out as brown paper bags? 


Wouldn't this coffee filter and burlap wreath look great next to a garland of those paper bag leaves? Go visit Crafts a la mode for the how to. 


Still looking to add to your Halloween decor ( or pin for next year)? Check out these no sew pillow covers from 24 Cottonwood Lane. NO SEW!

And this week's chocolate feature is courtesy once again of Karyn from the aptly named Dieter's Downfall


OK now for this week's treats!


Wednesday, November 21, 2012

Wishing You A Happy Thanksgiving

Gratitude

When we host Thanksgiving, I like to have a quote expressing gratitude, thankfulness etc. as part of my place setting. I used PicMonkey to create this one.

Wishing you all a day filled with family, friends, food, love, and happiness. Grateful for all of my readers and BFFs here.

Easy Cranberry Sauce From Scratch

Easy Cranberry Sauce

Whenever I tell people I make cranberry sauce from scratch they think I’m nuts (the reason they give me is the making from scratch part anyway) but I can’t think of an easier thing to make.  So I’m sharing here in case anyone thinks this is really hard. Of course when you make it and people like it, it was really really really hard. You know, like you picked each berry by hand hard.

I shared the recipe straight from the Ocean Spray website last year but this year, I remembered to take pictures while I was making it.

For this you will need:
  • Fresh or frozen whole cranberries. I used Ocean Spray
  • Sugar
  • Water
  • Orange peel ( optional)
You need 1C Sugar for each bag of berries. I used two bags so 2C. Same amount of water. Put those in the pot, bring pot to boil. I like to add fresh orange peel to mine:

Cranberry Sauce Sugar
Photographed here before adding the water.

Once boiling, add berries. We have lots of cranberry bogs here in WA and we pass them on the way to visiting my father in law. So if you see this on your bag, we probably drove by them!
Ocean Spray Cranberries

Mr. Chocolate loves cranberry sauce as its own dish. Not as a condiment. He will literally eat a bowl of it. So this time of year I stock up and throw bags of berries in the freezer.

Cranberries 1

Here they are in the sugar/water/orange peel. You want them to come to a boil and they’ll get a bit foamy. You do want to watch this pot boiling though because the berries will foam up and can bubble over. 

Cranberries foamy

As they bubble, they’ll turn a darker shade of well, cranberry. I let them go until they just about reach the top of the pot and then turn off the heat. Let them come to room temp or mostly cool off. Go make crafts.

Cranberry Sauce

Once they’re cooled down, pour into bowl, cover, refrigerate. I leave the orange peel in until I ladle into my serving dish to let the flavor set.

Seriously. Easy. And the recipe’s from the back of the Ocean Spray bag!

Monday, November 5, 2012

BFF Open House Link Part #77 Wrap Up and Features

Thanks to everyone who linked up to last week’s party ! You all are way ahead of me on Thanksgiving and Christmas ideas! Here are just a few to share:

Let’s start with this gorgeous burlap wreath from My CreativiT:


I am in love with all of those gorgeous ruffles!

Would you believe these leaves are made from brown packaging paper? Me either!


Go visit Twigg Studios to learn how to make some of your own.


Jenn, over at One Thrifty Chick, gave out mulling spices to teachers for Halloween. I love this idea as something you could send home with guests at Thanksgiving ( or take as a hostess gift).

Rachel over at Holy Craft shared how to make these lovely twine and book page pumpkins:


Jumping ahead to Christmas, could this be more adorable? The idea and the model?  Visit Cherished Bliss to get the hat pattern. You’re on on your own for the model.

Adorable FREE Stocking Hat Crochet Pattern via cherishedbliss.com

Awwwwwww!

And finally, this week’s chocolate feature. OMG:

Cookie Dough Truffle Cake Balls

Cookie Dough Truffle Cake Balls from Lemons for Lulu. There are no words to describe how yummy these look!

Thanks again for choosing to share your creativity here at The Answer Is Chocolate. Make it a creative week!

Wednesday, September 19, 2012

Mod Podge and Tissue Paper Pumpkin Tutorial

Mod Podged Tissue Papered Pumpkin

I’m finally getting around to some Fall projects. I’m a late bloomer. This is something that’s super easy and can stay out from Halloween through Thanksgiving. You will need:
  • Paper Mache Pumpkin (the one I used is about 6 inches across)
  • Tissue paper (I used 2 sheets, 12x12)
  • Mod Podge
I started with a paper mache pumpkin I found on sale after season last year. I’ve seen them this year at Michaels, JoAnn’s etc.

Paper Mache Pumpkin

On one of my recent Michaels trips, I discovered packs of Recollections printed tissue papers in the scrapbook paper aisle. They were $1.99 for a pack of 5 regular price.

Recollections TIssue Papers

For this project, I chose the script paper. This is a good project to do if you’re in a bad mood. Not saying that I was, just saying. Why? Because you get to scrunch and tear stuff! Tear all four edges of your papers first. Then:

Recollections Paper Pumpkin

Wad, scrunch, ball up your paper. Unwad, then tear into smaller pieces:

Recollections Paper Pumpkin 2

The reason you’ll want to have torn your edges first is that they blend better when podging.

Mod Podge Pumpkin

Apply Mod Podge ( I used Matte Finish) to the back of your paper pieces, then apply your paper to the pumpkin. Since tissue paper is thin you don’t want to oversaturate but it’s also very forgiving and gets in the creases of the pumpkin unlike stiffer paper would.

I was conscious but not OCD about making sure the script was all going the same way.

Mod Podge Tissue Paper Pumpkin

In some spots, paper got layered  making things more opaque, and in others it didn’t and I liked the effect of some of the naked pumpkin showing through.

Tissue Paper Pumpkin

Once you’ve got all of your paper on, coat with Mod Podge and just wait for it to dry.  I’m working on another variation so check back soon.

Sharing At: