Showing posts with label Papercrafting. Show all posts

Monday, December 18, 2017

TagMania! Gift Tags Gone Wild


Every year I make gifts of gift tags. They're something everyone can use, easy to mail since I have friends all over,  and a great way for me to use up scraps.  I love seeing these small bits come together and never really have a plan.  So far I've made 9 sets between Christmas and Hanukkah lol. I think I have a problem!


There is the traditional collection with lots of red and green ( or burgundy and cream) with some splashes of black that remind me of Santa's suit.  This year, I added tiny jingle bells to some of them. 


But since not everyone decorates in traditional colors, there are the contemporary sets with lots of bright colors and silver and gold. 


They're easy to package as gifts. Perfect for girlfriend or hostess gifts. 


They're perfect for when you find a bag of last year's tags and ribbon you saved because you're a maker and you re-invent things. 


They're great for when you saved a branch from the greens you cut from your yard to add to your Christmas decor and you get an aha moment and make a wall hanging in 5 minutes and you get to give your husband that look that says "you doubted me ? " 


OK my name is Carol and I think I may have a slight tag problem.


Monday, March 6, 2017

Scrappy Spring Tags and a Giveaway


Who else is excited that it's almost Spring? Not that it's been a particularly bad Winter (OK wettest February on record in the PNW)  but there's something about Spring...the sense of freshness and renewal (probably associated with longer brighter days and things sprouting from the ground) that's invigorating. 

One of my 2017 challenges to myself was to work outside my usual color palette. Another was to use up things I have in my stash, especially when it comes to my paper collection and paper scraps. Those came together this weekend when I worked on some tags just because that was what I was in the mood to do. No rhyme. No reason. 


Aren't they Spring-y? 


I went through my paper scraps and pulled out a bunch of coordinating Spring-y scraps to play with. 


Got out my favorite tool for small projects, the Xyron 2.5 sticker maker, and cut out some tags on my Silhouette. 

I think the reason I love making tags so much I there's no plan. I just like tearing papers, seeing what goes together, embellishing them w/ bits and pieces. 


I used some paper flowers, punched some more from glitter paper scraps, added bits of washi tape ( glittery and otherwise) and some adhesive pearls. I think I'm happiest when I'm making for the sake of making. Ya know? These put me in a really good mood. And what's the best thing to do when you're in a good mood? SHARE! 

So I'm giving them away. Two sets of eight. With Spring holidays like Easter and Mother's Day approaching, or Spring birthdays, showers etc. who can't use a tag to dress up a gift? 

Here's how to enter. The giveaway will run through Friday 3/17! 


Wednesday, December 16, 2015

Tagmania: Pretty and Practical Gifting


Being addicted to paper as I am, I hate to see any beautiful papers go to waste. So I've had a lot of fun making gift tags to give as gifts figuring who can't use more gift tags this time of year? I know I've wrapped many a present and then realized I had no way to personalize it / indicate the recipient. 

This is one of those things that the more you make, the more you want to make! 

Simple process: 
  • Gift tags (you can buy packages of ready made tags or cut your own. I cut mine using my Silhouette)
  • Paper scraps
  • Random embellishments : rhinestones, washi tape, punched shapes buttons, etc. ( this is a great way to use up onsie twosie leftovers)


These are some I made for a Hanukkah gift. I cut the dreidels using my Silhouette, randomly covered them w/ embossing ink and then embossed with gold embossing powder. 


One friend of mine decorates her tree in bright greens, pinks, purples so I coordinated these tags around those colors. To embellish I used punched glitter stars, snowflakes, sequins, and glitter ribbon and had some Japanese Mizuhiki cord in my stash that coordinated. 


Tip: I apply the papers slightly wider than the tag and then trim the edges all at once so they're uniform. 


I used the same idea for these in black, white and green, using white Mizuhiki cord on some. 


After seeing these, Mr. Chocolate asked "where are our tags" so guess what I'm working on ? 


Tuesday, October 29, 2013

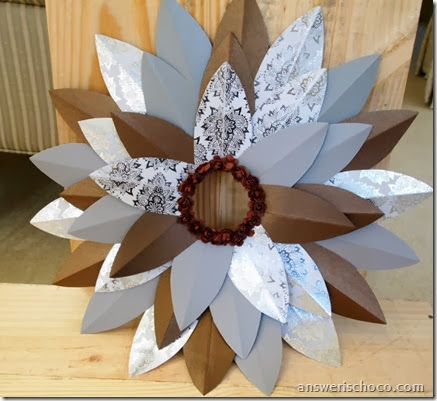
Brown and Silver Paper Wreath

Paper Wreath

Mr. Chocolate and I were in a shop the other weekend and I saw a really simple but elegant wreath kit that inspired this project. He knows me so well because he said " I can see you thinking how you can make that". HA!
For this project you will need:
  • Wreath base ( I cut mine from a scrap of cardboard)
  • 6 sheets coordinating 12x12 paper
  • Strong double sided tape
  • Millinery paper roses
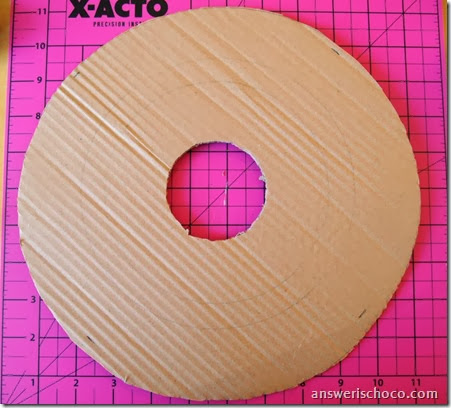
Cardboard Wreath Base

I cut the wreath base from a scrap piece of cardboard using a plate as a template and a lid for the inner circle.

PA291252

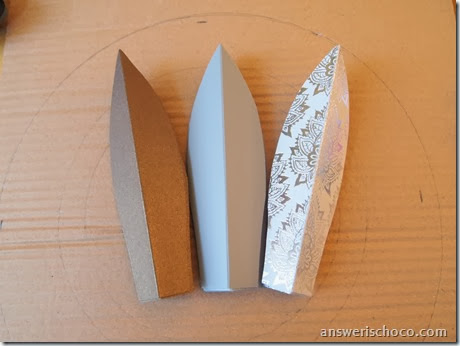
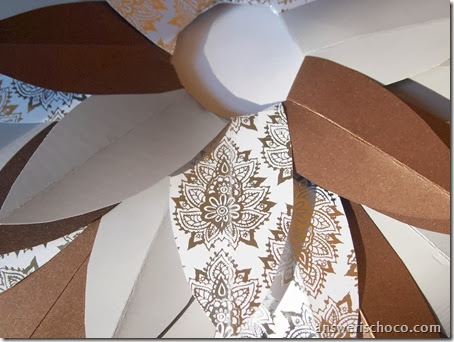
I chose metallic brown, grey and silver and white patterned  papers from my stash and made a template to use so all the pieces would be uniform. While I have electronic digital cutters, I just felt like doing this low tech. Cut my 12x12 papers into 6x3 pieces, folded in half, traced my template on the fold and then cut them out. The fold in the middle gives the wreath some depth.

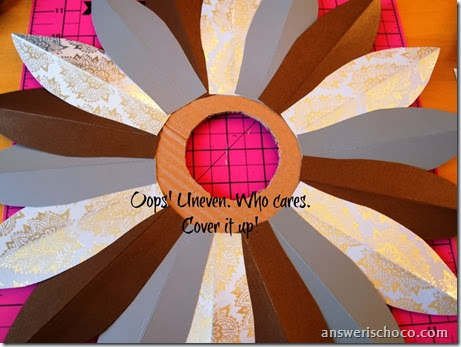
Paper Wreath FIrst Layer

Using double sided tape, I went around the inner circle adhering the leaves as shown. You can see I wasn’t precise but it didn’t matter because you’ll add two more “layers” of leave which will cover the gap.

Paper Wreath Layers


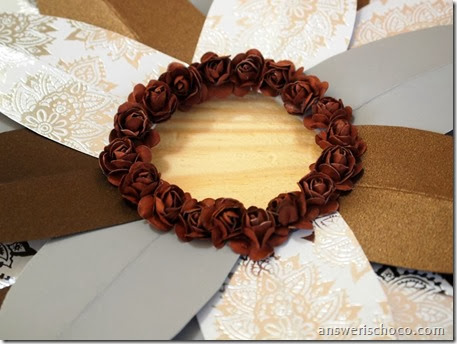
When I got to the third (innermost) layer, I folded the ends of the leaves through the opening and taped the ends to the back of the wreath form. I originally thought I’d stop there then decided I wanted some more depth. I had paper roses left over from my “Cheap to Chic Pumpkin” project and since this was the same color palette, voila! Hot glued those around the center.


Wreath Center Paper Roses

Since I already had all my materials it’s hard to estimate a cost but fairly sure this was under $4 with the most expensive element being the silver patterned paper. I get most of my papers when there's a 5 for $1 sale at Michaels or JoAnns, so I'd splurged on that paper at a scrapbook show. Yes I do too know what's in my stash Mr. C!

Brown and Silver Wreath and Pumpkin

Sharing At:


Saturday, November 24, 2012

Easy Christmas Countdown Banner

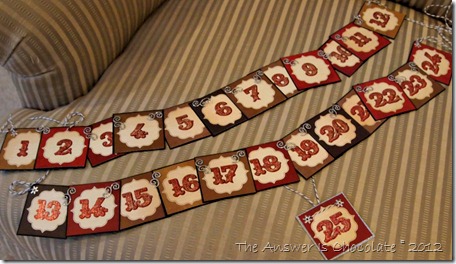
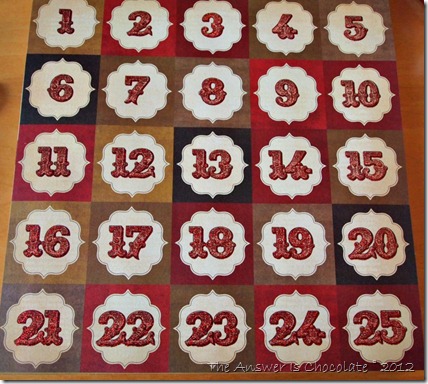
Coundown Banner

I haven’t hung this up yet since I haven’t decided where it’s going but thought I’d share this quick Christmas Countdown banner.

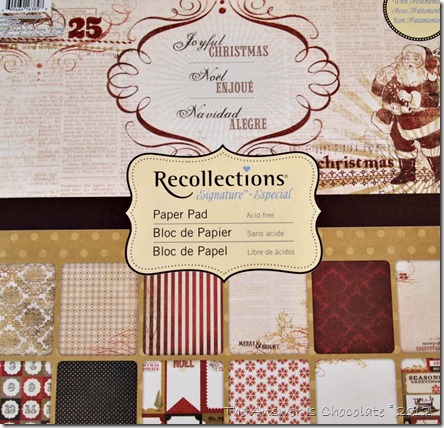
Once again, I fell in love with a paper stack. It’s an illness. I accept  I have it.

Joyful Christmas

This time it was “Joyful Christmas” by Recollections at Michaels. Lots of vintagey goodness with some sheets full of glitter accents. Yum.

Countdown Page

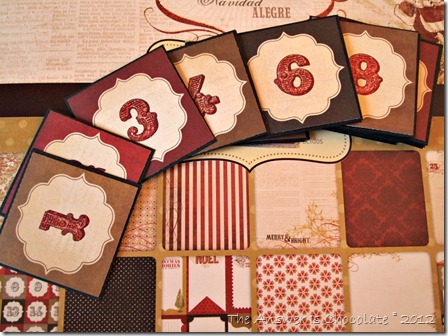
You can see how easy they made it to make this banner since there are a couple of countdown sheets in the stack. I just cut each one out and mounted onto a black panel.

Countdown Numbers

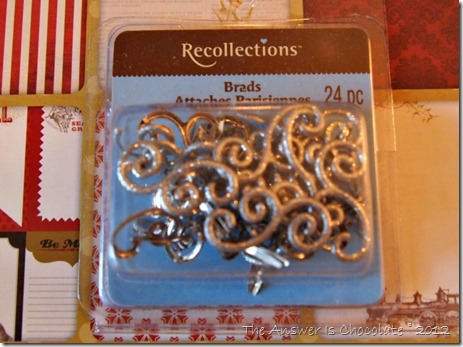
I had these brads in my stash from after Christmas shopping last year:

Recollections Brads

Connected the corners using the brads but decided that 1-25 all together would be way too long so I did 1-12, 12-24 and then 25 as a standalone.

Coundown Banner

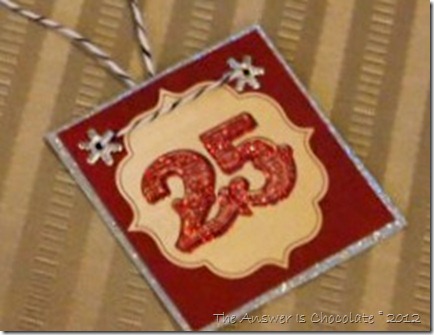
Framed "25" with a silver glitter scrap and snowflake brads. Used black and white bakers twine to finish things off.
Sharing At: