Showing posts with label Jewelry Making. Show all posts

Wednesday, February 21, 2018

Black Panther Movie Inspired Jewelry


Image result for black panther movie

So like millions around the world based on the Box Office reports, we went to see Marvel's latest Superhero Movie "Black Panther" this past weekend. It was awesome for many many reasons.  I don't really do Cosplay but for this movie, I did want to have some fun and made some jewelry inspired by the lead characters costume. 

Without giving anything away, the Black Panther's costume relies on the necklace designed by his brilliant teenage sister Shuri. I took my inspiration from that and made some earrings and a necklace. 

Image result for black panther movie

I went through my jewelry supplies ( to quote Mr. Chocolate "You just had all that stuff?" ....I plead the fifth) and chose components that reminded me of the necklace. Silver and black, spiky and bold. 


The hammered metal collar piece and spike beads are things I'd picked up on one of my trips to the amazing Shipwreck Beads located in Lacey WA. They have a great online store! It's like Disneyland for jewelry makers. Not affiliated with them, just a loyal customer. I attached those to the collar piece with jump rings and strung the square and tube beads ( Michaels) onto head pins as shown. 


I wanted to make this more bold so I then took waxed cotton cord and tied some silver beads randomly and added those to the collar piece. Finally, I added strips of leather from a bag of leather scraps in my stash. 

For the necklace itself, I attached three strands of leather cord to chunky cord ends which I attached to the focal piece with jump rings. 

Not content with the necklace alone, I made a pair of earrings to go with! 


I'm known for wearing big bold earrings but these are the biggest and boldest I think I've made! I went to my Shipwreck stash again and chose hoops that have holes in them so you can attach findings. I spaced more of the spiky beads, and mixed in some chain and tube beads ( Michaels). 


Both the necklace and the earrings look heavier than they are. The elements themselves are quite light. 

Alas, they give me no superpowers or superhero suit, but I loved wearing them and will enjoy wearing them just as part of my wardrobe! 

#WakandaForever!


Wednesday, December 27, 2017

Handmade Gifts: Leather Earring Ensemble


I hope everyone had a wonderful Christmas and is getting some rest now that the chaos is over! Sharing a project  I couldn't share before Christmas since it was a gift for my Mom.  She is what my son calls a "stylish Grandma" and loves to be fully accessorized and coordinated. 

I was busy in my workshop so didn't take a lot of pictures along the way. You never know where you will find supplies. I'd gone w/ my husband to a place he wanted to go, and lo and behold they had bags of leather scraps they were giving away for FREE! He mentioned to the guy working there "she's a crafter" to which the kind man said "oh then take two" so I have two bags of amazing leather scraps. 

I trimmed two pieces into leaf shapes for the earrings,  gold leafed 1/2 of each, punched a small hole at the top and added a strand of beads .


I used the beads from the same package ( a bead mix I picked up at Shipwreck Beads) (one of my favorite bead places in the world) to make the coordinating bracelet and pendant.  The bracelet is strung on Stretchy Cord. 


My habit of  "stash collecting" (aka picking things up with no particular project in mind) paid off because I had this antique gold pendant base in my jewelry making supplies and added more beads from the same collection to it along with pieces of coordinating chain. 

Happy to say that she loved all the pieces! 

Tuesday, May 16, 2017

Ermagerd! Special Gift for a Special Friend


A few years ago, fate introduced me to someone who has become a great friend. A change in work assignments brought us together though in our company, "together" is virtual since she is on one side of the country and I'm on the other.  

Our paths had never crossed before and we quickly discovered we had many things in common. Our passionate love of our kids, our "wicked smaht" sense of humor, our shared love of the same TV series and movies and more. I don't remember exactly how the expression "ERMAGERD" (for OMG) became part of our daily discussions but it was probably from something that had happened on "Game of Thrones" or "Bates Motel". 

We'd always have the same take on something and that morphed into us saying we were like Forrest and Jenny from "Forrest Gump" ...."peas and carrots" which became "peas in a pod". She became Erma and I became Gerd and that's been our thing!  I wanted to commemorate our relationship which is what this gift represents. Still with me? 


I knew I wanted to letter something, and I knew I wanted to frame it so I started with these supplies: 
  • Unpainted Frame
  • Acrylic Paints 
  • Lettering Pens
  • Embellishments for frame
  • Heavy Paper ( I used watercolor paper)
  • Lightbox
  • Fun Font


I painted the frame black , then crackled it using my tried and true white glue crackle technique with metallic gold as the top coat.  Once dry I added the rolled paper flowers I picked up on one of my Michaels trips. 


For the lettering and pea pods, I chose a fun font, found a piece of clipart I liked, created the sentiment on my computer, printed off and then using my lightbox, layered watercolor paper on top. Traced with a pencil, then outlined with a high quality non-bleed pen ( I bought a pack of pens by Recollections @ Michaels, comparable to Micron Pens). 

Some might ask why I didn't just use the computer generated print but I wanted this to have a hand lettered feel (and the watercolor paper wouldn't fit my printer anyway). Since I wanted it to coordinate w/ the frame, I used a metallic gold gel pen to accent the peas in the pod. 


We also share a love of black and white clothing. Since I love making jewelry and had recently picked up some new supplies to play with, I made her a pair of earrings, and made a complementary pair for me! I wear big earrings, so I made hers a little less bold but using the same beads. 


I  can't have pierced ears so mine are clips and hers are pierced. I'd picked up a package of  connector links ( the silver ovals) and layered different sizes together for each pair, and then strung the beads on headpins as shown, connecting them to the links with jump rings. 

I've waited to post this until I knew she received ( and liked!) her gift which she did and does. As I told her, the BEST feeling in the world for us makers is the excitement we feel when someone loves something we made for them. My gift in return ( not that one was expected) was her excitement over receiving this. Best feeling in the world! 


Love ya Erma!


Tuesday, January 3, 2017

Angel Wing Necklace : Handmade Holidays


Like all of us makers, I made a lot of holiday gifts so I'll be sharing some that I wasn't able to share at the time. 

This one was for our favorite server at our regular Friday night go to restaurant. From the first time she came to our table we had an instant bond.  We are creatures of habit and the second time she came to our table she already knew our order! She's so good  to us, often treating us to dessert and just always such a sweet person. So I wanted to make her a little something and this Angel Wing charm seemed perfect. 


With the holidays being so busy I didn't take the time to take pictures of the step-by-step. One of my blogging resolutions for 2017! But the process and materials are simple: 

Supplies: 
  • Black chain ( Blue Moon Beads)
  • Silver Bead Caps ( Bead Landing)
  • Opaque White Crystal Beads ( Stash)
  • Black Crystal Spacer (Stash) 
  • Head Pins ( Stash)
  • Angel Wing Charm ( Shipwreck Beads)
  • Jump Rings (Stash)
  • Silver and Black Large Rings ( Bead Landing)
  • Toggle Clasp ( Stash) 
Measure lengths of black chain. I did 4 sections, 6 inches long, two strands each. Wrap white beads and bead caps on head pins and attach to each end of the double strands of chain.

Attach Angel Wing charm , spacer beads, and wrapped white bead to large jump ring as shown to make the pendant part. Attach chain and pendant to black and silver rings as shown. 

Of course what's a gift without a card so I made this one to go with it since her disposition is always Merry and Bright...not just at holiday time. 


Oops. I see my Merry & Bright was a little crooked. The card was super easy. Combination of papers from Recollections Black and Gold Christmas paper pack I fell in love with and a coordinating scrap from my stash!

Happy New Year all. Happy Making! 

Sharing At: 


Monday, April 25, 2016

Lavender and Gold Birthday


The  Mumster's birthday was last week and before knowing that we were losing The Purple One, Prince, I'd made some things for the other Purple One, my mom. She truly could have given Prince a run for his money with her love of purple. 

I'd picked up the lavender beads at Michaels without really having a plan. The plan came together when I found the lavender, gold, and silver handmade paper which gave me the inspiration for the necklace and bracelet I made. 


The bracelet and necklace combine the lavender beads with antique gold. For the pendants, I used antique gold bezels (Darice, avail at JoAnn's) , gold glitter paper (Michaels) and glass domes (CraftFantastic.com).  


The necklace is gold chain with sections of lavender and gold beads. 


I used the handmade paper to make some altered candles ( plain candles, Dollar Tree) and finished them with strips cut from rhinestone sheets ( DCWV) ribbon, and charms.  I used a leftover scrap of paper to cover the box for the jewelry. 

What's a birthday without a card? 


The crackled paper is from Oriental Trading company. I'll have a post later in the week featuring more OTC goodies. The flower is suede paper I picked up when I found the handmade papers. I used a Tim Holtz die to cut the flowers. 

I had some beads and charms left over from the candles so I used them to make a few ribbon bookmarks. One for my mom and a couple extra as gifts. 


Sharing At: 


Monday, January 5, 2015

Foiled Turquoise Glass and Silver: Earrings and Pendant


BMB Turq and Silver Earrings

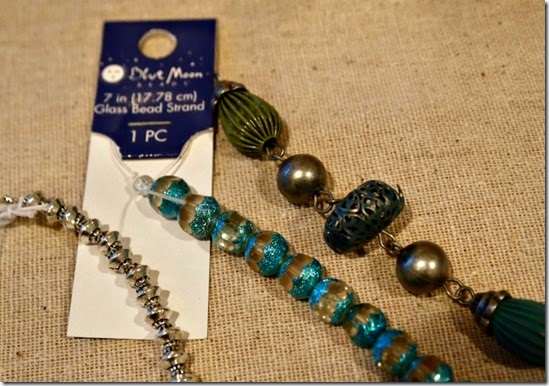
My favorite repeat “customer”, College Boy, placed another order with me for some jewelry. This time for a birthday present for one of his besties.  Based on the colors he told me she likes, I chose this turquoise and silver color combo from my Design Team stash of Blue Moon Beads.
  • 7 inch glass bead strand (8MM foiled turquoise beads)
  • 12 inch metal spacer strand ( silver beads)
  • 14 inch metal connector strand
  • Silver chain, clasp
  • Jump rings
BMB Turq and Silver

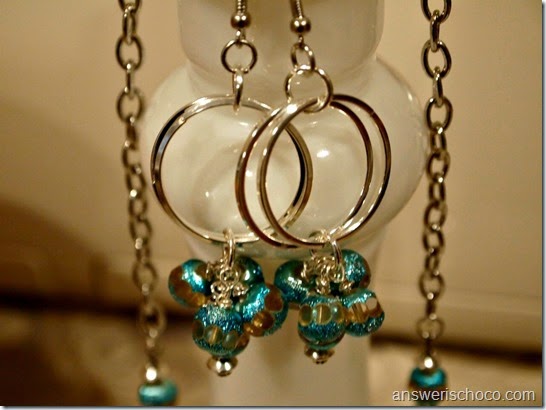
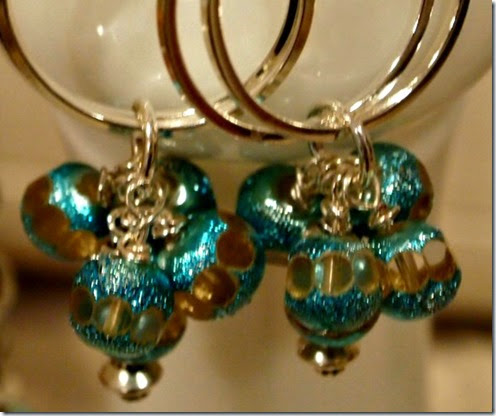
For the earrings, I strung the glass beads onto head pins, and made wire wrapped loops to close. For each of the earring bead clusters, I made one longer piece using the silver spacer beads in addition to the glass beads. You’ll end up with 5 pieces per earring. One silver / glass combo piece and four other glass bead only pieces. I attached these to two large chain links using jump rings.

BMB Turq and Silver Earrings
Using another jump ring, attach your ear wire.
For the pendant, I used a portion of the metal connector strand along with another glass and silver bead combo on a head pin. SImilar to the earrings, I doubled large links and attached the pendant with jump rings and added some leftover metal chain:

BMB Turq and Silver Pendant

I made two more double wrapped loop pieces using the turquoise beads which I used to join two different types of chain to complete the necklace.

BMB Turq and Silver Earrings

While these supplies were provided to me as part of my participation in the Blue Moon Bead design team, project ideas are my own. Blue Moon beads can be found at JoAnn stores nationwide along with other craft retailers.


Sharing At: 


Monday, July 28, 2014

DIY Upscale Men's Leather Bracelets

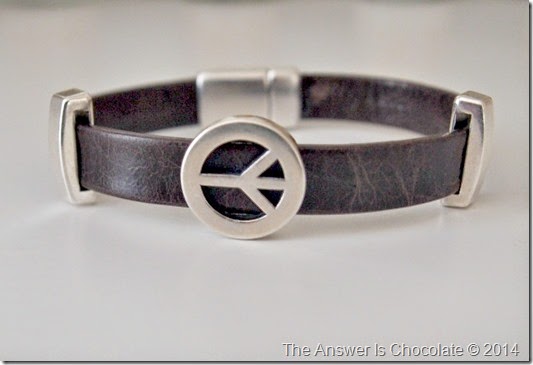
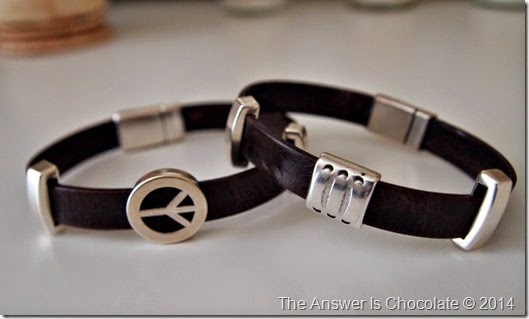
Men's Leather Bracelets

I’ve mentioned before how happy I am to have guys in my life who don't complain about trips to bead stores and even ask me to make jewelry for them! OK maybe not those times when  they pick out stuff more expensive than I was thinking but overall…yep…still happy!

Mr. Chocolate and I were having a daycation one weekend and we were near a store I’ve long wanted to go to in Seattle : Fusion Beads. DANGER!! This place is amazing, especially if you are looking for something extra special.

I’ve seen some really nice leather and metal bracelets in stores but ca-ching. Out of my price range. Fortunately, Fusion Beads carries some gorgeous leathers and best of all the big bold findings that go with the leather. We had fun picking out the components for each and I'm really happy with the  results.

Men's Peace Bracelet

Mr. C and I decided we liked this aged brown Regaliz 10MM flat leather for both him and College Boy. Priced at $.37 per inch, the total per bracelet for the leather was $2.96.

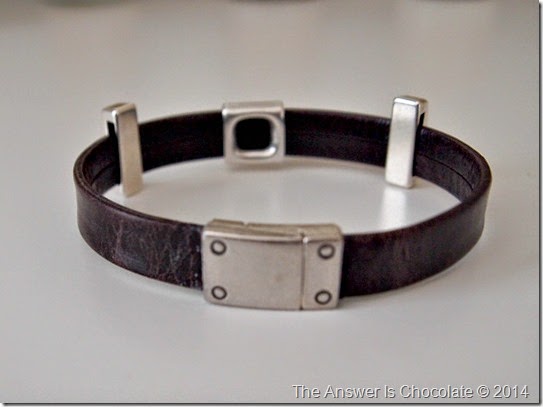
Leather Slider Bracelet

The closures are magnetic and you simply glue each end to the end of the leather after adding whatever slider beads you want.  The beads range in price from $1 up and the clasps were about $6. Total cost to make each bracelet was about $12. A far FAR cry from this one below by David Yurman  (whose designs I love but... ) @ $595.
Modern Cable ID Bracelet


Sharing At: 


Monday, May 19, 2014

Retirement In Style (Not Me...I Wish!)

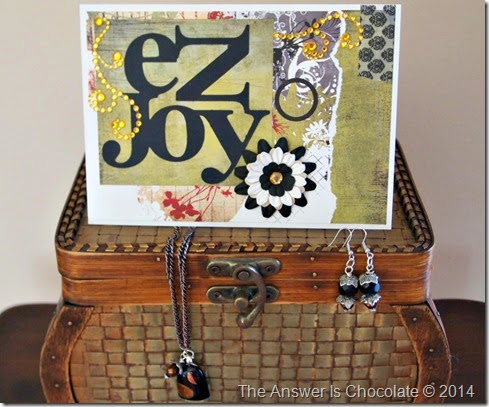
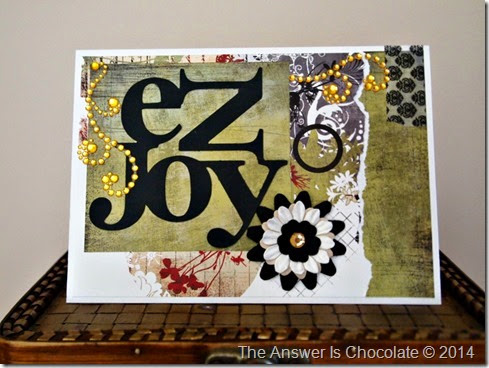
Enjoy Retirement Card

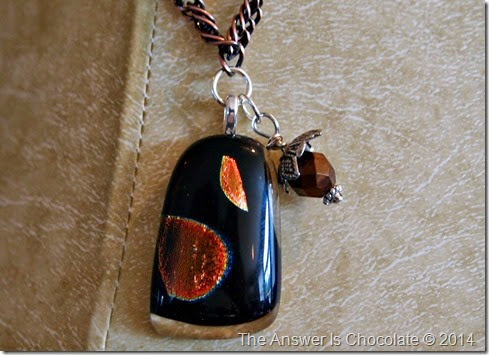
A friend and colleague of mine is retiring and I wanted to do a little something for her. I’ve had some pieces of fused glass in my stash that I bought at an arts fair. Those things that you pick up but want to save for a special occasion. This qualified!

Black and Bronze Pendant

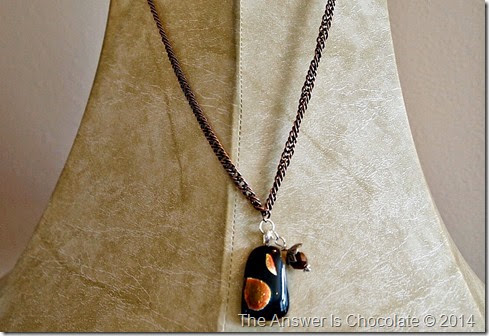
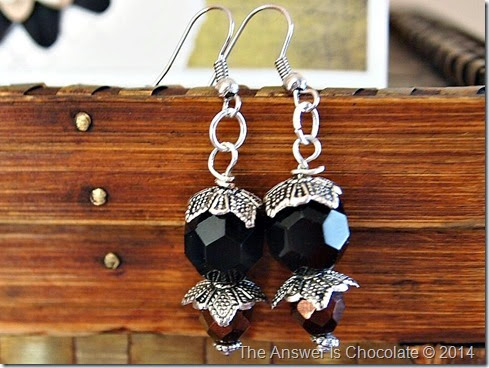
I made this piece of copper and black glass into a pendant by gluing a flat bail to the back. I strung a bronze crystal bead onto  a silver head pin and added a silver bead cap and added to the pendant. Used a jump ring to attach the pendant to a strand of woven antique silver and copper chain.

Black and Bronze Pendant 1

Used the same bronze beads and silver bead caps to make a matching pair of earrings.

Black and Bronze Earrings

And of course I had to make a card! I’ve been having some fun lately re-discovering what’s in my stash ( Shhhhh Mr. Chocolate…do not need to hear about this thank you very much XXOO). I used some paper from a Basic Grey stack (Scarlet’s Letter) and my Graphically Speaking Cricut cartridge (jumbled ENJOY)  and Expression for the card.

Retirement Card

Finished off with some  paper flowers and rhinestone swirls.

Sharing At: