Showing posts with label Halloween. Show all posts

Monday, September 19, 2016

2016 Halloween: Gothic Pumpkin


I am working on some Halloween decorating and projects and whipped up a couple of fun faux pumpkins this weekend. Not showing the whole table on which these are displayed yet since that will be part of an upcoming sponsored post! 

This is an easy peasy project so I didn't take a lot of step by step pics. 

Supplies and Steps: 
  • Faux pumpkin (small) ($9.99 ea less 60% sale)
  • Glittered leaf bush ($4.99 lesss 50%)
  • Glass Knob (Clearance $.50...yes fifty cents)
  • Scrapbook Paper in gold metallic ($.10 on one of their 10 for $1 sales)
  • Paper Roses (stash)
  • Hot glue / glue gun
With the exception of the paper roses which I had on hand, all other supplies are from Michaels, and of course all supplies were on sale! Total cost to make two pumpkins was $10, or the regular price of one pumpkin.


Faux white pumpkin, glitter leaf bush, glass knob, messy desk


Make 6 rolled paper roses from the gold scrapbook paper, set aside. I used 3 per pumpkin. Pinterest has tons of tutorials on how to make these.  

Cut 6 leaves per pumpkin from the bush, hot glue to the pumpkin making a kind of crown. I did 4 (North, South, East, West) and then layered the remaining 2. 


I thought these glass knobs were awesome at $1.50 when they first came in but wasn't sure what I'd use them for. When I saw them for $.50 I bought several. I'd come up with something! 

Start a hole in the pumpkin stem and then screw in the glass knob. Hot glue three of the rolled roses to the stem and fill in any spaces with the paper roses and voila. 


Sharing At:

Monday, October 26, 2015

Happy Hallow-Week! Bone Yard and Franken Family Oreos

Pic Monkey Fun! 

I don't think I will ever out grow Halloween much to Mr. Chocolate's chagrin. Even with Grad School Boy out of the house, and exactly 0 trick or treaters last year, I can't help myself! 

I'm also not sure when GSB will stop getting holiday care packages. I thought "oh once he's out of college" but Noooooo.  

I've done all kinds of dipped Oreos over the years and this year's no exception. This time...acid green candy melts and Frankestein themed sugar decorations.  I didn't take pictures of the process because you can find the how to's all over Pinterest but here are my goodies! 


For these I covered completely in acid green candy melts and then put a candy  Papa Frankenstein, Mama Frankenstein, Baby Frank and Franken Pooch on top! The package also came with Cats and Bats. I love these things because they are so detailed and so easy ( but you don't tell people that of course!)


The rest of the cookies are a boneyard theme , just 1/2  dipped in the candy melts and sprinkled with black sugar and white sugar bones. All products are Wilton. I got mine at Michaels and Target. 

I packaged them up in cello bags along  with some Dove eyeball candies, and the rest of the goodie box contains a scarf for the cold weather he will not be used to this winter, two pounds of coffee, and of course more candy as filler! 


For some extra fun I decorated the inner flaps of the box with some Halloween scrapbook paper.  I had to include a card....cut out the "BOO" bat with my Silhouette, glittered it and mounted as shown. 


 Your kids may grow up but you will always be a mom right? 


Monday, October 19, 2015

Creepy Bride and Groom Silhouettes: Easy Vinyl Project


I get teased by my family for picking things up without a plan in mind...I can't imagine any crafter who doesn't experience this!  Maybe not the teasing but the picking up items without a plan. Or, the teasing. 

During the Summer I picked up a pack of metallic painted canvases at Michaels for 70% off. Two gold and two silver 8x8 originally 9.99 that I got for 2.99!  When I saw these creepy silhouettes in the ( no pun intended) Silhouette Online Store I knew what I wanted to do with my steal deal  canvases. 

This is such an easy project I didn't take pictures of the process because it's as easy as : 

  • Download images ($.99 each)
  • Size, cut with your Silhouette ( I have a Cameo) 
  • Apply to already painted canvas
  • Embellish
To embellish them I used metallic self adhesive rhinestones and washi tape. Easy Peasy


Monday, October 12, 2015

Creepy Crackled and Foiled Skulls


I had a lot of fun making these creepy crackly skulls for my mantle. They are so easy to do and look like they took a lot more work than they actually did. 

Supplies Needed: 
  • Ceramic Skull ( Mine was from Oriental Trading Company)
  • Black Acrylic Paint ( I used Craft Smart from Michaels)
  • Gold Acrylic Paint ( I used Martha Stewart Yellow Gold Metallic) 
  • White Glue ( I love back to school supply shopping for this craft staple)
  • Gold Leaf ( I used Simple Leaf by Mona Lisa available where fine art supplies are sold)  

Paint your skull gold ( or whatever base color you've chosen. 

When your skulls are dry, paint a coat of white glue over them. . 

When glue is still tacky but not dry ( temp and humidity make this hard to time so just keep an eye on things) paint over with the gold paint. Watch the crackle magic happen. You can hasten the effect with a blow dryer but the longer the paints cure, the more crackling you'll see. 

Optional: Improvise words to Rolling Stones "Paint it Black" and sing while you paint ie "I see a gold skull and I want it painted black" .  Or not :)


Metal leafing intimidates a lot of people but it shouldn't. It's easy ( messy at times!) but the effect is so worth it.  Follow the instructions on the leafing package. I usually use the leaf sizing glue but I was out. Mod Podge to the rescue. Just dabbed it on randomly where I want the leafing , applied the leafing by laying it over the glue and using pressing down w/ my fingers. I used a dry paint brush to brush away the excess and went on to the next spot. 

And Voila


After I was done I used some of the scrap leafing to highlight raised portions of the skull like the teeth, eye sockets etc. 


Sharing At 


Tuesday, October 6, 2015

Haunted Halloween Mantle and Halloween Spooktacular Giveaway from Oriental Trading Company


Surprise! It’s been a while since I’ve posted any projects but I’m excited to share my Haunted Mantle with you. (Disclosure, products for this post were provided to me by Oriental Trading Company) .

I’m sharing the overall mantle and in the coming days will share some tutorials of projects in this post.

I’ve been moving to a more gothic spooky look and when I saw these DIY ceramic skulls from OTC. I painted, crackled and gold leafed these for an elegant but spooky look.


To enhance the spookiness, I turned a large vase upside down and placed one of the skulls under it like a specimen in a lab.

I fell in love with this silver glitter fabric the minute I saw it and it was the perfect thing to simulate a magical spider web. I covered the mirror on my mantle with it and I wove more  of it on a side table.


I covered plain DIY wood photo blocks with paint, gold duct tape and scrapbook paper from a Poison Paper Pack  to make holders for signs to go with my spooky vignette.


Now here’s the best part of this post. Oriental Trading Company is having a weekly giveaway through October 17 with a chance to win $250 in Halloween products! They're also giving away a $25 gift card DAILY! Between craft and party supplies and Halloween decorations, think what kind of a party you could throw! Here's how to enter:

Spooktacular Giveaway from Oriental Trading
Visit www.spooktaculargiveaway.com today and enter to win their weekly prize -- $250 in Halloween products of your choice from Oriental Trading. Plus, they’re giving away a $25 Oriental Trading gift card every day! Contest ends October 17, 2015.


Wednesday, October 22, 2014

Halloween: Mummified and Mustached Monster Cookies...College Boy's Last (Undergrad) Halloween Goodie Box

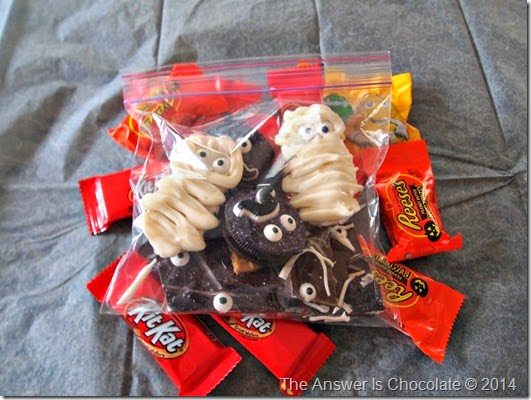
Monster Mummy Bundles

I can’t believe this is the last year I’ll be sending off a Halloween Treat Box of goodies to College Boy. At least as an undergrad :) Just because your child goes to school out of state, doesn’t mean you don’t still celebrate fun holidays with them. OK I'll speak for myself lol.  I started this his freshman year and it’s just become tradition. 

This year I decided to try my hand at Mummy Cookies I’ve seen around the way.
You can find lots of tutorials on Pinterest .

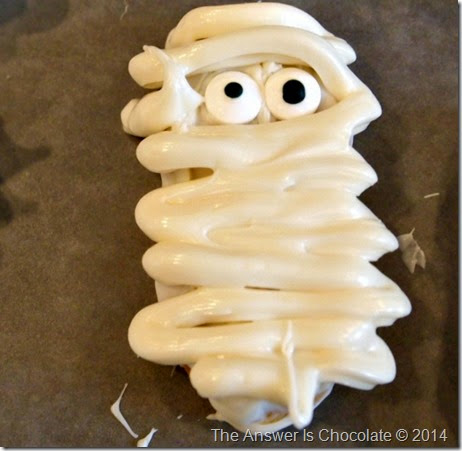
Mummy

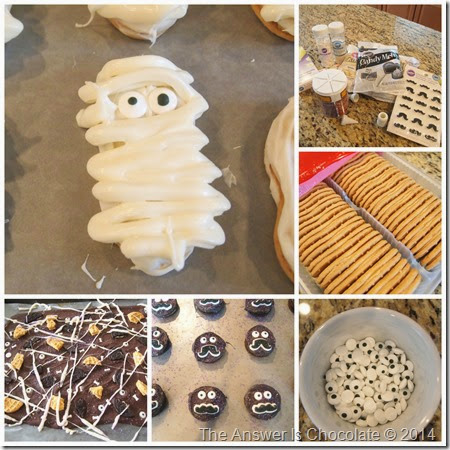
These are SO easy. I used Nutter Butter cookies, white Wilton candy melts, and my new favoritest ( that’s a word!) thing ….candy eyes! Because who doesn’t need eyes made of sugar?!

Mummy Cookies

I shmoosheared ( that’s another word….between smoosh and smear) the melted candy melt on the cookie using the back of a spoon just to give it a base coat. Knowing I was going to pipe more candy over the top, I  wasn’t exactly neat about it.  While still wet, attached the candy eyes. Using a disposable cake decorating bag with a round tip ( I wish I had a smaller tip but you make mummies with the tips you have) pipe more  melted candy coat stuff on the mummies. Just freehand back and forth.

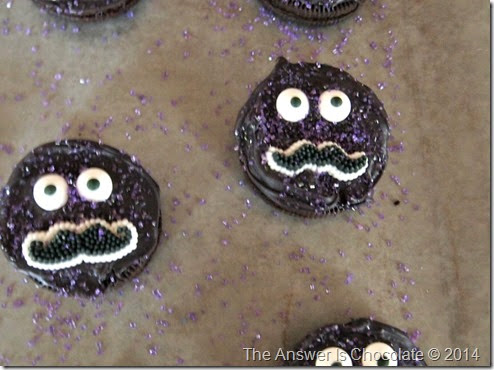
College Boy loves all things mustached so when I saw candy mustaches next to the candy eyes ( cake decorating supplies Michaels, JoAnn’s, Target) I had to get those too. Behold Mustached Oreo Purple People Eaters. Originally I was going to do bats to go with the mummies but the power of the ‘stache won out.

Good thing too because the black candy melts I bought weren’t really black when melted, but rather dark purple. So I dipped the Oreos, applied the eyes and the mustaches and then covered with purple decorating sugar.

Purple People Eaters

Monster Bark

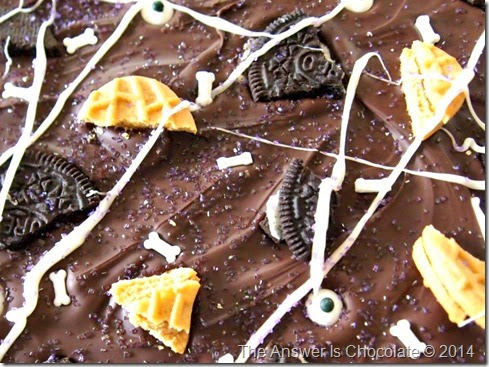
Since I had leftover everything, I decided to make this monster bark. Melted semi sweet chocolate, plopped broken Oreos and Nutter Butters, candy eyes and some sugar bones from last year randomly, let set, cut or break into pieces. Oh and more purple sugar because clearly this was not yet a nutritionist’s worse nightmare.

Mummy Monster Treats

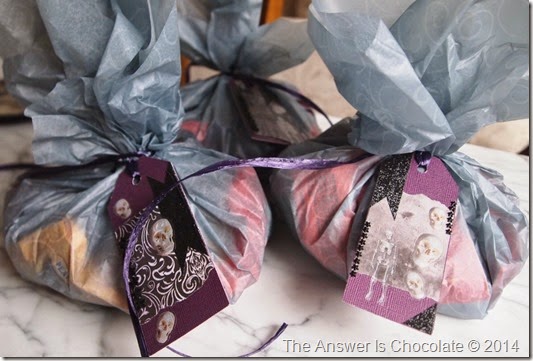
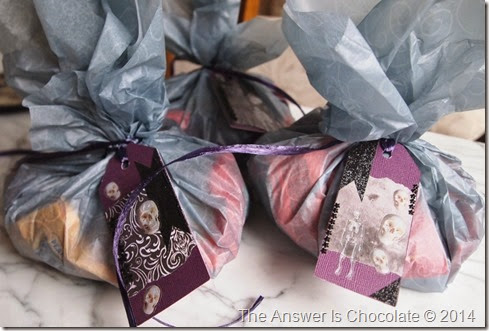
Did I mention I have to mail all of this stuff ( that no one told you you had to make for your son and his friends but lalalalala I can’t hear you and thank goodness for flat rate shipping)? Yay tissue paper bought after Christmas last year for $.25! Wrap and cushion all in one.

I spread the contents as shown on a layer of tissue then gathered up the edges to make  little bundles. Tied with ribbon and then “ let there be tags”. Because each bundle must have a tag. It's a rule or something.

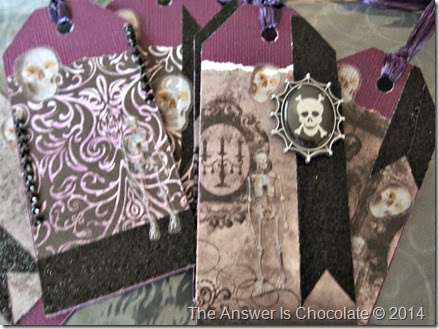
Treat Tags

I love making tags. It’s a great way to use up the scraps from other projects.

Monster Mummy Bundles

And voila! Monster Mummy Treat Bundles because this Mummy loves her College Boy.

Monday, October 20, 2014

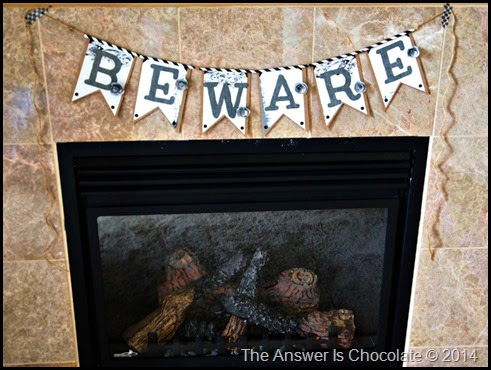
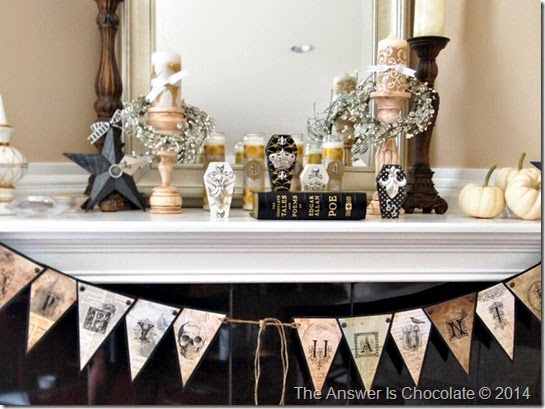
Halloween: BEWARE Banner and Ghosts of Projects Past

Beware Banner

We have a 2nd  fireplace without a mantle that was sitting there all naked and bare and I decided it needed a Halloween banner.
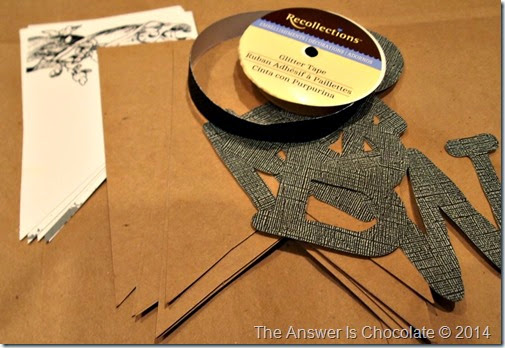
For this project you will need:
  • Chipboard
  • Scrapbook paper ( I used a black and white pack from Oriental Trading Co)
  • Textured Cardstock ( Core’dinations)
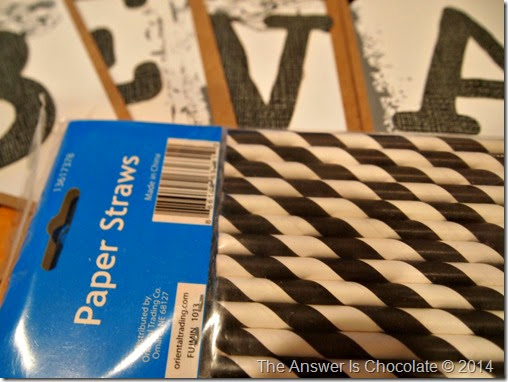
  • Paper Straws ( Oriental Trading Co)
  • Glitter Tape
  • Self adhesive rhinestones
  • Jute twine
  • Adhesive
Bewarer Banner 1

For the banner, I cut the letters from a textured cardstock using my Cricut.  Cut the pennant shapes from chipboard (4.5 x 6.5) . I did these the old fashioned way using math and everything! Determine the center point of your rectangle ; draw lines to the bottom corners to make a triangle and cut. Same for the scrapbook paper layer reduced by 1/4”. Layer scrapbook paper pennant on chipboard , cut photo corners from glitter tape and apply, adhere letters and finish with rhinestones.

Beware Banner 2

I got the idea to use the paper straws both to embellish each piece of the pennant because that's how I roll.

Cut straws to width of pennant pieces and attach with hot glue.

Beware Banner 3

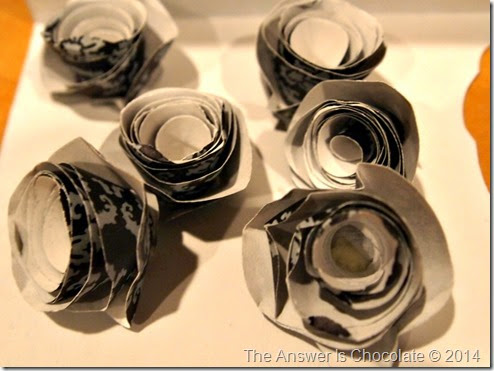
Using another piece from the scrapbook paper pack, I made rolled paper roses for each of the letters. To hang, thread jute through each straw and attach with washi tape.

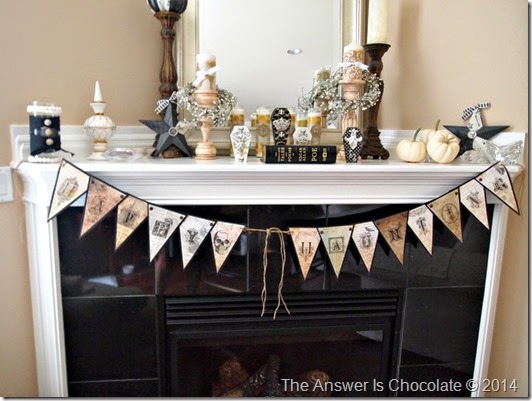
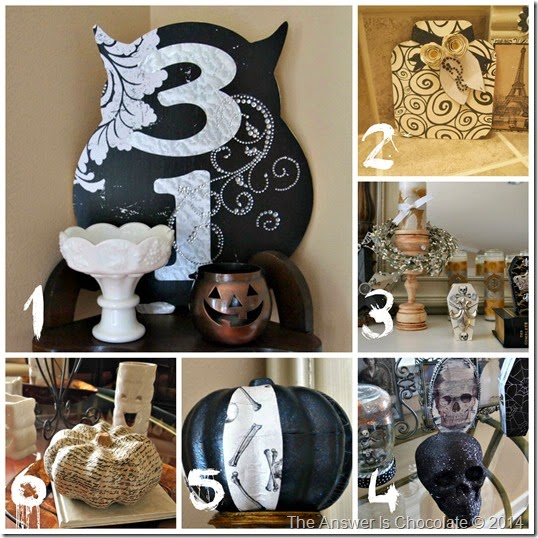
Also sharing some of this year’s Halloween décor using past projects (active links go to tutorials):

Haunted Mantle

Haunted Mantle 2

Halloween Decor
  1. Paper and Vinyl Owl
  2. Pressboard and Paper Pumpkin (I didn't do a post on this but it's a leftover pressboard "page" from a shaped album, covered in scrapbook paper using Mod Podge)
  3. Gothic Coffin Boxes
  4. Halloween Snow Globe (Halloween take on Christmas snow globes; old jar, Halloween figure, glitter )
  5. Glitter Decoupage Pumpkin
  6. Tissue Paper Pumpkin


Sharing At: 


Tuesday, October 14, 2014

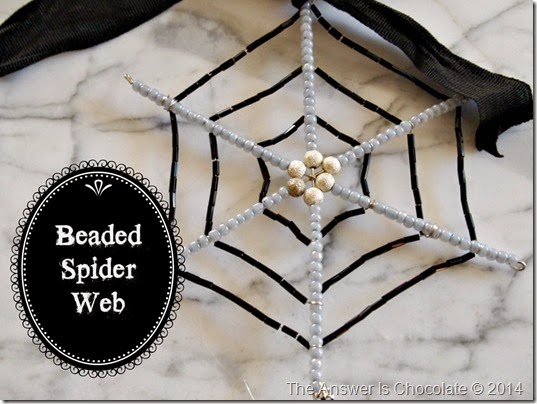
Halloween: Beaded Spider Web

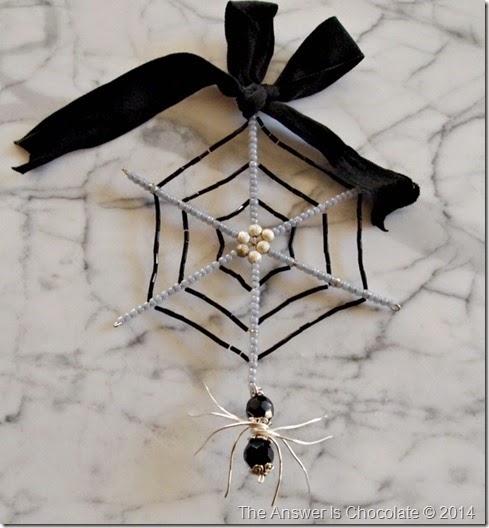
Beaded Spider Web

Oh what a tangled web we weave as the saying goes. Only with this project, the deceiving part is how easy this project is to make. Now I know not everyone loves spiderwebs or spiders (including College Boy who is very happy he’s safely away at school nowhere near my “pretty but evil” creation…his words).

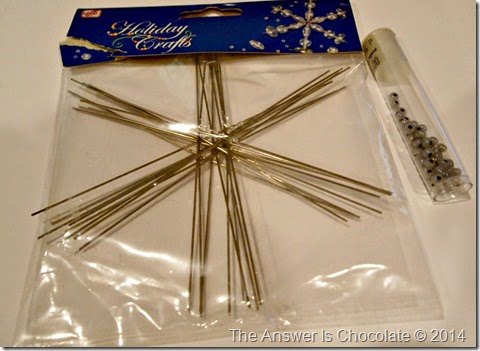
For this project you will need:
  • Wire Snowflake Form
  • Seed Beads and Bugle Beads
  • Misc beads for center
  • 26 Gauge Wire
  • Needlenose pliers
I had the snowflake forms in my stash but you will find them with the Christmas supplies at your local craft store:

Beaded Spider Supplies

Starting with one of your “misc beads” ( I scrounged around in my leftover beads and found enough that matched)  string onto one spoke of the wire form. String seed beads until almost full, leaving enough exposed wire to make a loop for the end. Use the pliers to bend a loop. Repeat until your wire form is covered.

I started with about a two feet of the 26 gauge wire and wrapped the starting end around one of the beaded wire spokes enough to secure it. Work from the middle out and string enough bugle beads to get to the next spoke. Wrap that spoke with wire, string more bugle beads. Rinse. Later. Repeat until you’ve gone around the whole thing.  Eyeball where you want the next row of your web to be and repeat the process two more times as shown.

Beaded Spider Web 1

I finished my web with a bow of scrap grosgrain ribbon I saved from a package of curtains. Left it all wrinkly because of the creepy factor.

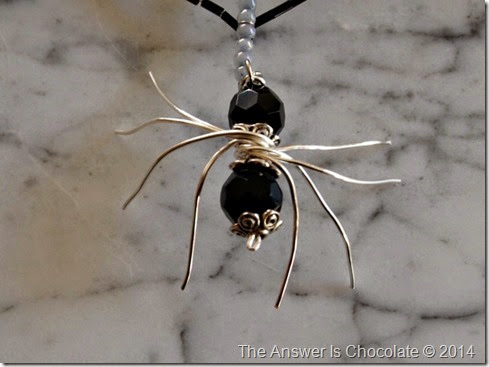
But what’s a web without a spider? The basic construction is two beads and some wire. There are tutorials on Pinterest and You Tube you can follow to get the basic construction. I decided not to bead my legs because I liked the wire legs plain.

Bead Spider 
I also used the same size beads (10mm) vs two different sizes that a lot of the tutorials show. And I added some beadcaps. Attach your spider to its web using a jump ring.

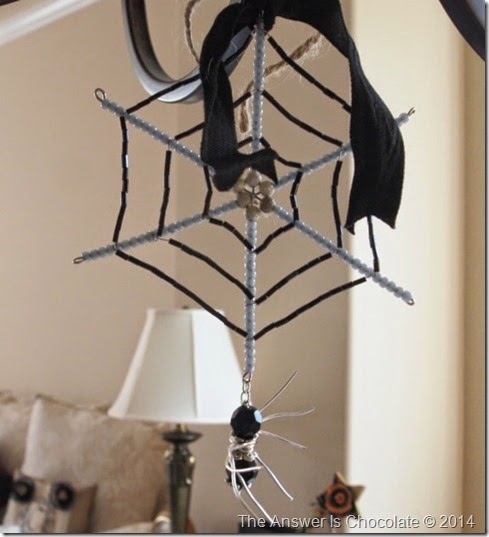
I hung mine from our dining room light fixture ( "Hi welcome to dinner don’t mind the spider hanging above you”) using some jute twine.

Beaded Spider Web 2

They’re creepy and they’re kooky
Mysterious and spooky
They're altogether ooky
My beaded spider webs

You're welcome for the Addams Family theme song ear worm.

Sharing At: