Showing posts with label Dollar Tree. Show all posts

Monday, October 21, 2013

Zombie Cookies and Monster Fingers: This Year's College Boy Halloween Treats

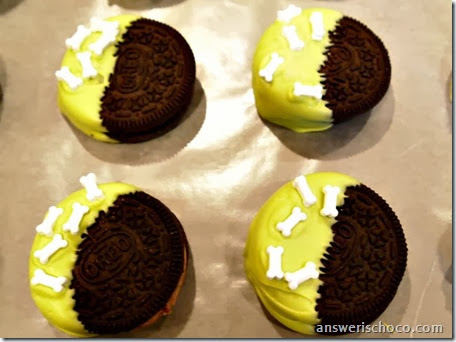
Monster Mash Oreos

If you’ve followed my blog for the past few years, you’ll know that I usually do a Halloween care package for College Boy. Halloween always falls around mid-terms and if you’re the parent of a college student, you might be familiar with the “send your kid a care package” letters that usually come out this time of year. Some company will deliver a care package to your student but needless to say, I’d rather make my own.


I try to make these fun but keep the cost down especially since we have to mail these. Dollar Tree, Michaels, and stuff I had on hand came together. 

This year I went with a Zombie / Monster theme . We’re huge “Walking Dead” fans. While Zombies aren’t known for eating bones, I couldn’t find any candy brain sprinkles so bones it is.

Monster Mash Cookies

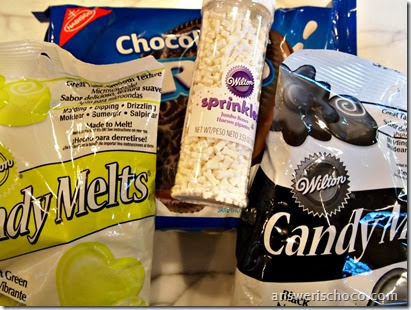
For this project you will need:
  • Oreos
  • Candy Melts ( I hadn’t yet decided between the green and the black but ultimately just used green)
  • Bone sprinkles ( if anyone finds brains, let me know!)

Dipped Oreos are about the easiest thing you could ever do. To start:

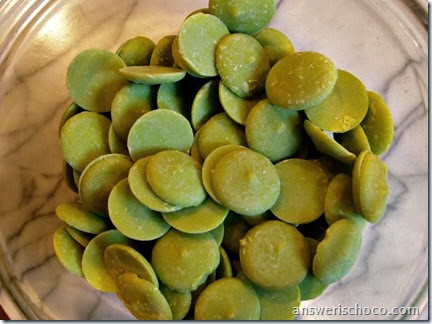
Wilton Green Candy Melts

Melt candy melts. I usually do mine in the microwave.

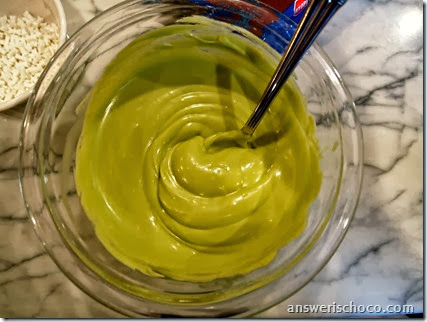
Melted Green Candy Melts

Once melted, dip. Place on wax paper. Sprinkle with stuff. Done. Seriously.
I had some green goo left over and I’d picked up a Halloween themed silicone mold at the Dollar Tree because I have wanted to try using them . I have had mixed results with the clear plastic molds. I’m hooked on the silicone molds!

Double Layer Crunchy Fingers

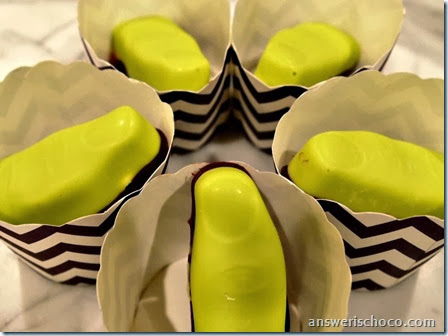
I made crunchy candy Monster Fingers! I spooned the leftover green melted candy into the mold until about half full.  I spotted some M and Ms and decided to sprinkle them on top of the green candy. Then went over that with melted dark chocolate. When you bite into the finger, CRUNCH, just like a bone. I know, I’m twisted.

Crunchy Fingers

For the bone shapes in the mold, I filled with dark chocolate.  Not a great photo but didn’t have time to worry about lighting when I was trying to “set my bones”.

Monster Mash Cookie Cups

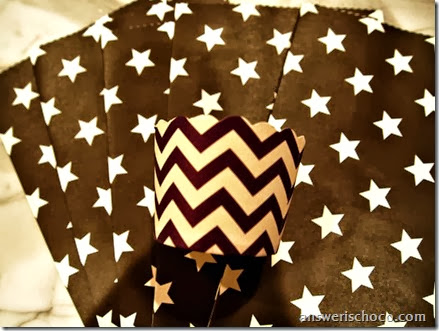
To package everything, I used these purple chevron striped cups I got last year from Pick Your Plum. I stacked the cookies and wrapped them using clear cello bags. Same for the fingers.

Star Bags

Paired the cups with these black and white star bags I picked up on one of my dig through the clearance stuff trips to Michaels. 75% off!

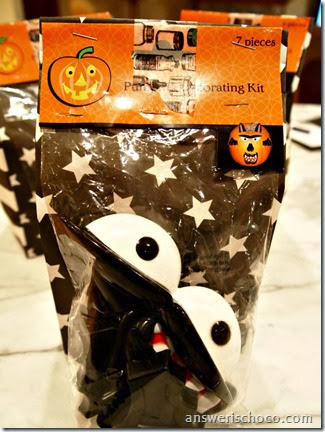
While I was at the Dollar Tree, I also picked up some pumpkin decorating kits. No carving required, the pieces just stick to the pumpkin. Last year I recall he and his friends went in search of no carve options so hopefully they still want to do this!

Vampire Pumpkin Decorating Kit

Filled the paper star bags with the cookies, finger, and additional candy and stapled the kits to the outside.
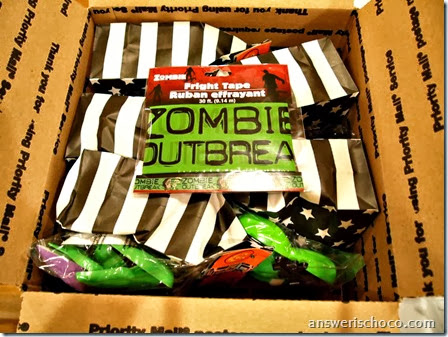
Zombie Outbreak

Dollar Tree also had some Zombie Outbreak tape that went well with the theme so added that. All packed up and ready to go!

2012 Halloween Treats  "Fangtastic Treat Bags"

2011 Halloween Treats  "Reverse Trick or Treat"

Sharing At:

Tuesday, January 15, 2013

DIY : Upscale a Dollar Store Tray (With Matching Journal)

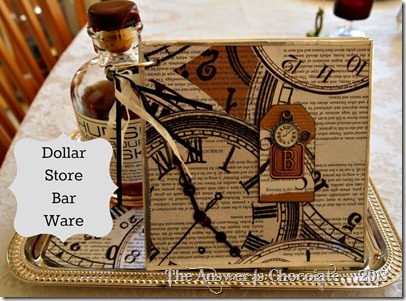
Dollar Store Bar Ware
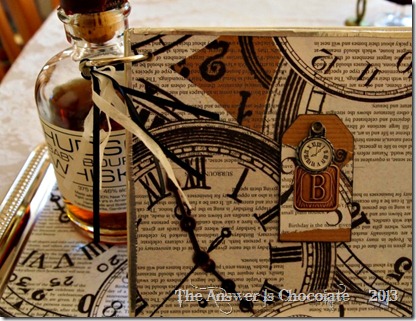
I might have to start calling Mr. C, Mr. B. He’s become an aficionado of small batch bourbons (not to excess!)

I don’t mind because I get all kinds of cool bottles to play with. He mentioned the other day that he saw an online bourbon journal but it only allowed 5 entries until there was a charge for it, so I decided I’d go old school and make him a hardcopy journal. He’s also into watches and time pieces, and I already had some very cool clock themed paper in my stash. Win-win since I’m working to bust some stash this year.

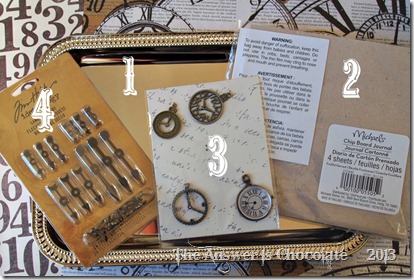
DIY Bar Tray Supplies

For this project you will need:
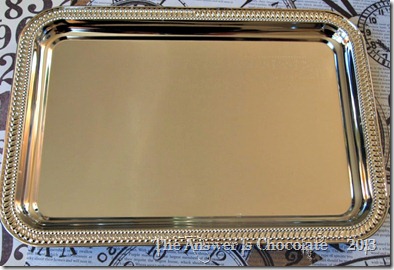
1.) Dollar Store Silver Tray ( I got mine @ Dollar Tree)
2.) Pre-made (or make your own) chipboard journal….This was on sale after Christmas at Michaels for $.25! A whole quarter. Cheaper than making my own.
3.) Coordinating charms to match your paper of choice. These were NOT on sale at Michaels but they were $2 for the pack and totally justified given the $.25 journal ( which I may or may not have purchased more than one)
4.) Embellishments. In this case I had these Tim Holtz game spinner thingies in my stash. So my total cost was $3.25.

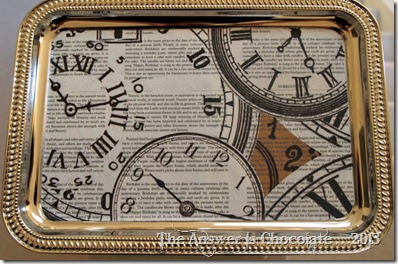
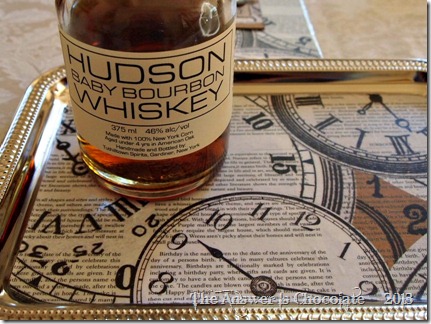
I cut my watch themed paper to fit the inside of the tray. Applied Mod Podge to the tray, applied the paper and finished with two coats of MP.

Dollar Tree Silver Tray

Mod Podged Dollar Tree Tray

Before Christmas we saw some high end barware at Macy’s . Gorgeous, but $$.  I like my price a lot better!

Bourbon Journal and Tray

For the journal, I covered two pieces of the chipboard ( it actually comes w/ four pieces but I’ll use the other two for something else) with the watch paper on one side and some number themed paper on the other. Mod Podged these on. Went around the edges with some aluminum tape.

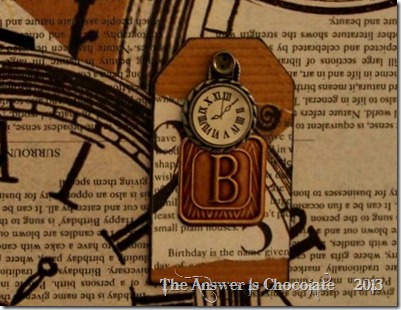
I had a chipboard tag in my stash which I left naked and applied a scrap of the watch paper to, then edged with black ink.  I added one of the watch charms (one of four from my $2 package so this was $.50), and an antique embossed monogram sticker I had in my stash.

Bourbon Journal and Tray

To finish off the journal, I added some of the game spinners to the watch hands on the paper.

Dollar Store Bar Ware

Just gives it a little dimension. I cut the inside pages to size from paper I had on hand, and put on the ring that came with the journal ( added some ribbon on hand just cause) and done.

So now Mr. C or Mr B or whomever I’m married to , has a place to display his current favorite find, as well as keep track of what he likes, doesn’t like, etc. about them.

Barware Tray

If adult beverages aren’t your thing, you could easily adapt this for any kind of theme from coffees / teas, flavored syrups, olive oils, balsamic vinegars or just cause you want to decorate a tray!


Sharing At:


Saturday, December 1, 2012

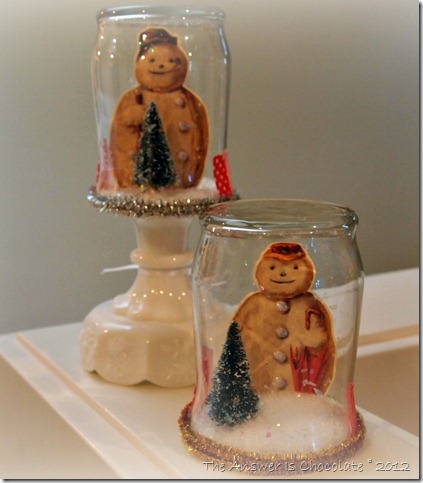
Vintage Paper Snowmen Under Glass

Vintage Snow Jars

When I was at a scrapbook show a few weeks ago, I saw some really cute domed jars. I fell in love with them but they were $5 each and I couldn’t justify it knowing I’d want to use more than one.

So I kept walking. Then I was at Dollar Tree and saw these clear glass candle holders that were similar in shape. Ding Ding Ding. Idea!


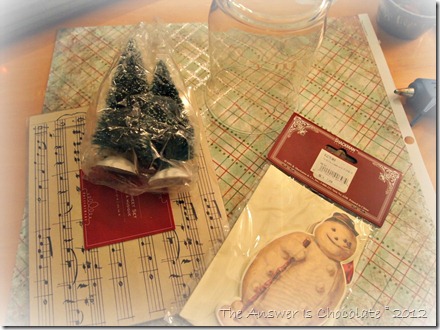
For this project you will need:
  • Clear glass jar or candle holder
  • Paper snowman 
  • Small tree
  • Epsom Salts
  • Glitter
  • Pipe Cleaner
  • Chipboard
  • Scrapbook Paper
  • Tinsel Pipe Cleaners

Vintage Snow Jars

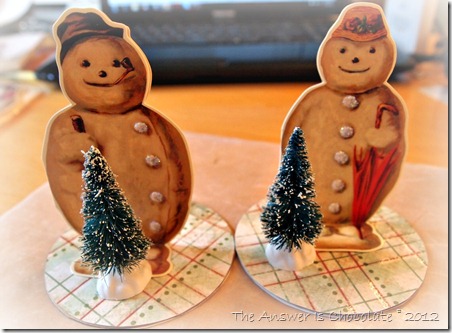
The diecuts I used are actually vintage cards I picked up somewhere. You could print a vintage graphic on cardstock and trim  to get the same effect.

Stickles Snowmen

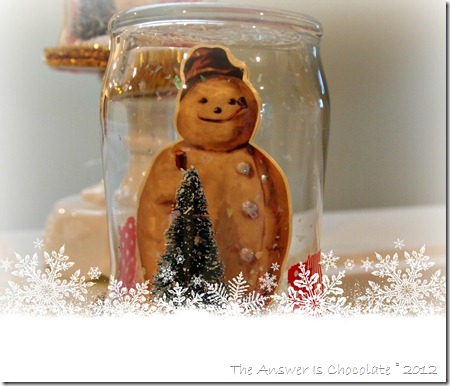
I added some Stickles glitter glue to the buttons on these snowpeople to give some dimension. Since these are cards they open and are hinged in the middle. The bottoms aren’t connected so I made a stand by folding the front one way and the back the other.

Using your candle holder as a guide trace circles around two pieces of scrapbook paper and a piece of chipboard. Apply scrapbook paper to either side of chipboard.

standing snowmen

Hot glue your snow people to the circles. Hot glue your trees in place.

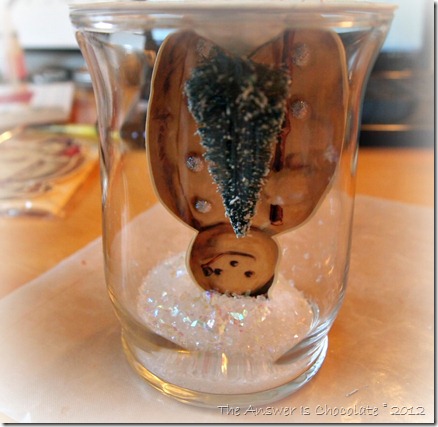
Snowman jar

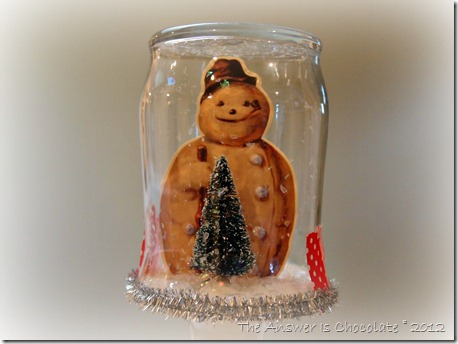
Pour Epsom Salts and glitter into candle holder and then hot glue your diorama in place.

Frosty Snow Jar

I added some coordinating washi tape just cause and finished by hot gluing tinsel pipe cleaners around the bottom.

Frosty Snoman Jar

Sharing At:


Wednesday, December 28, 2011

Even A New Year's Grinch Can Celebrate: Easy Party Hats

New Year-001
We are not big New Year’s Eve party people. I joked with my mom that I’d celebrate on Australia time which means I could mark the New Year a day earlier and not even attempt to pretend (or pretend to attempt)  I was going to stay up. 


I don’t have anything against New Year’s Eve…I love thinking about the year past, the year ahead, goals, memories etc. Just have no desire to dress up in stuff I’ll wear once, and/or be out and around people who’ve had too much to drink.

So it’ll be another cozy night at home. But we’re not total Grinches! We’ll have a special dinner and of course there will be chocolate, and we’ll have a movie or On Demand TV series marathon. Living on the edge I know, but even homebodies can be festive! Especially with a trip to Dollar Tree, supplies on hand and the amazing Graphics Fairy!
Party Hats
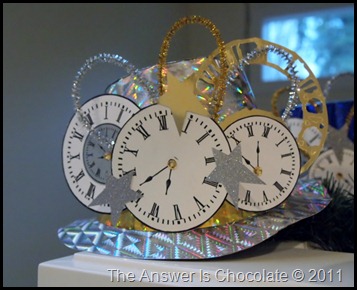
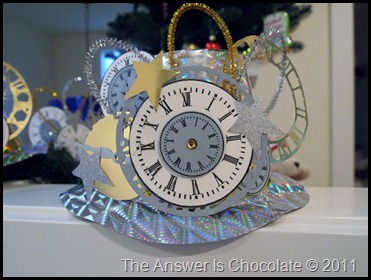
I found the basic paper top hat at Dollar Tree…variety of colors but I liked the silver and gold. Except they only had two. Well they had three but one was smashed in. So I got blue for college boy since it goes with his school colors.

Remembered I’d downloaded a great antique clock graphic from The Graphics Fairy. Printed several on cardstock in various sizes and cut them out.
New Year's Eve Hat
I have the Tim Holtz Weathered Clock die by Sizzix so I cut out several in silver and gold and used up scraps from my Christmas cards to punch glittered silver and gold foil stars.
New Year's Eve Party Hat
I used 3 chenille stems for each hat, bending each one in half to make a loop and hot glued them to the hat. Then stuck the clock faces on, embellishing some w/ self adhesive rhinestones. Just kind of stuck stuff
wherever.

Not too bad for a $3 investment by a New Year’s Grinch right? 

Don't forget, I also have a great giveaway of My Memories Suite digital scrapbooking software going on through New Year's Eve!
Sharing At:


A Crafty Soiree


Friday, December 16, 2011

Framed Glitter Ornament

This week's BFF Open House link party is still going on here and will be up through Sunday. 

I thought I'd post an idea I recently shared over at The Scrap Shoppe where Michele has had a wonderful Handmade Holiday series going. This week is recipes so you should definitely check it out! It wraps up tomorrow but there have been some wonderful ideas shared. 


I was excited  Michele decided to do another Homemade Christmas and thrilled to be invite  to share a  fun , easy, and inexpensive piece of Christmas décor : A Framed Glitter Ornament

Dollar Tree Ornament Frame

I really enjoy making things using inexpensive materials. Largely that’s because I can justify buying more supplies, but I’m also a firm believer that you don’t have to spend a lot to have pretty things around you. Like so many crafters, one of my go to places is The Dollar Tree.

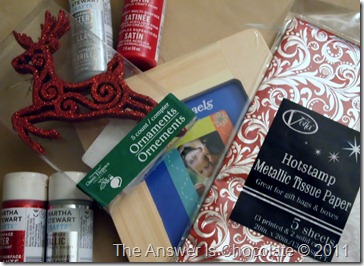
On one of my trips I found a pack of glittered reindeer ornaments. Five for $1! Had to have.Right next to them was  a pack of red tissue paper “hot stamped” with silver. Also a must have!
Dollar Christmas Decor
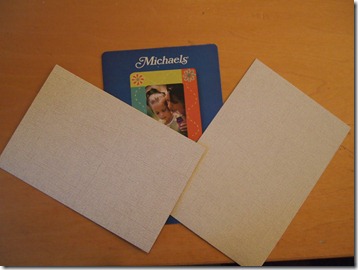
One of my other stash staples are unfinished wood frames from Michaels. Yep you guessed it. They’re $1.

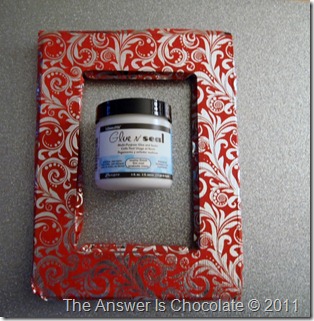
I took one sheet of the tissue paper and traced around the frame and cut out. Covered my frame with Ranger’s Glue N Seal and then put my tissue paper on. You could also use Mod Podge. I chose not to seal the top since I wasn’t sure if it would dull the shine of the silver foil.
Dollar Chrismas Decor
Don’t worry if you don’t get this exactly measured to your frame. Let your adhesive dry and then I file around the edges with a piece of fine sandpaper or a package of emery boards that you picked up at Dollar Tree!

Waste not want not, so I covered the cardboard that came with the frame with some scrapbook paper:
PB173554
I covered both sides because it just gives a nice finished look since there’s no back to the frame.

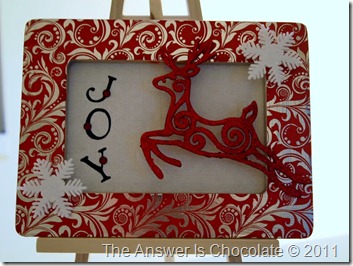
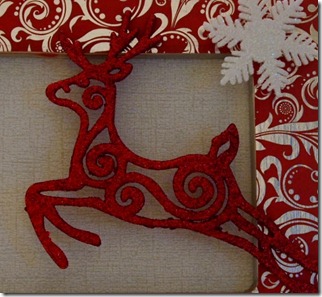
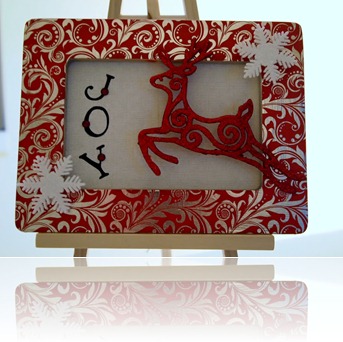
Took one reindeer from my package of ornaments, cut off the string used to hang and then hot glued it to my finished frame, offset so the feet and antlers are glued to the frame vs onto the paper. I liked the dimension this gave.
Dollar Tree Framed Ornament
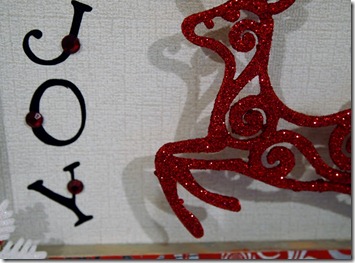
I cut the letters JOY from black vinyl using my digital cutter but if you don’t have one of those, you could easily use alphabet scrapbook stickers or letter stamps.  Embellished those with red self adhesive rhinestones I had in my stash.
Dollar Tree Ornament Shadow
Another reason I like the effect of gluing the reindeer to the frame vs the paper is this shadow effect. The glittered snowflakes I also had on hand and came in a package of 12 for $1.99 at Michaels.

My total cost for the supplies for this project was about $3!
  • $1 frame
  • $1 Tissue Paper ( over 4 sheets left over  so lots more crafting!)
  • $1 Ornaments ( really $.20  for this project since I used one of five)
Let’s say you decided to spend $4 more on frames and make a total of five of these so you used up all your ornaments. Price per project would be around $1.40!! And I guarantee you’ll still have tissue paper left over.
Dollar Tree Ornament Frame

If you're looking for a last minute decor idea or gift, this is a fast an easy way to whip something up.

Sharing At: