Showing posts with label DCWV. Show all posts

Monday, September 26, 2011

Repurposed Dress Halloween Wreath

Yes, all those words really do go together.
P9263077
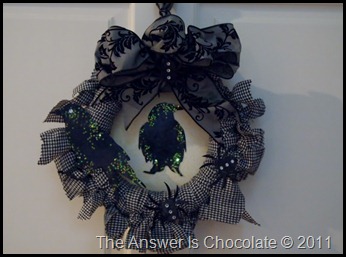
I recently cleaned out my closet and while I donated most things to Goodwill, I saved a few pieces because of the fabric. One was a black and white checked dress . I’ve see tons of cute yarn wreath ideas but know I don’t have the patience for all that wrapping. But I thought hmmmm….maybe strips of fabric? Out came the rotary cutter and I cut strips and strips and strips (I think about 20 total) and tied them around one of those green styro wreath forms from Dollar Tree.

 Since I was not at all sure where this was going, or if it was going anywhere, I didn’t take pics along the way. Once I had my wreath form wrapped, I trimmed the edges with pinking shears . I thought it would be fun to give this wreath a back so I cut a circle of Halloween Cardstock from DCWVs “Ghosts and Goblins” pack and hot glued it to the back.
P9263080
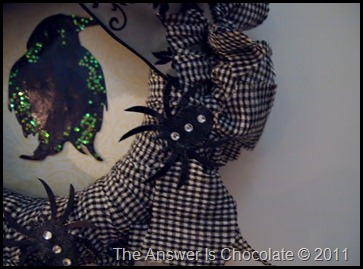
I had a pack of black Halloween silhouette die cuts I picked up at Michaels ( Recollections) . Fingerpainted some glue randomly on my selected images and sprinkled with fine clear glitter and the middle vial of  this stuff I found at Michaels from Art C:

I embellished another bird the same way and went over the spiders with just the glue, glitter and some self adhesive rhinestones.
P9263079
Finished it off with some ribbon from my stash (one of those after Christmas I know I’ll use it sometime finds at 75% off somewhere!)
P9263081
What’s in your closet?
Linking Up At: 


Photobucket
homework

Paper Issues Blog Design


Tuesday, June 28, 2011

A Couple of Cards

Sharing a couple of cards I made tonight. A belated graduation card and so I don’t make that mistake again, a birthday card that I can send early!

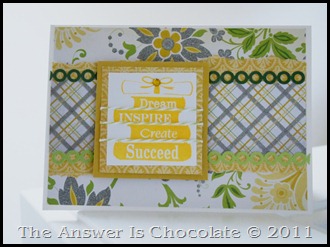
For the grad card, I wanted to do some different colors than those I’d been using for my son’s friends cards. Stuck with school colors for those and am so over that! This time just went with paper I liked which happened to be from DCWV’s Lemon Flower Stack. Hard to tell from the pics, but a lot of the papers in this pack are glittered. Oooh la la!

Yellow Grad Card
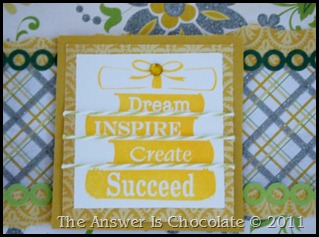
I stamped the focal image using this ink which I’m in love with:
Yellow Grad Card Closeup
It’s chalky but pigmenty and provides great coverage.

I used the floral background from the paper stack along with a scrap strip of another print from a previous project from the same pack. Say THAT three times fast!  Embellished with The Twinery’s twine in honeydew and some KandCo self adhesive scrapbook borders.

For the birthday card:
Pink and Green Birthday Card
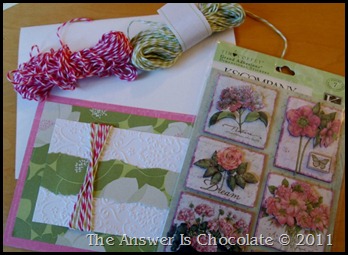
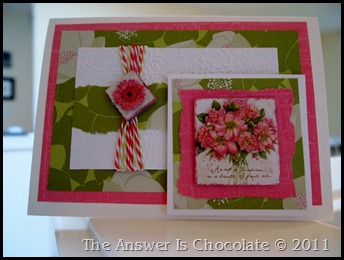
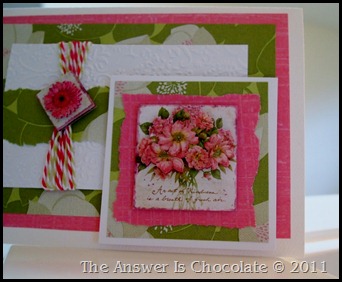
I remembered to photo my supplies which included more Twinery twine…honeydew and pink sorbet, some Ann Butler designed Kand Co paper and Tim Coffey designed KandCo dimensional floral stickers. I ran a scrap of white paper through my Cuttlebug using damask embossing plates and then layered everything as shown onto a white 5x7 card.
Pink and Green Birthday Card (4)

P6281173
Linking Up At:
UndertheTableandDreaming 

Wednesday, January 12, 2011

The Bug and I: Another Card

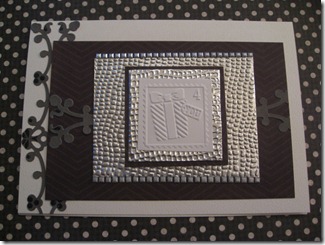
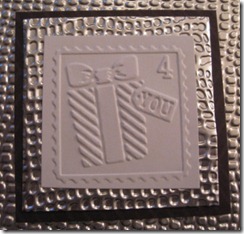
I needed a birthday card and my Cuttlebug included a perfect birthday folder. This is another guy card which have always been a challenge for me because I like to add all kinds of stuff. But I kept it pretty simple.
IMG_4724
I used DCWV paper ( a brown herringbone pattern) layered with embossed metal and the focal point of the card is an embossed present. That’s one of four mini folders that came with the Cuttlebug. The metal was already embossed ( bought it at a craft fair) but I’m pretty sure it was also done using “the bug” so going forward, I can make more. Mwaaaahhhhhhh
Here’s the center of the card close up:
IMG_4722
Layered on another piece of the metal, on top of a scrap of the brown herringbone.
The whole thing is on a plain white card. Other embellishments:
IMG_4725
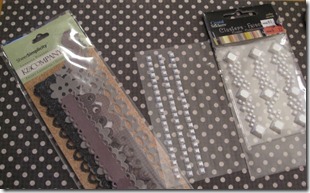
K&CO self adhesive scrapbook borders and strips of self adhesive pearlized diamond thingies from one of my dumpster dives in the clearance bins at Michaels. $.99 for the whole package!
Linking Up At: 
 Beyond The Picket Fence

Catch a Glimpse Button

Sunday, November 7, 2010

Thankful Cards

When my son was little, it always bothered him how things went immediately from Halloween to Christmas. Thanksgiving was the overlooked holiday as far as all of the stores and decorations went. So I made sure that we decorated properly for Thanksgiving and that we celebrated it the same way that we celebrated the other holidays which in my case means sending cards. Not quite as many as I do for Christmas but more than I do for Halloween. Given that it's always a busy time of year, I don't always have time to stamp the quantity of cards I need to make so I look for creative alternatives that still allow for a handmade touch and imprint. My computer is an invaluable art tool and it took me a while to stop feeling like I was cheating by using it.

My handwriting has gone downhill since the days when the nuns used to emphasize penmanship and with so many cool fonts to choose from it's just too much fun, so I like to use the computer to generate sentiments.

Created the "Give Thanks" panel using a leaf graphic from my graphics program, altering the color, using a transparent cracked effect and then layered the sentiment on top. Printed on white cardstock and matted with black. This card was made using metallic copper cardstock (Stardreams) and the DCWV Premium Stack "Naturals" that I used for my "Turkey Tails" banner. Finished with "M&My Big Ideas" Copper Willow foil sticker. Stickers are another great tool to use when you have to make a lot of cards.
For some of the other cards I made, I selected a Thanksgiving Corn graphic, changed it to black and white, used the same transparent cracked effect in my graphics program and an option to color behind the image in a complementary brown. Printed, trimmed, matted with black. As with the first card, finished with complementary colors of adhesive rhinestones.
 This card uses transparency overlays by Colorbok. Package of 10 ( it's called Nectar) was $4.99 regularly but I bought on sale for 40% off at JoAnn's. I fell in love with the copper foil effect of this so of course I bought 2 packs! Each design is different. For the cards I made using these, I just mounted using Diamond Glaze on a panel of DCWV foiled paper (Naturals) and the put the focal sentiment on top of the transparency using a foam dot.

Linking Up At:

Paper Issues Blog Design

Fine Craft Guild
Thanksgiving Party At All Thingz Related
 
  UndertheTableandDreaming

Friday, October 29, 2010

Thanksgiving Banner With Turkey Tails (Update About Letters)

 UndertheTableandDreaming

OK maybe they won't look like turkey tails to you, but they look like turkey tails to me! I know...Halloween's still a couple of days away and I'm already moving on to Thanksgiving decorations. Yup. Once you start making banners, there's no turning back so I can't wait until next week to change out my Halloween banner on my mantle for my Thanksgiving one. Now what does any of this have to do with turkey tails? I kind of had a rough idea of what I wanted to do (which didn't involve turkey tails) It did involve coffee filters but I wasn't sure how until I sat down with them. First I folded like this:
Then I folded it in quarters but got the idea to fold it in thirds. You can fold your half in half to make a line so you know where you will want your points ( which I'm about to show you) to line up. Fold like you're making a paper airplane:
Fold left and right sides into the middle, staple
I made one of these for each of the letters I was going to use. Computer generate letters; trim. I liked these "fan" side up and "point" side down and that's when it struck me they look like turkey tails! Adhere one letter to each "tail":
But wait! We're not done. I sound like an infomercial. "If you call now..."

I cheated on K&CO because I fell in LOVE with DCWV's ( Die Cuts With a View) "The Natural Stack" pad when Jo-Jo's ( JoAnn's) had all of their paper pads 40 or 50% off. OK when don't they? Anyway...it's got a mix of matte and metallics with lots of copper...perfect for this time of year! Pulled out some coordinating sheets and cut them in approx 6" banner shapes and matted those on black. Then put my "turkey tails" on top and :
My mantle is otherwise occupied so my wall had to do for now
My camera ( OK my photography skills) doesn't capture the brilliance of the colors or the metallics but this paper is almost as yummy as chocolate.

UPDATE: 
I've had a few inquiries about how I did the letters so I'm posting here since not everyone has their email enabled. I did mine in the graphics program I use the most which is Broderbund's Printshop Deluxe. I'm sure other graphics programs have similar functionality....this has an "initial cap" option which is what I used and chose a circle graphic but would think you could just do large capital letters. The font I used is called Almeria and I did a drop shadow option. Hope that helps!!
UPDATE 2:
I created a PDF file with the letters so if you would like, just email me through my profile and I'll send.
Linking Up At: 
Paper Issues Blog Design


Visit thecsiproject.com
 UndertheTableandDreaming 


Photobucket


Thursday, October 14, 2010

Quick Cards

"Oh mom, do you think you could make me a couple of Thank You cards?"
"Sure. When do you need them?"

You know the answer was tomorrow right? Just kidding...I mean the answer really was tomorrow but when you have a mom who makes cards it's really not that big of a deal. It's also OK if your child thinks it is :)

So he needed these for school which meant the school colors which I don't love. Red and yellow. Fine on their own and with other things. Hate them together. Sorry. I won't actually make him choose a college based on colors I like but the thought did occur to me.

Stamp: INKADINKADO...Paper: red cardstock and DCWV "Indian Summer" Stack
Another time sensitive card...a condolence card...but more my style:
DCWV "Natural" Stack; Floral paper, Magenta Silver Peel Offs, Chipboard Embellished w/ clear sentiment sticker

Tuesday, October 12, 2010

Having Fun With Rub-Ons!

Thanks Meg!
A Little Knick Knack
Have you ever used them? So. Easy. And, addictive. I haven't always loved them because when I first tried them they were, to quote Julia Roberts character in "Pretty Woman" when she's trying to eat escargot: "Slippery little buggers".  But I think they've gotten loads better and they don't come off the backing stuff as easily or shift around so much. Any that I've used in the past couple of years have behaved.

I was at Michaels this weekend searching for some that I'd seen used at Jessica's blog "Craftily Ever After"  where she did a great makeover of a key rack. She also has some awesome downloadable Halloween art which she's been sweet enough to share. Go visit and follow her! She'd mentioned she got the rub-ons she used at Michaels. I was so bummed when the Michaels I was in had dismantled their $1 section ( oh yeah..they're a DOLLAR) but all was not lost, I found a really cute pack of DCWV rubons. Still, it was nagging at me ,so when I had to go to Costco last night, which was right next to another Michaels, well you can probably guess the rest but just in case....THEY HAD THEM!!! Yippee!

First I did this:
Which started out as a plain wooden trinket box that I painted cream, dry brushed with tan, Mod Podged some scrap sheet music pieces, applied some of the DCWV ( Die Cuts With a View) rub-ons. You can't tell from the pic but these rub-ons have some glitter to them. Here's a link to the ones I used: Mariposa collection

I was liking the finish on the box . I picked up this scrap piece of wood at a salvage place so I painted it the same way and will use it for a key rack (have to go get the hardware for it) and got to use some of the $1 rub-ons from Michaels. I think I bought 12 packages. Oops.
They have keys, birdcages, eyeglasses, watch / timepieces...see...you get why I bought 12 packs. They were a DOLLAR and there are an average of 8 images per pack!

And with the rest of my Mariposa DCWV rub-ons, 'cause I was still liking this paint finish, I did a frame:
Linking Up At:
A Little Knick Knack
Fine Craft Guild


 Beyond The Picket Fence
giveaways