▼

Wednesday, September 30, 2026

Halloween Crafting: Nightmare Before Christmas Ornaments


I finally did something I've been meaning to do for a few years, which is to add some "The Nightmare Before Christmas" elements to my Halloween Tree. I promised myself after our Disneyween-a-Versary trip that I wouldn't let another year go by!

Supplies:
  • Flat Acrylic Ornaments
  • Acrylic Paints
  • SVG Files
  • Vinyl
  • Cutting Machine

Every so often, I have a "TEMU moment," which is how I ended up with way too many of these acrylic ornaments. I found the SVGs online and imported them into my Cricut Design Space Software and sized to fit my ornaments. Since my tree is mostly black, white, and purple, I decided to cut the images out using black vinyl and applied to one side. 

I grabbed acrylic paints in the colors that match the characters and painted the backs of the ornaments. For Sally, I just did the face/body. For the others, I covered the whole back. 


I painted using a sponge spouncer which is why the wet paint looks, well, spongey, but it dries flat. I used two coats for opacity. 


To secure them to my tree, I used some black glitter pipe cleaners. Easy Peasy! 

TIP: If you don't have a cutting machine, you could easily trace these onto the ornaments using a paint pen, then paint the backs. I think that would give the same effect.


But wait, there's more! The Haunted Mansion also has a really cute wreath made out of bones for Zero the Dog from the movie. I knew I had some "bags o bones" from Dollar Tree in my stash, so that gave me an idea for another addition to my tree.


Each package comes in three different sizes which worked great for my idea. I laid out a basic shape, and glued a base together with hot glue. Then I just kinda added to it and built up.


They naturally formed a kind of dog-house shape! 


After it was assembled, I hit it with some white spray paint. I wanted a banner like the one in The Haunted Mansion has, so I cut two shapes from scrap paper and then wrote ZERO on by hand. 


These were super easy to make, and I love how they look on my tree! 


Monday, September 28, 2026

Halloween Crafting: Dollar Tree Mini Stackable Pumpkins Mackenzie Childs Treatment


In last week's party, I featured some Mackenzie-Childs-inspired pumpkins shared by Master Pieces of My Life, which in turn inspired me to make some. Actually, make some more because I did these a few years ago:


This time around, I used the Mini Stackable Pumpkins from Dollar Tree. I've always loved the signature black and white. 

Supplies:
  • Mini Stackable Pumpkins (Dollar Tree)
  • Multi-Surface Acrylic Paint
  • Metallic Gold Paint Pen


Have you seen these mini-stacked pumpkins? They're perfectly tabletop-sized. Naturally, I had to buy more than one set!

This was pretty quick and basic. I thought I took more in-process pictures than I did then realized it's because there's not that much to them! 


Here are the pumpkins separated. I decided to do the top and bottom the same just following the natural lines, and then do the checkerboard in the middle. I did this all freehand, which is how the originals are painted, although my hand is not as steady as the experts! To begin, I painted all three components white with Folk Art Multi-Surface paint in Titanium White. 


The stripes were pretty easy. Not perfect, but easy! For the checkerboard, I just eyeballed and tried to be consistent. If you want more opacity, you could paint the insides, but I was lazy. To finish, I grabbed a gold paint pen and went over the black lines and checkerboard squares. 


And now, I have a new centerpiece for my island Halloween display!


BTW, have you seen the stackable pumpkins they have with the fox on top instead of a pumpkin? I'm not saying I'll have to go back and get that. I'm absolutely NOT saying that. No. Nope. 👀

Sharing At: 


Thursday, September 24, 2026

BFF Open House


Happy Friday Eve, all, and Happy Fall Y'all!! 

And happy birthday to my two oldest (as in how long I've known them!) friends who share the same birthday tomorrow, and to another dear friend, whose birthday is today! I share a birthday month with some amazing women. 

Hope you've all had a creative week. Started haunting my halls, which to normal people is early, but to "us types" is LATE. HA HA. Already seeing Christmas popping up. 

This week I shared:


I've also been working on some new ornaments to add to my Halloween tree, and Mr. Chocolate is pretending he didn't hear me say I need a bigger one. 

Lots of wonderful Fall inspiration was shared at last week's party, so let's take a look at some ideas! 


Building Our Hive shared a beautiful Day of the Dead Wreath. Living in the Southwest, this tradition is huge here, and I really love what it represents, plus all of the art around it. 


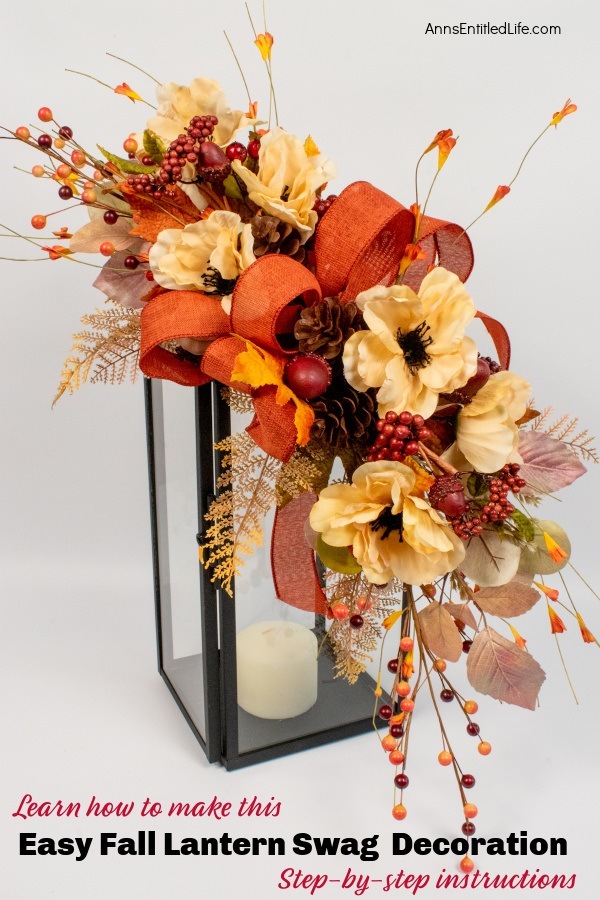
Ann's Entitled Life shared this equally beautiful Fall Lantern Swag, which can last now through November! 


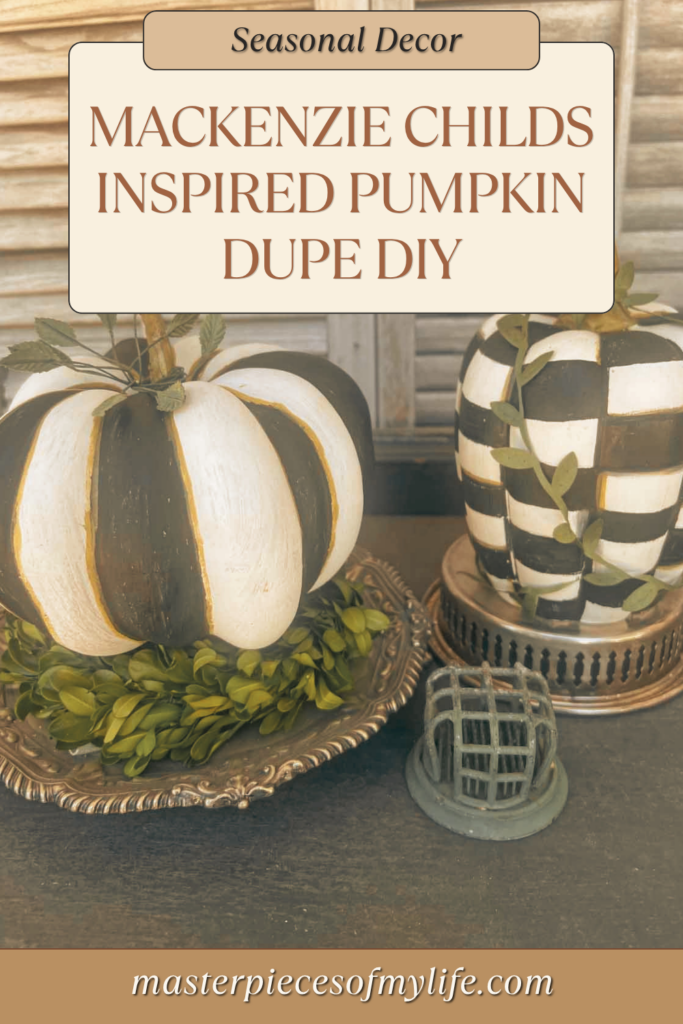
If you love Mackenzie-Childs' style but not the prices, Master Pieces of My Life shows you how to achieve the look for less. And while signature black and white is well known, I was in Dillards last week, and they have a collection in various colors, inspiring us to branch out if this isn't your palette. 


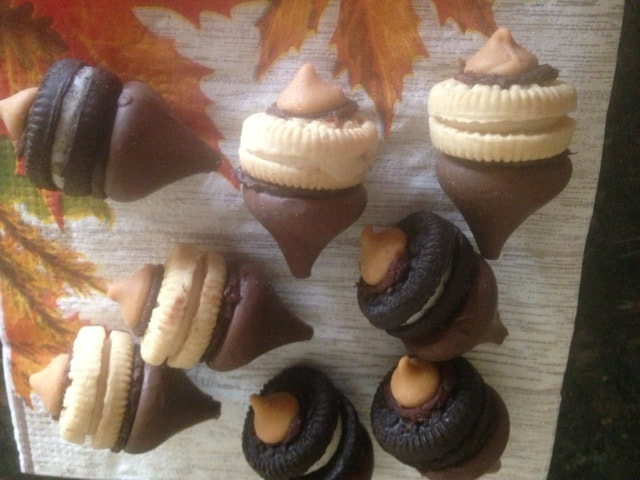
Finally, how perfect are these No Bake Acorn Cookies from Cindy's Online Recipe Box? 

Thanks as always to all who linked up! Let's see what's in store this week. 


You are invited to the Inlinkz link party!

Click here to enter

Tuesday, September 22, 2026

Halloween Crafting: Blinged Pumpkin Pail


Diamond Art, Bedazzeld Things, Blingy Things, are everywhere. And for someone who loves her some bling I wanted to play! Transform a plain pumpkin bucket with some paint and rhinestones! 


Supplies:

  • Pumpkin Trick or Treat Pail (Walmart)
  • Multi-Surface Acrylic Paint (Michaels)
  • Apple Barrel White Painte Pen (Walmart)
  • Rhinestone Sorting Trays (Amazon)
  • Rhinestones and Rhinestone Picker (Amazon)

I figured what better way to practice my skills than with a $1.97 pumpkin pail, right? If I messed it up, no big loss. But I'm not an orange person. No shade to those who are, just..we like what we like. So I grabbed some multi-surface black paint and a sponge applicator and covered it. 


After it was covered, I outlined the eyes, nose, and face with a white paint pen. Why? 'Cause I did. That's how I roll. 


I used Clear-Gel Tacky Glue and if you're going to do any rhinestone stuff, I highly recommend getting some rhinestone sorting trays. They help get the majority of your rhinestones to lay on the flat side so you can use a tweezer or better, a rhinestone picking tool (mine are like a wax crayon with enough stickiness) to pick them up from the top and place them on your surface. 


These were, I think, $5.99 for a set of 24 that came in their own case. This way you can sort different colors easily. 

LEARNING: I learned that you want enough but not too much glue. Practice helps you figure out what you need. The first eye I did, was too much and things were slipping and sliding. 


What's up with the wax paper? I was trying to make sure all my rhinestones were flat, but a little glue oozed out so I figure some wax paper wouldn't stick to it as I flattened them down. Worked! 


I did the eyes in gold, and the teeth in clear. For the nose, I used a little triangular mirror from a package I picked up at Dollar Tree. My plan is to use it for a floral arrangement I have yet to do! Not sure why the rhinestones ghost shadowed on the pic but they're not on the pail. Guessing it's reflecting off my glass table. Anyhoo...


Off to bling some other things!


Sharing At: 


Thursday, September 17, 2026

BFF Open House Link Party


Happy Friday Eve, all. Happy to report that the blog issues that got resolved last week has stayed resolved! I hope everyone's moved into September smoothly, with those of you sending kids back to school settling into routines. I well remember all the school start up meetings, paperwork, class-specific things to get, etc. 

This week I shared: 


And you all have been busy with Fall crafting so let's take a look at some ideas! 


Steph Creates shared an adorable and easy accent piece with this simple and cute Framed Ghost idea.


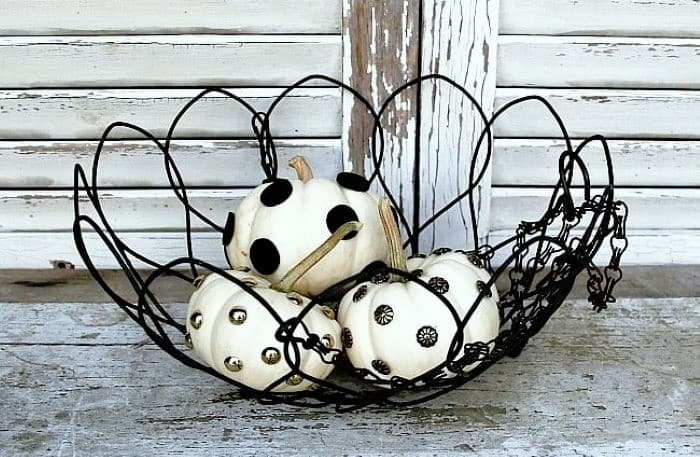
 Petticoat Junktion shared a great way to Decorate Mini Pumpkins. Not all pumpkins need to be carved! 

With prime baking season revving up, if you like coffee flavor, this Coffee Buttercream Frosting Recipe from Ann's Entitled Life is a must-check-out! 


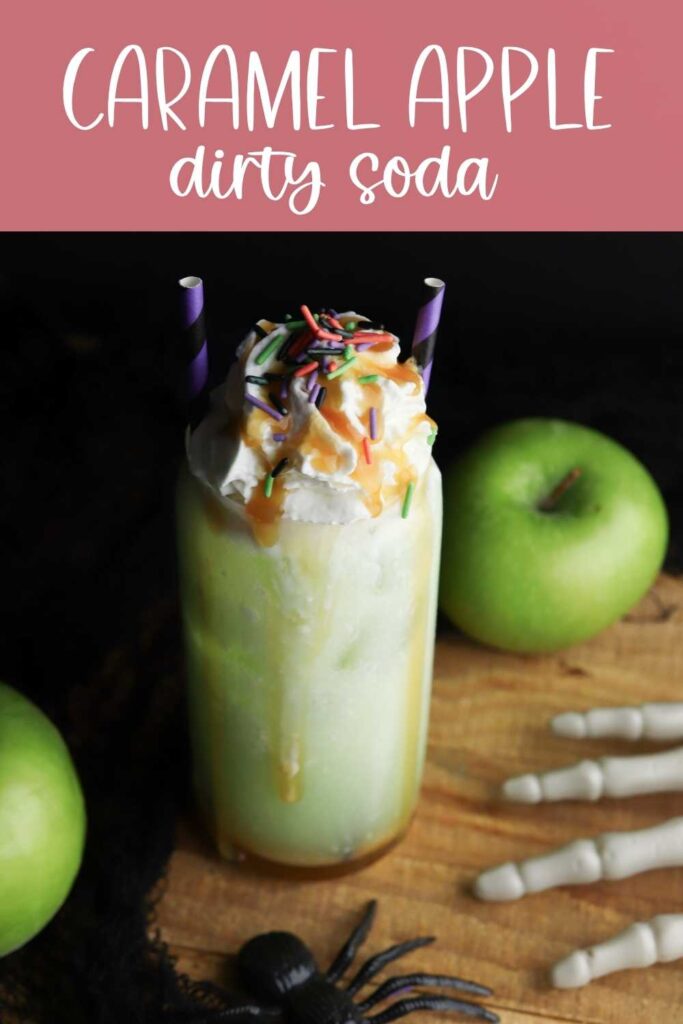
Finally, Fall is also apple season, and caramel apples are at the top of the list. This Caramel Apple Dirty Soda from Hunny I'm Home DIY should do the trick! It's alcohol free so everyone can have it.  

Thanks to everyone who linked up and can't wait to see what you've got to share this week!!


You are invited to the Inlinkz link party!

Click here to enter